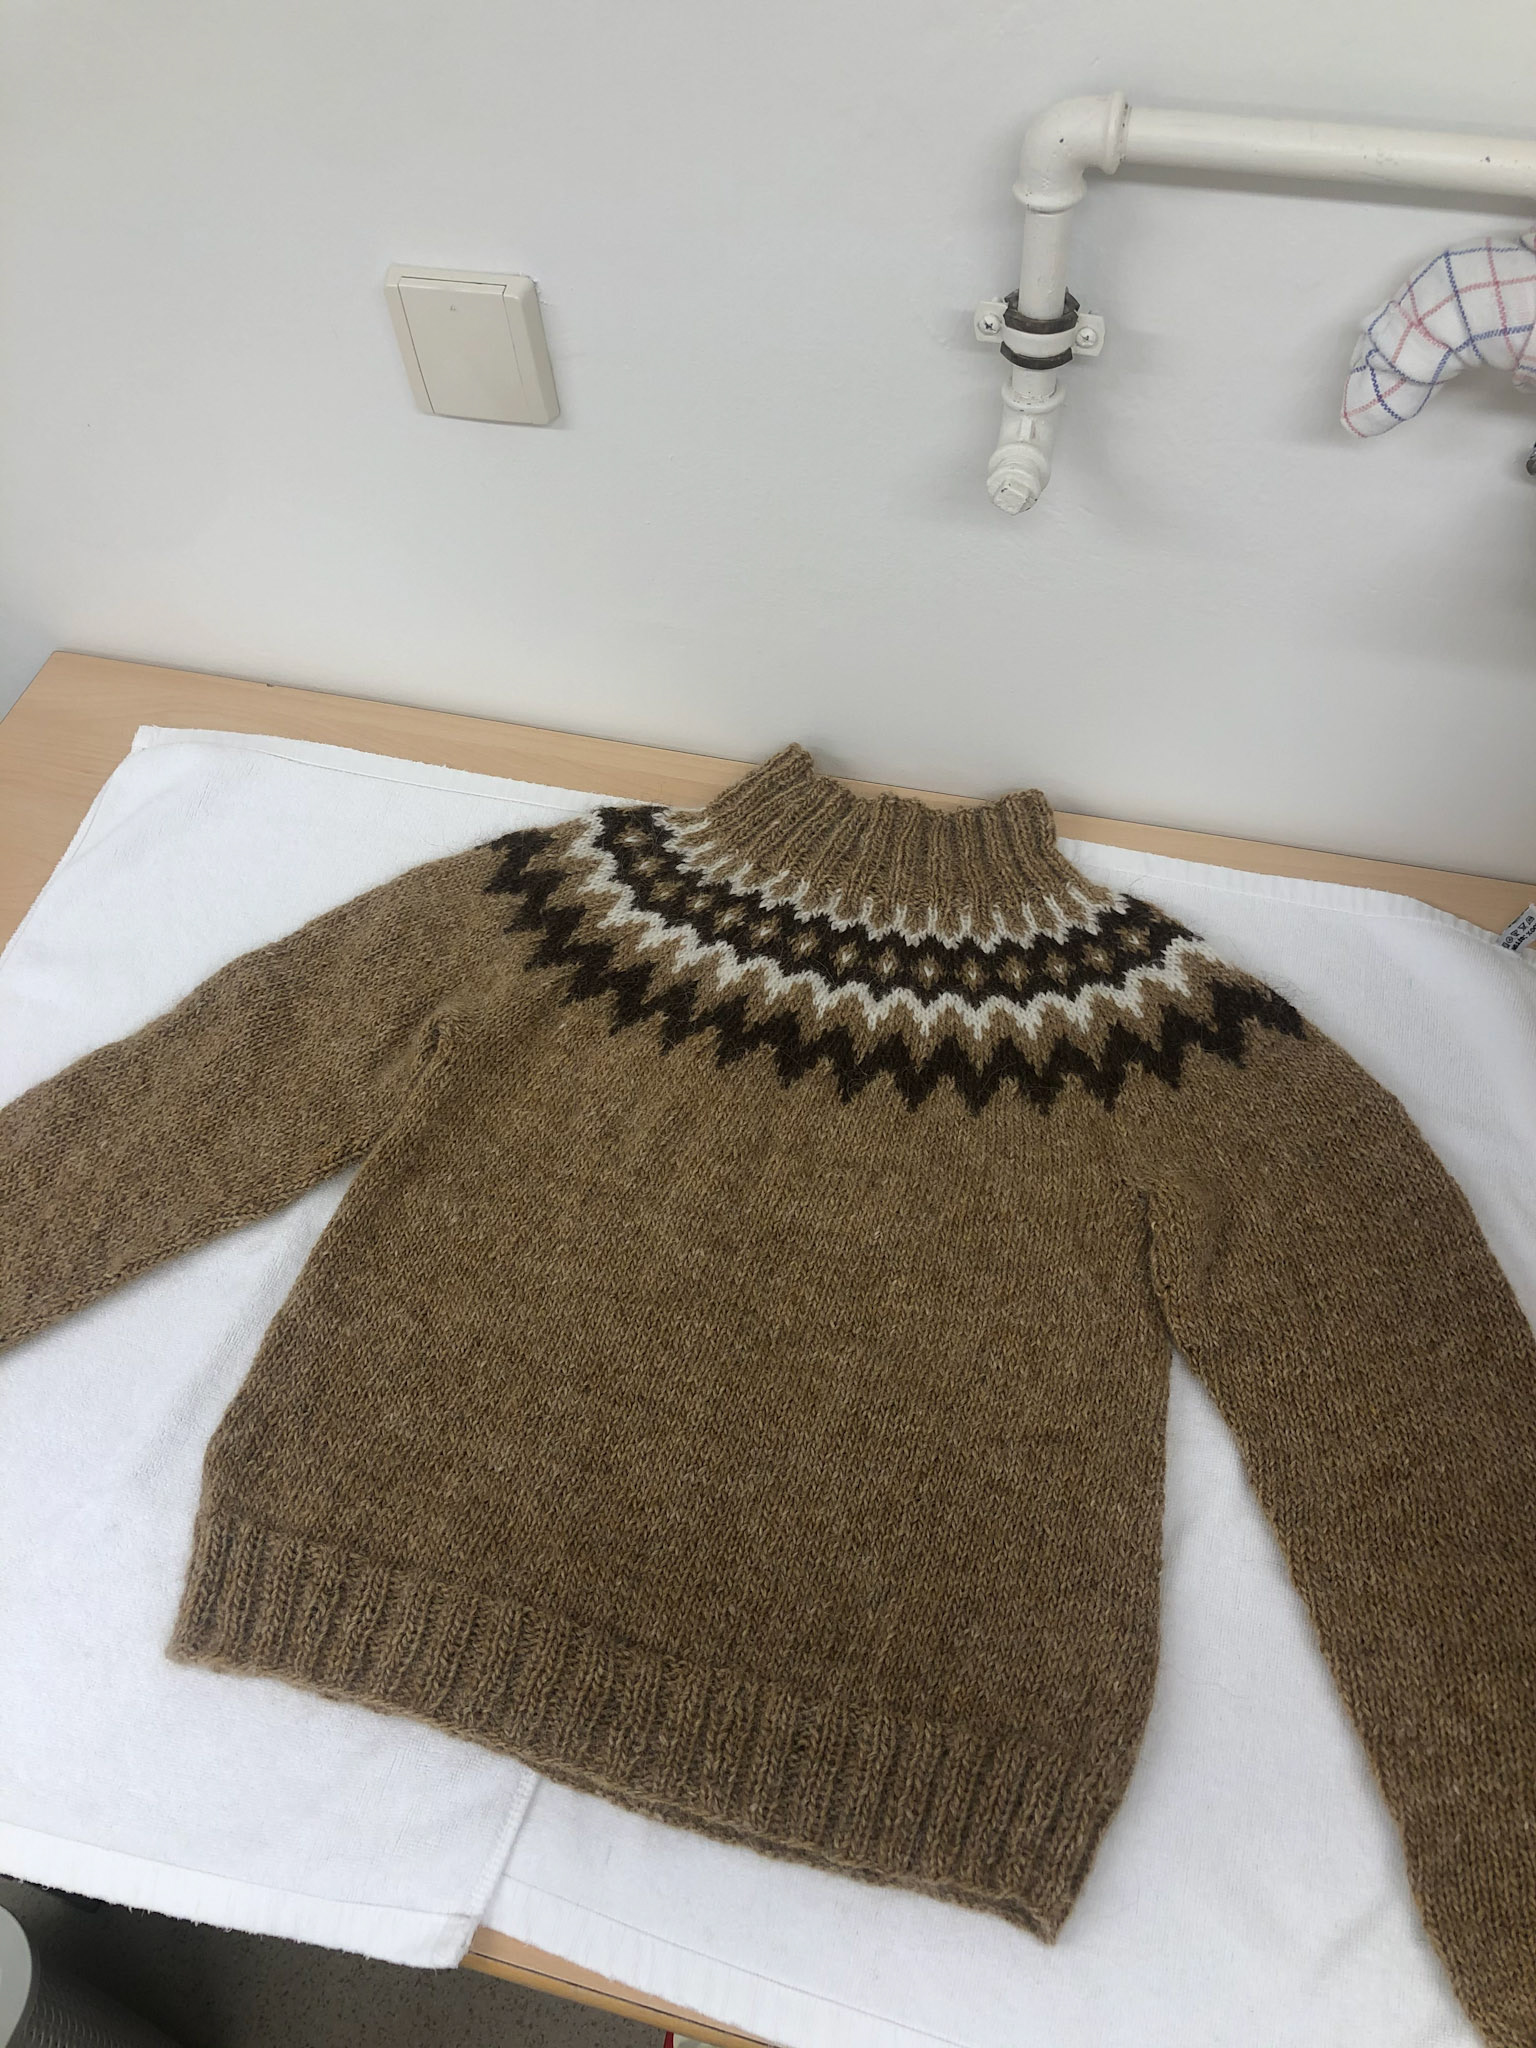
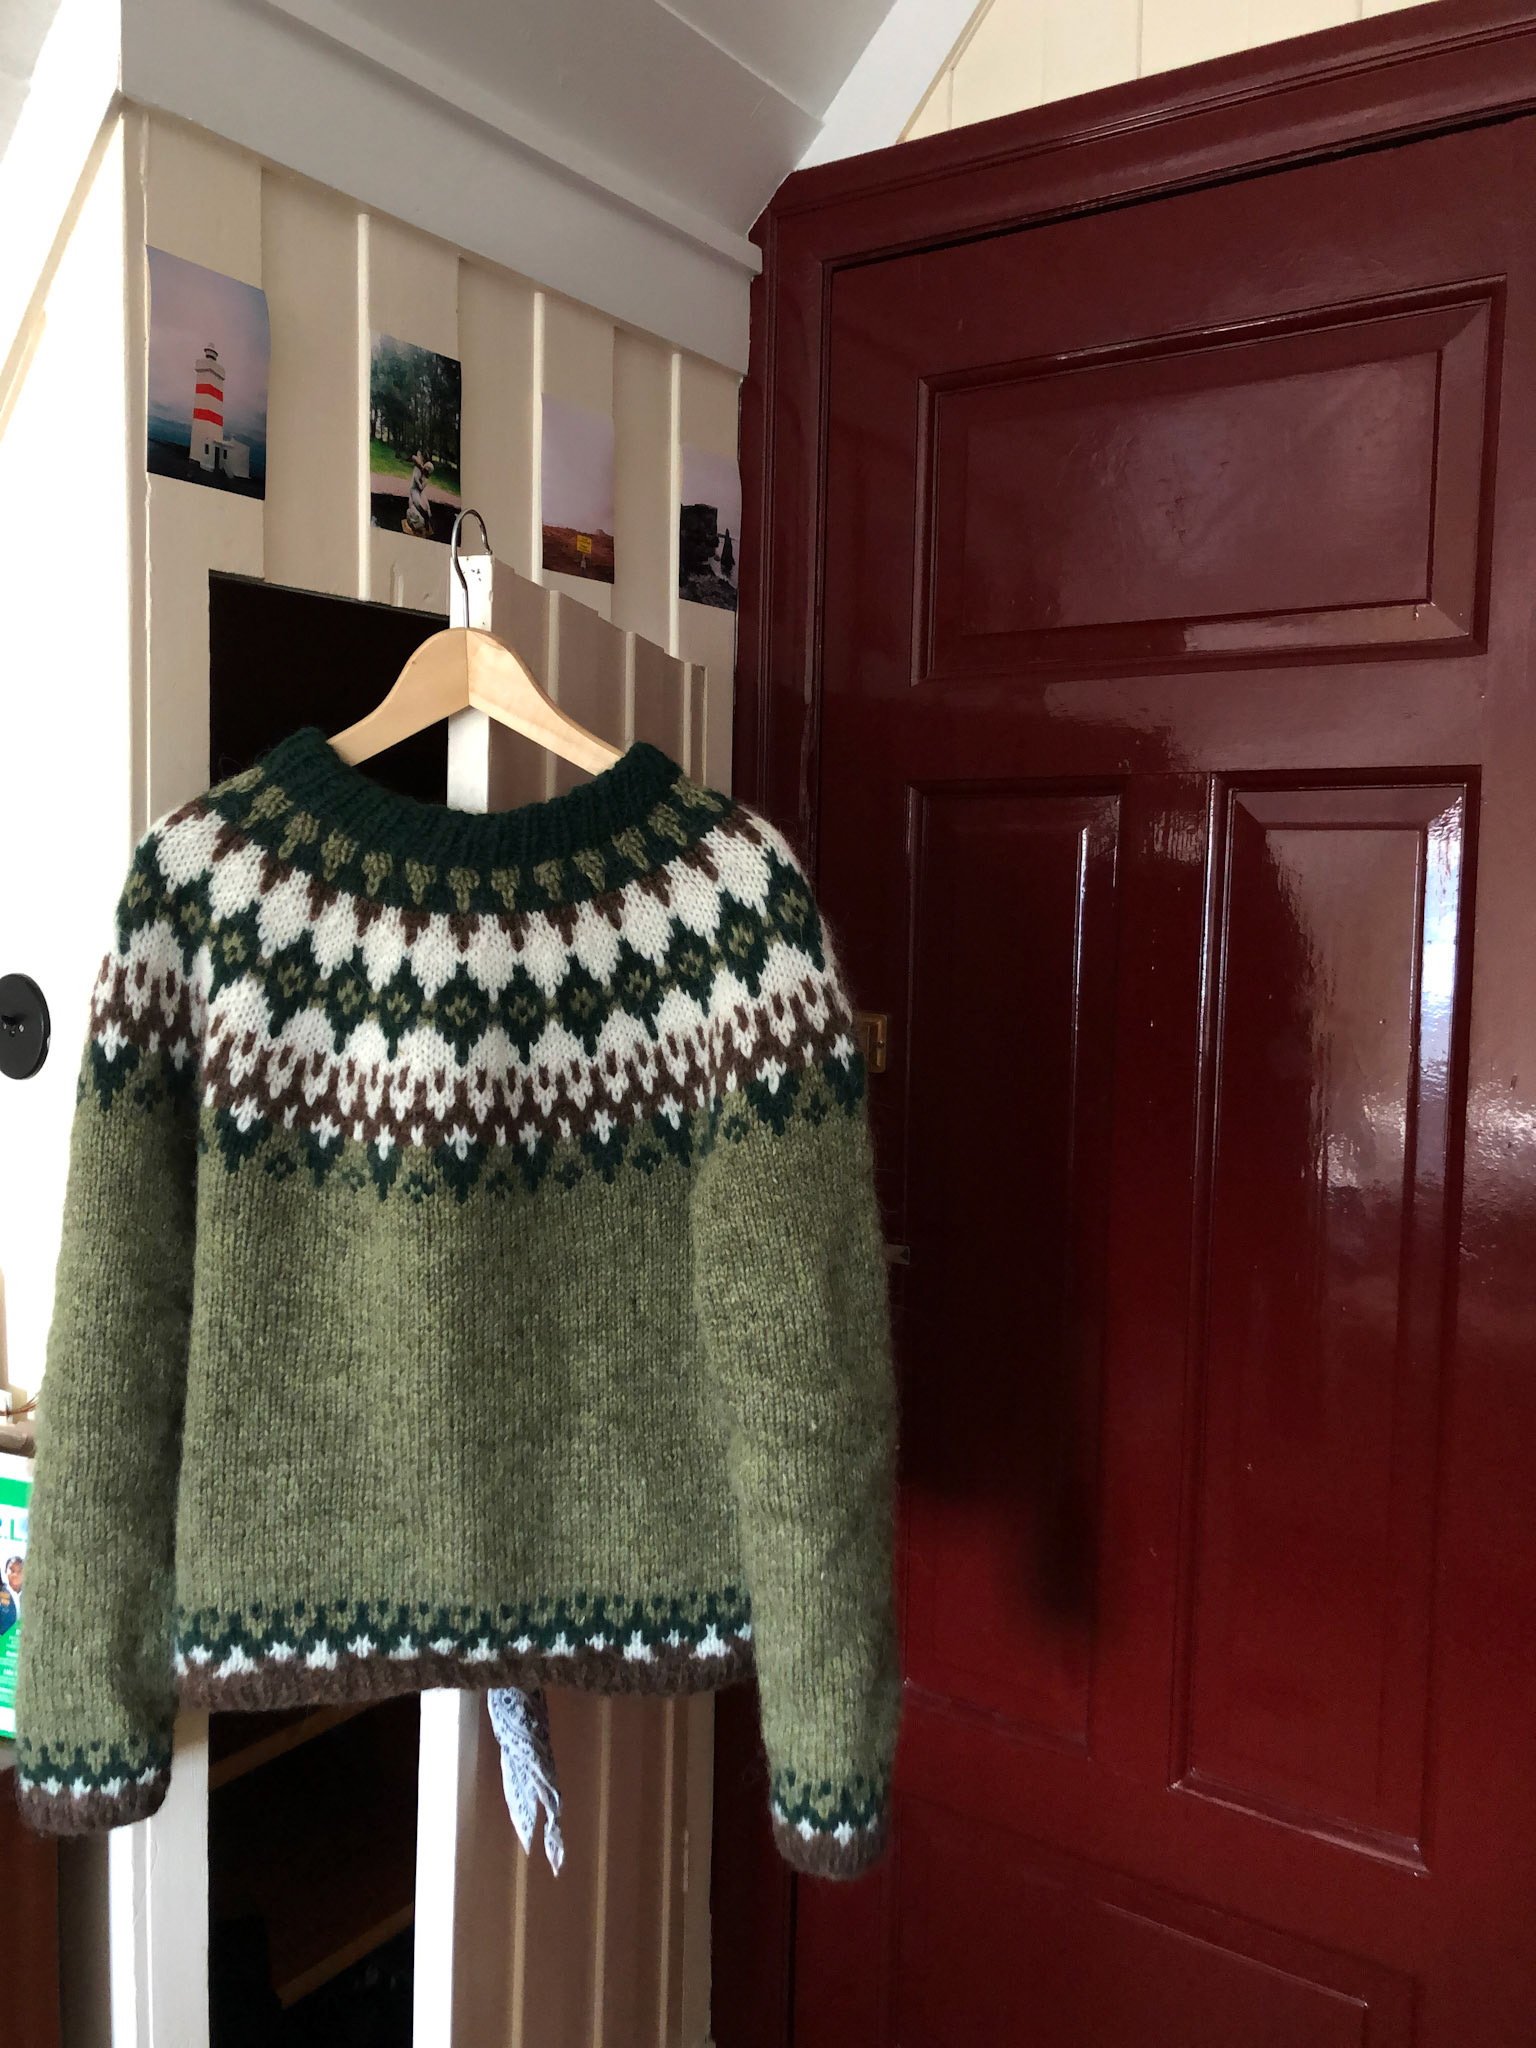
This traditional icelandic sweater is a lopapeysa, and was my first knitting project. I hand-knit this sweater using lopi wool, which comes from Icelandic sheep.
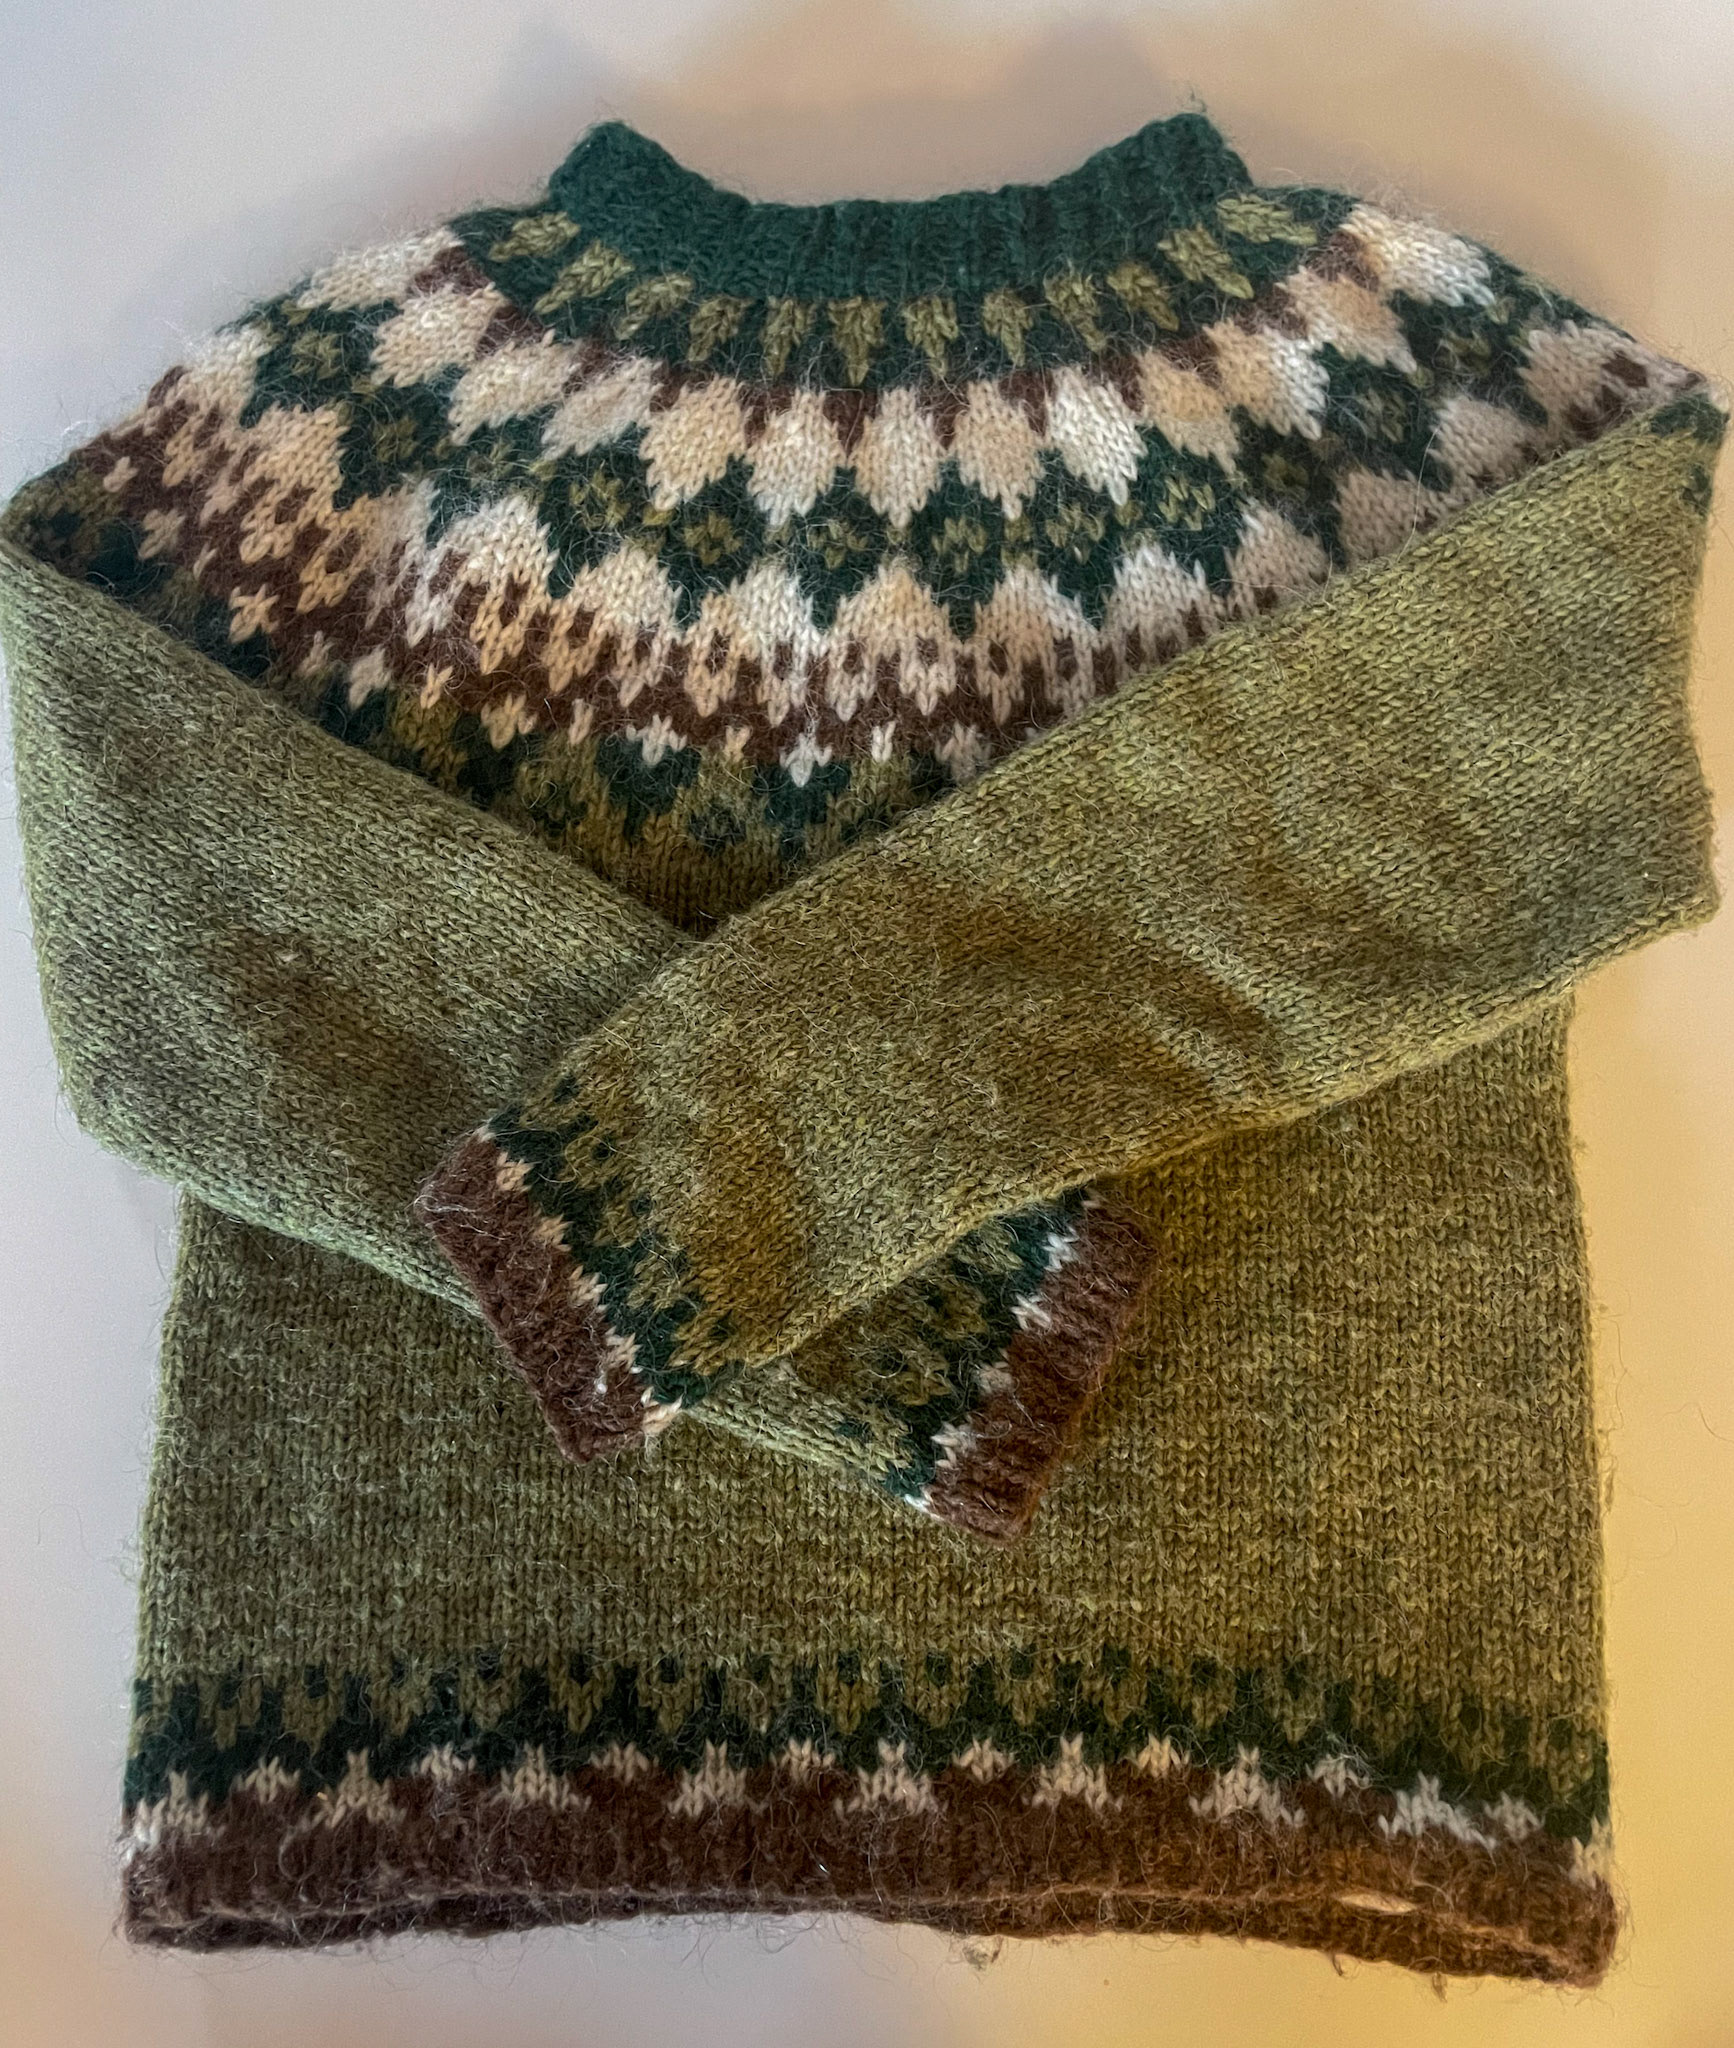
This image on the right shows the lopapeysa being blocked. Blocking is the final step that many take in a knitting project, which evens the stitches and sets it to the correct dimensions.
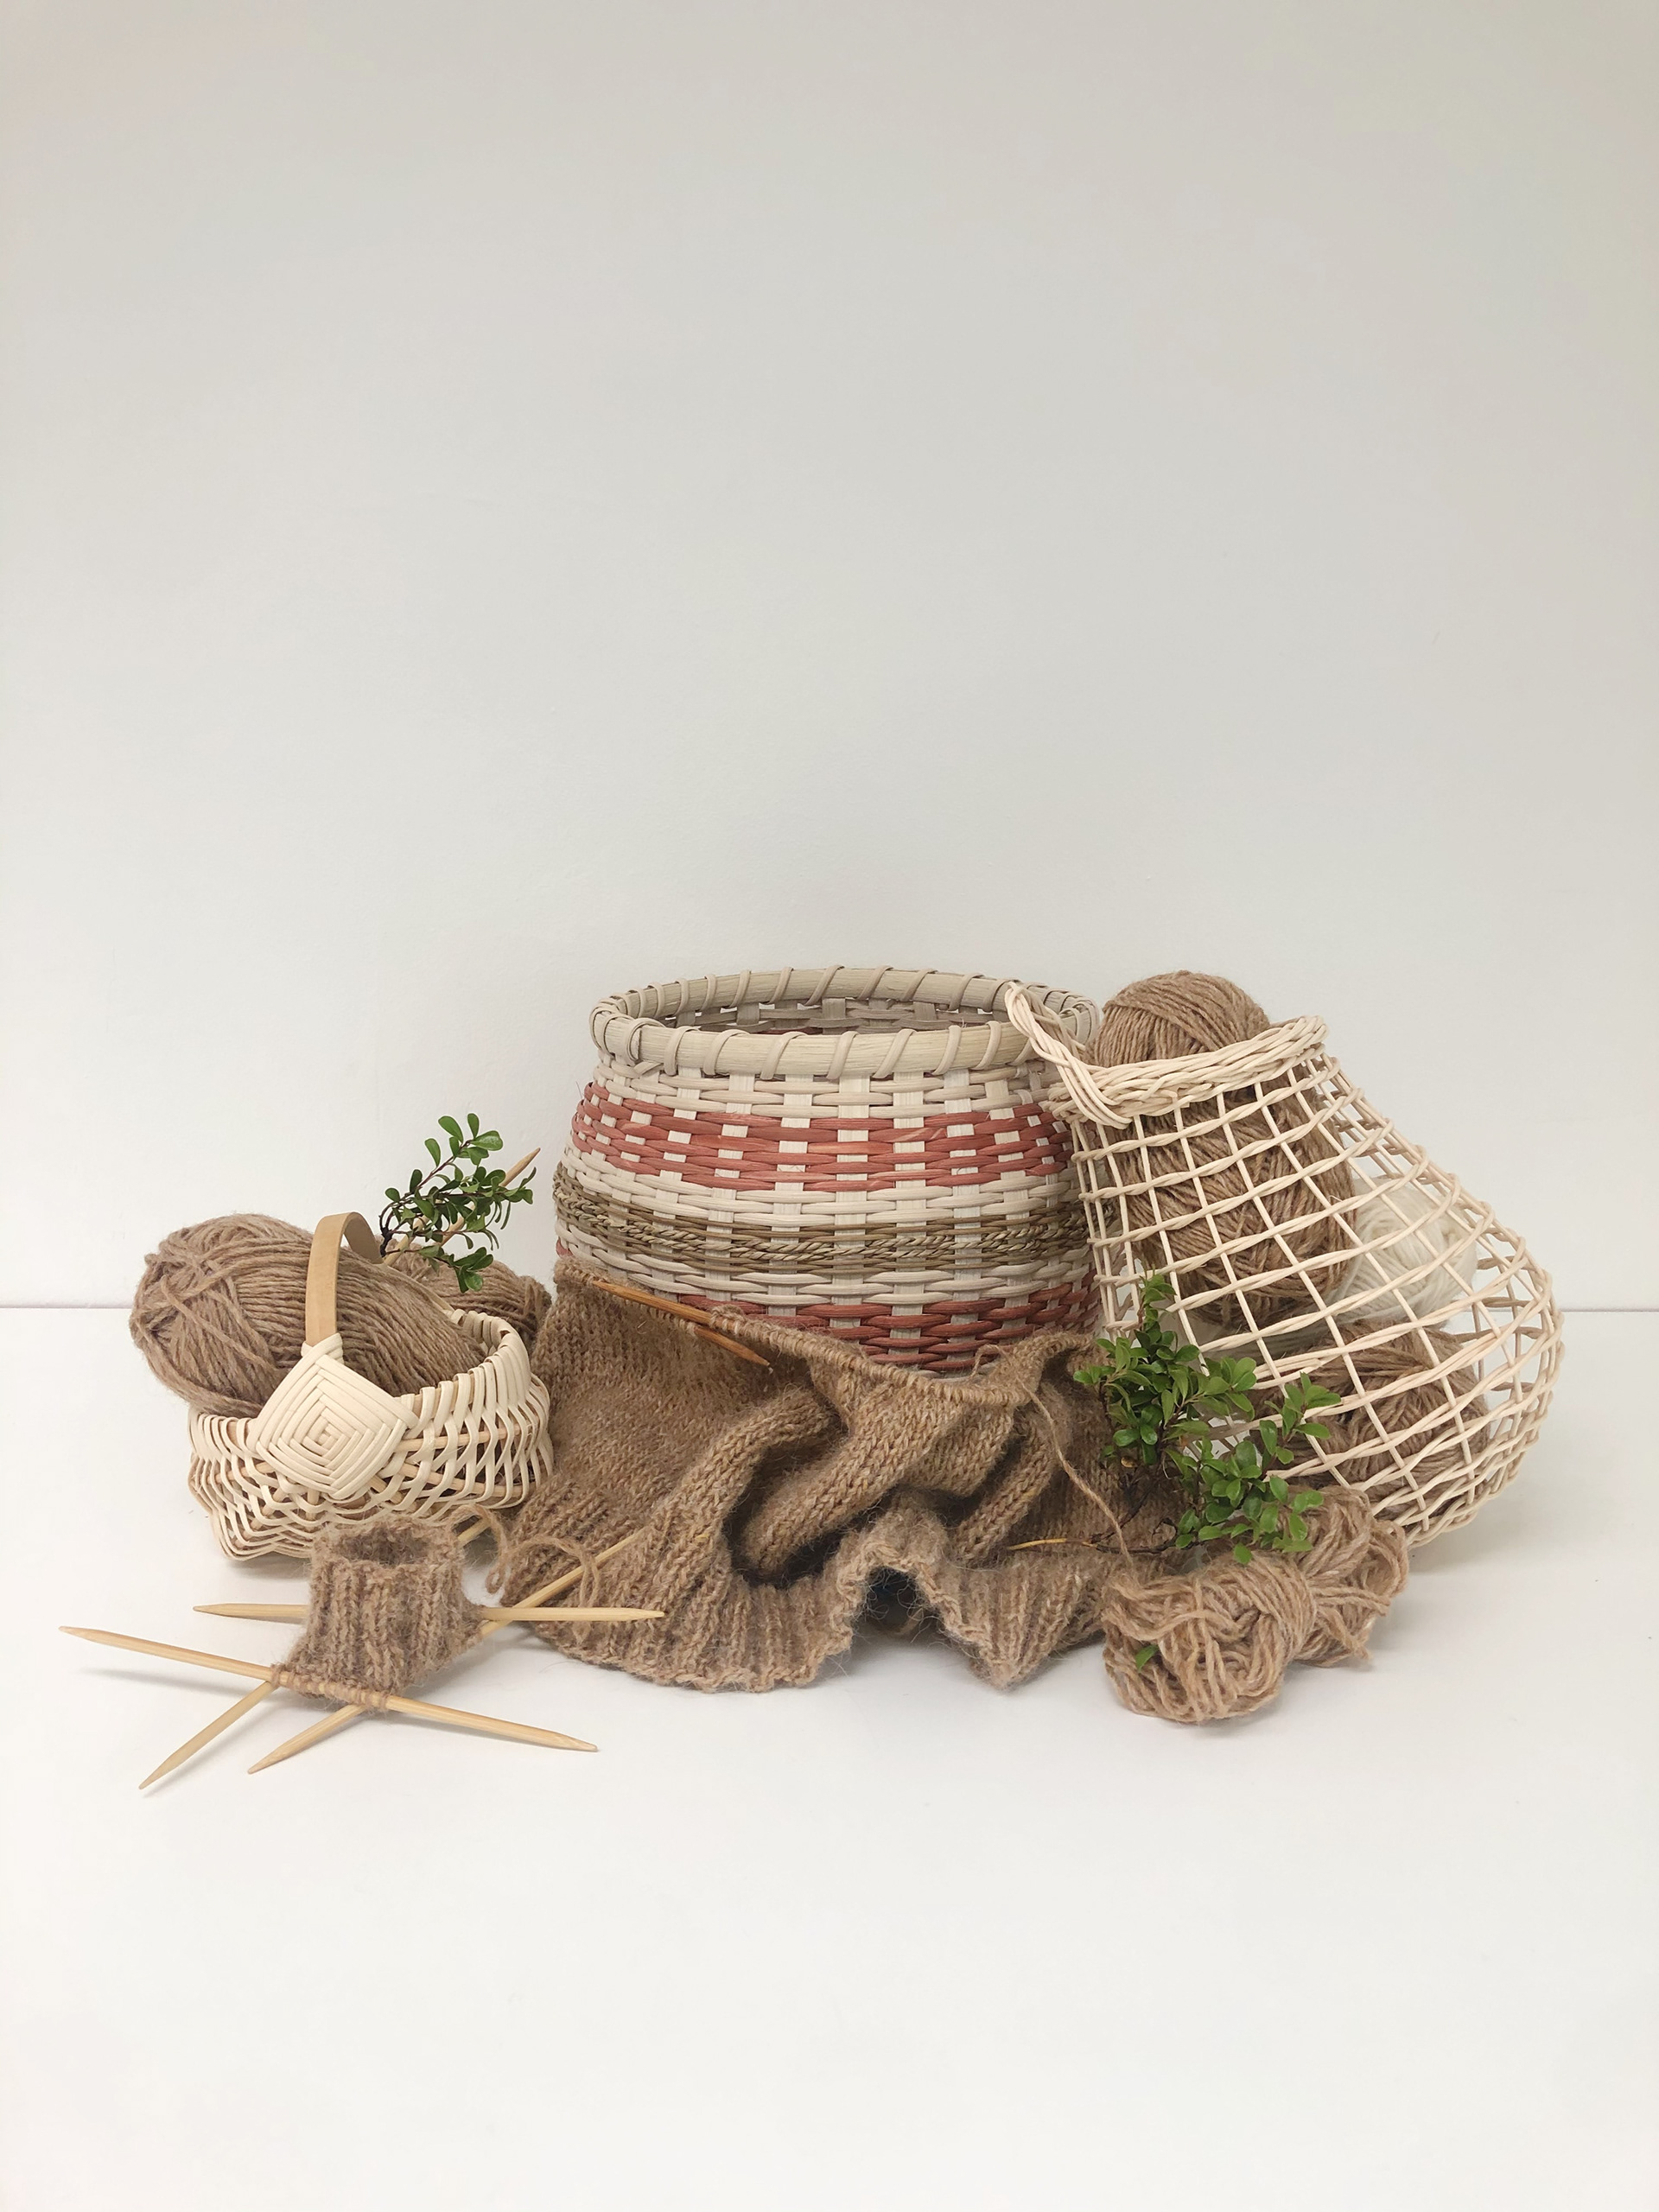
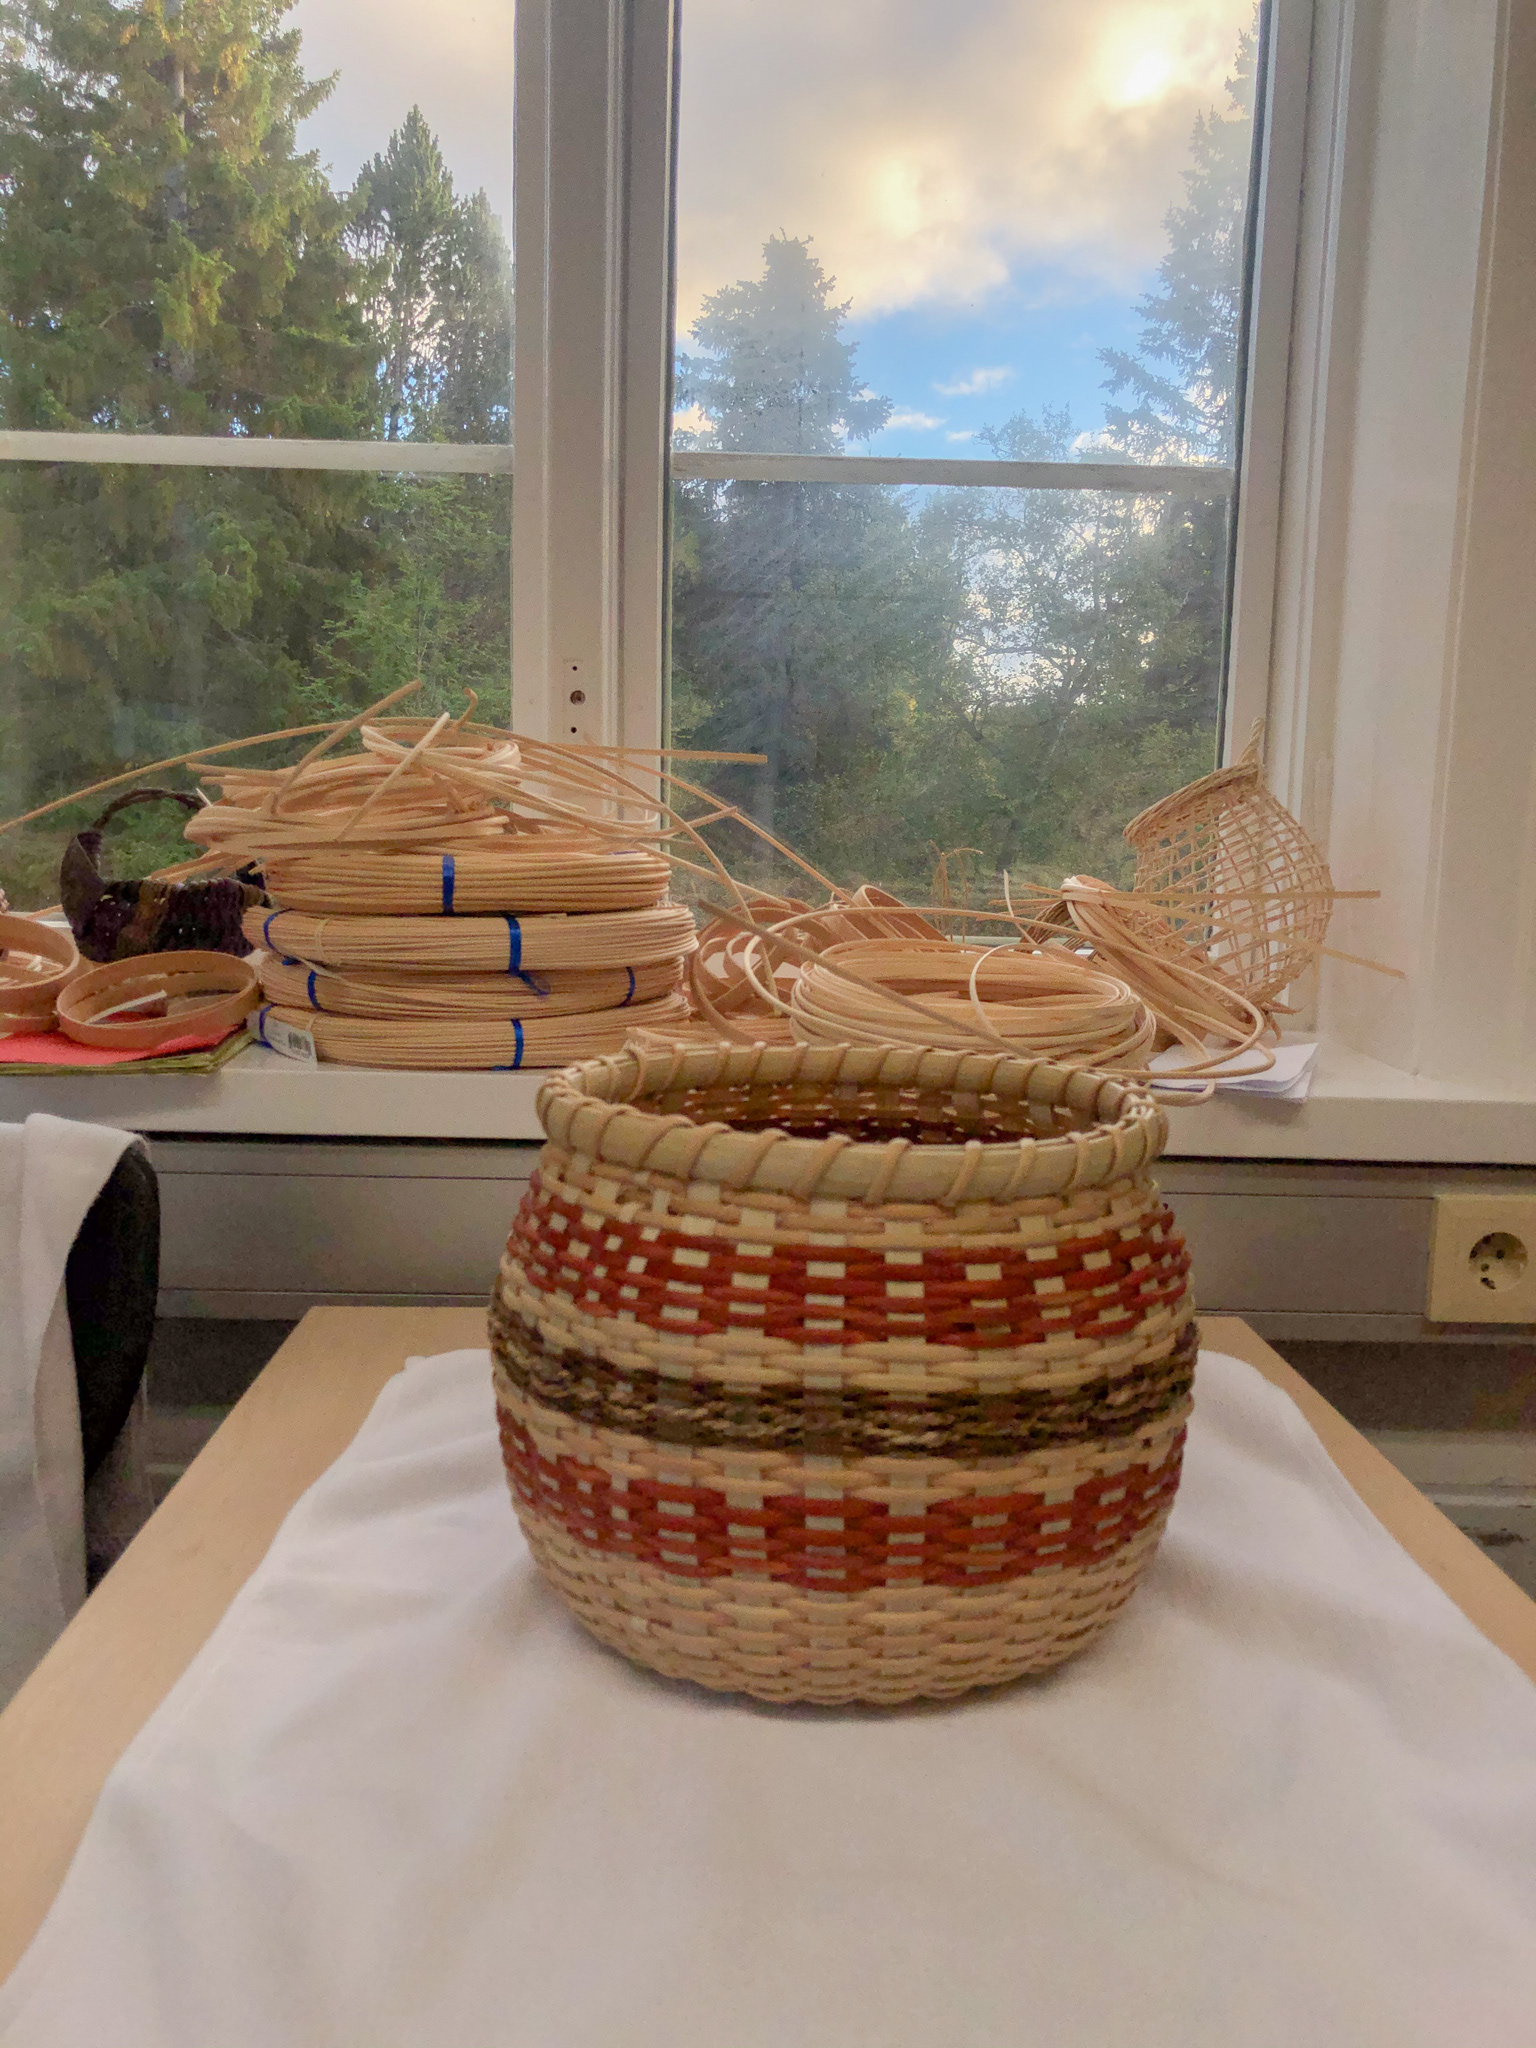
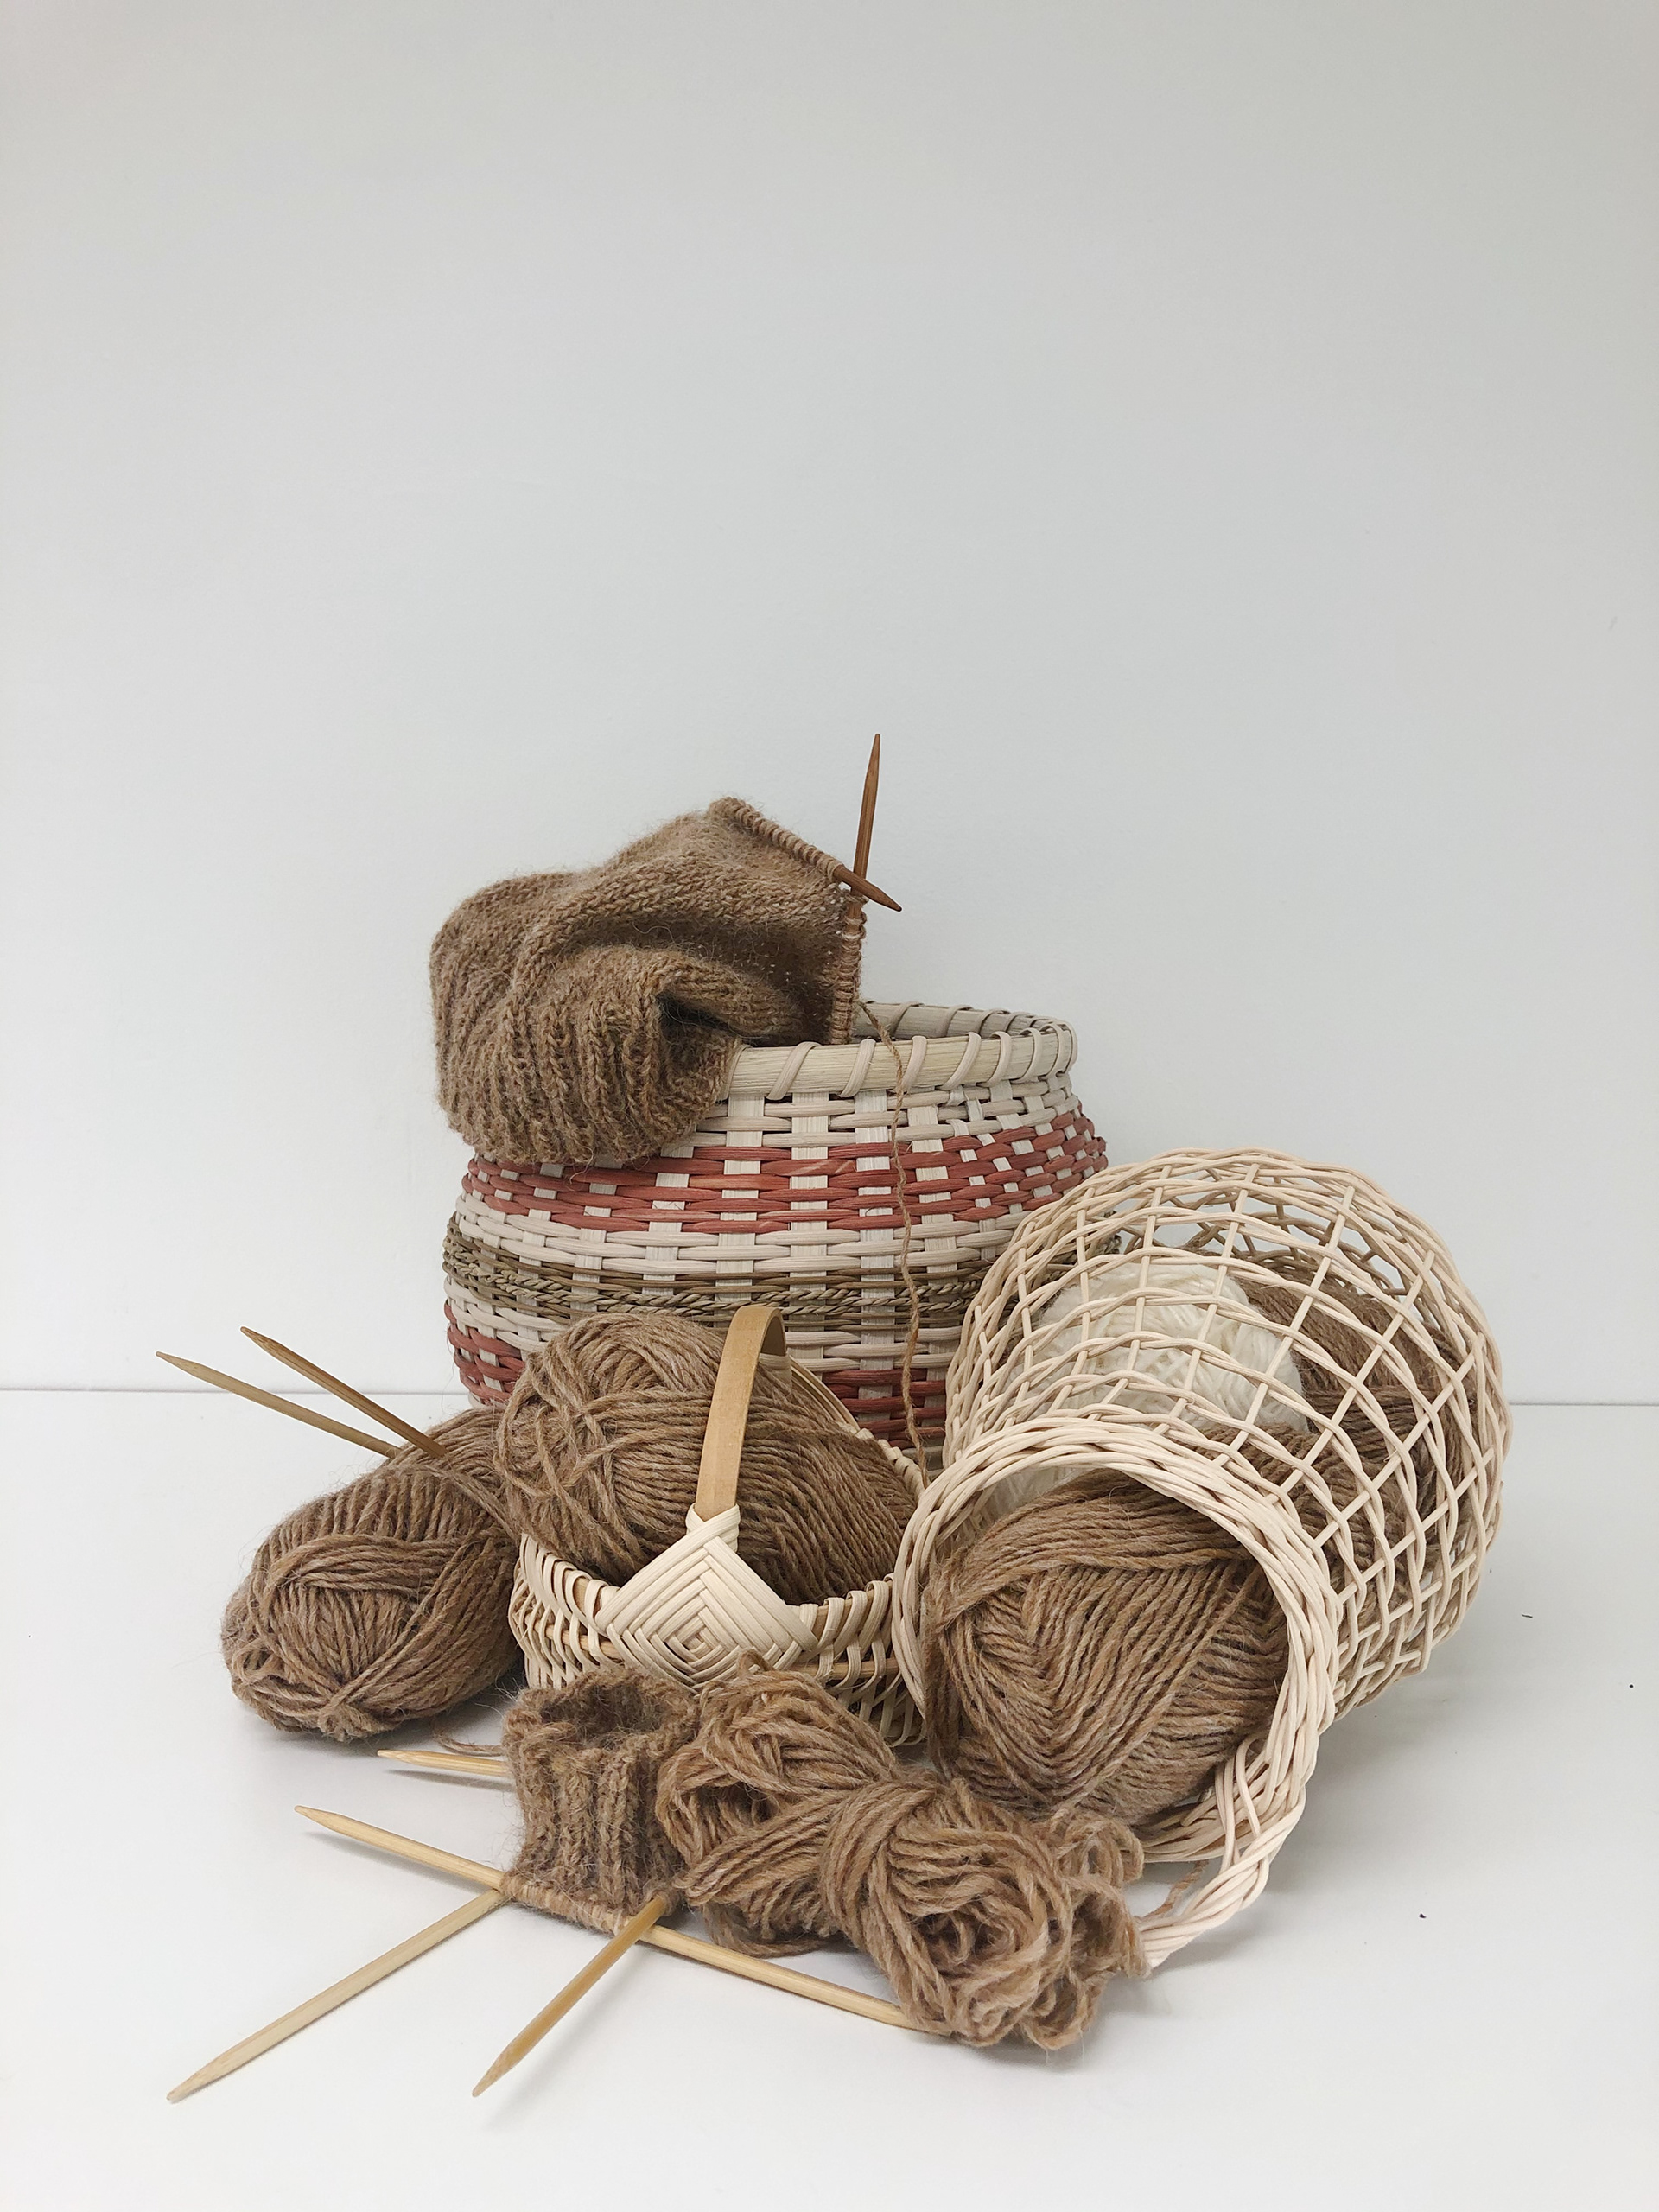
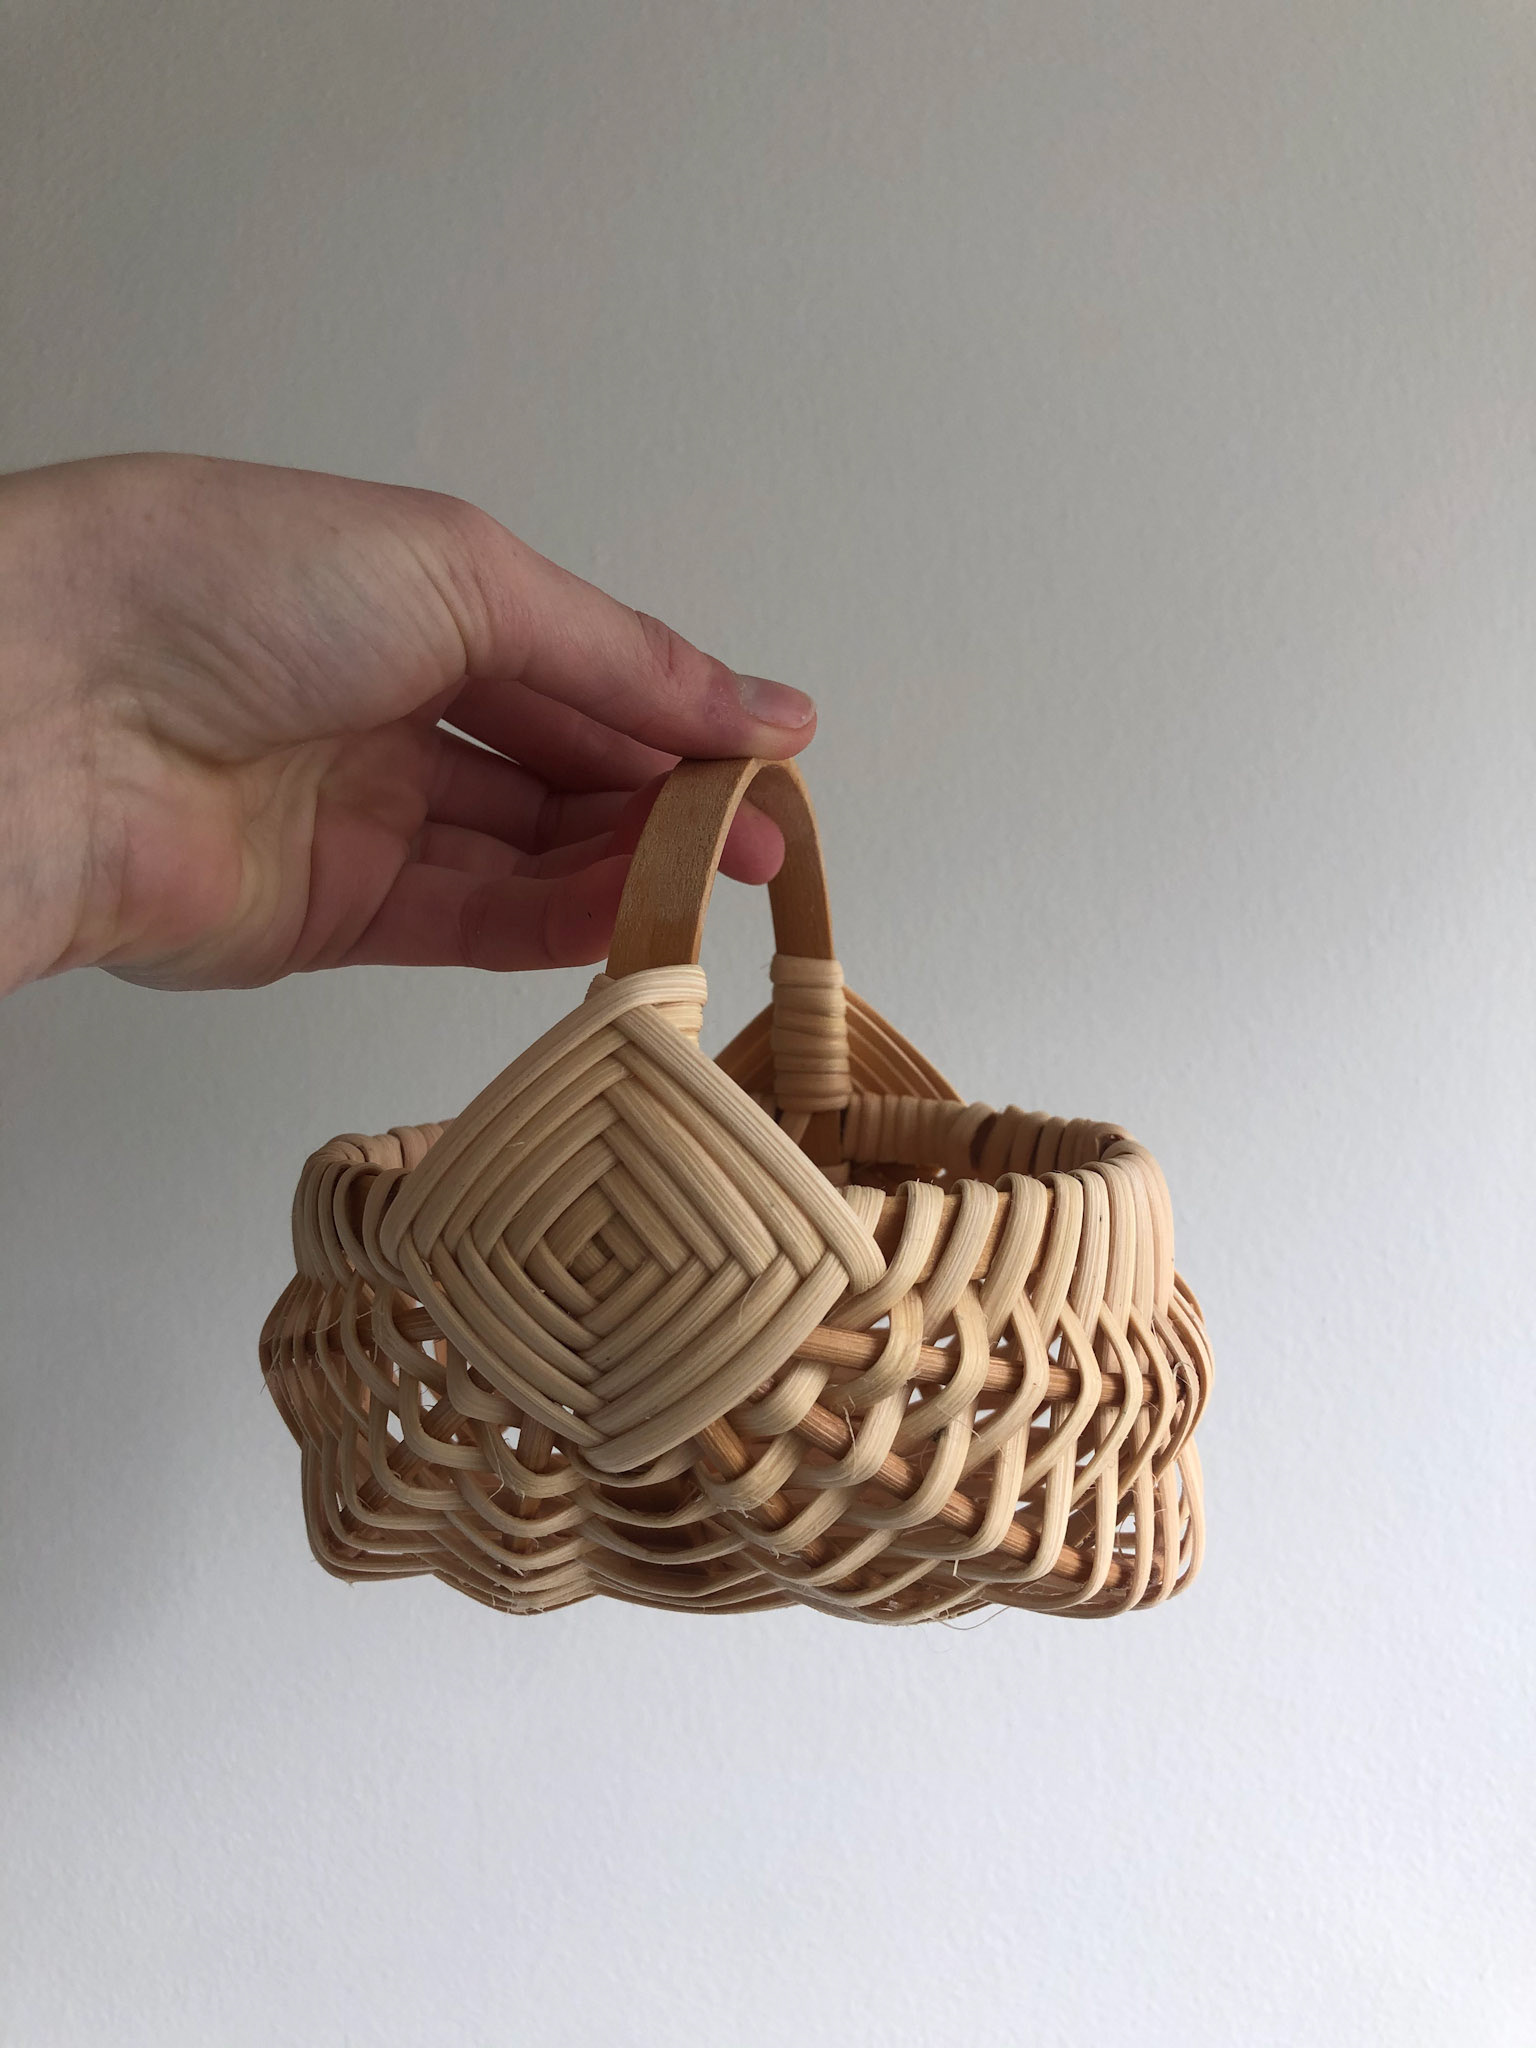
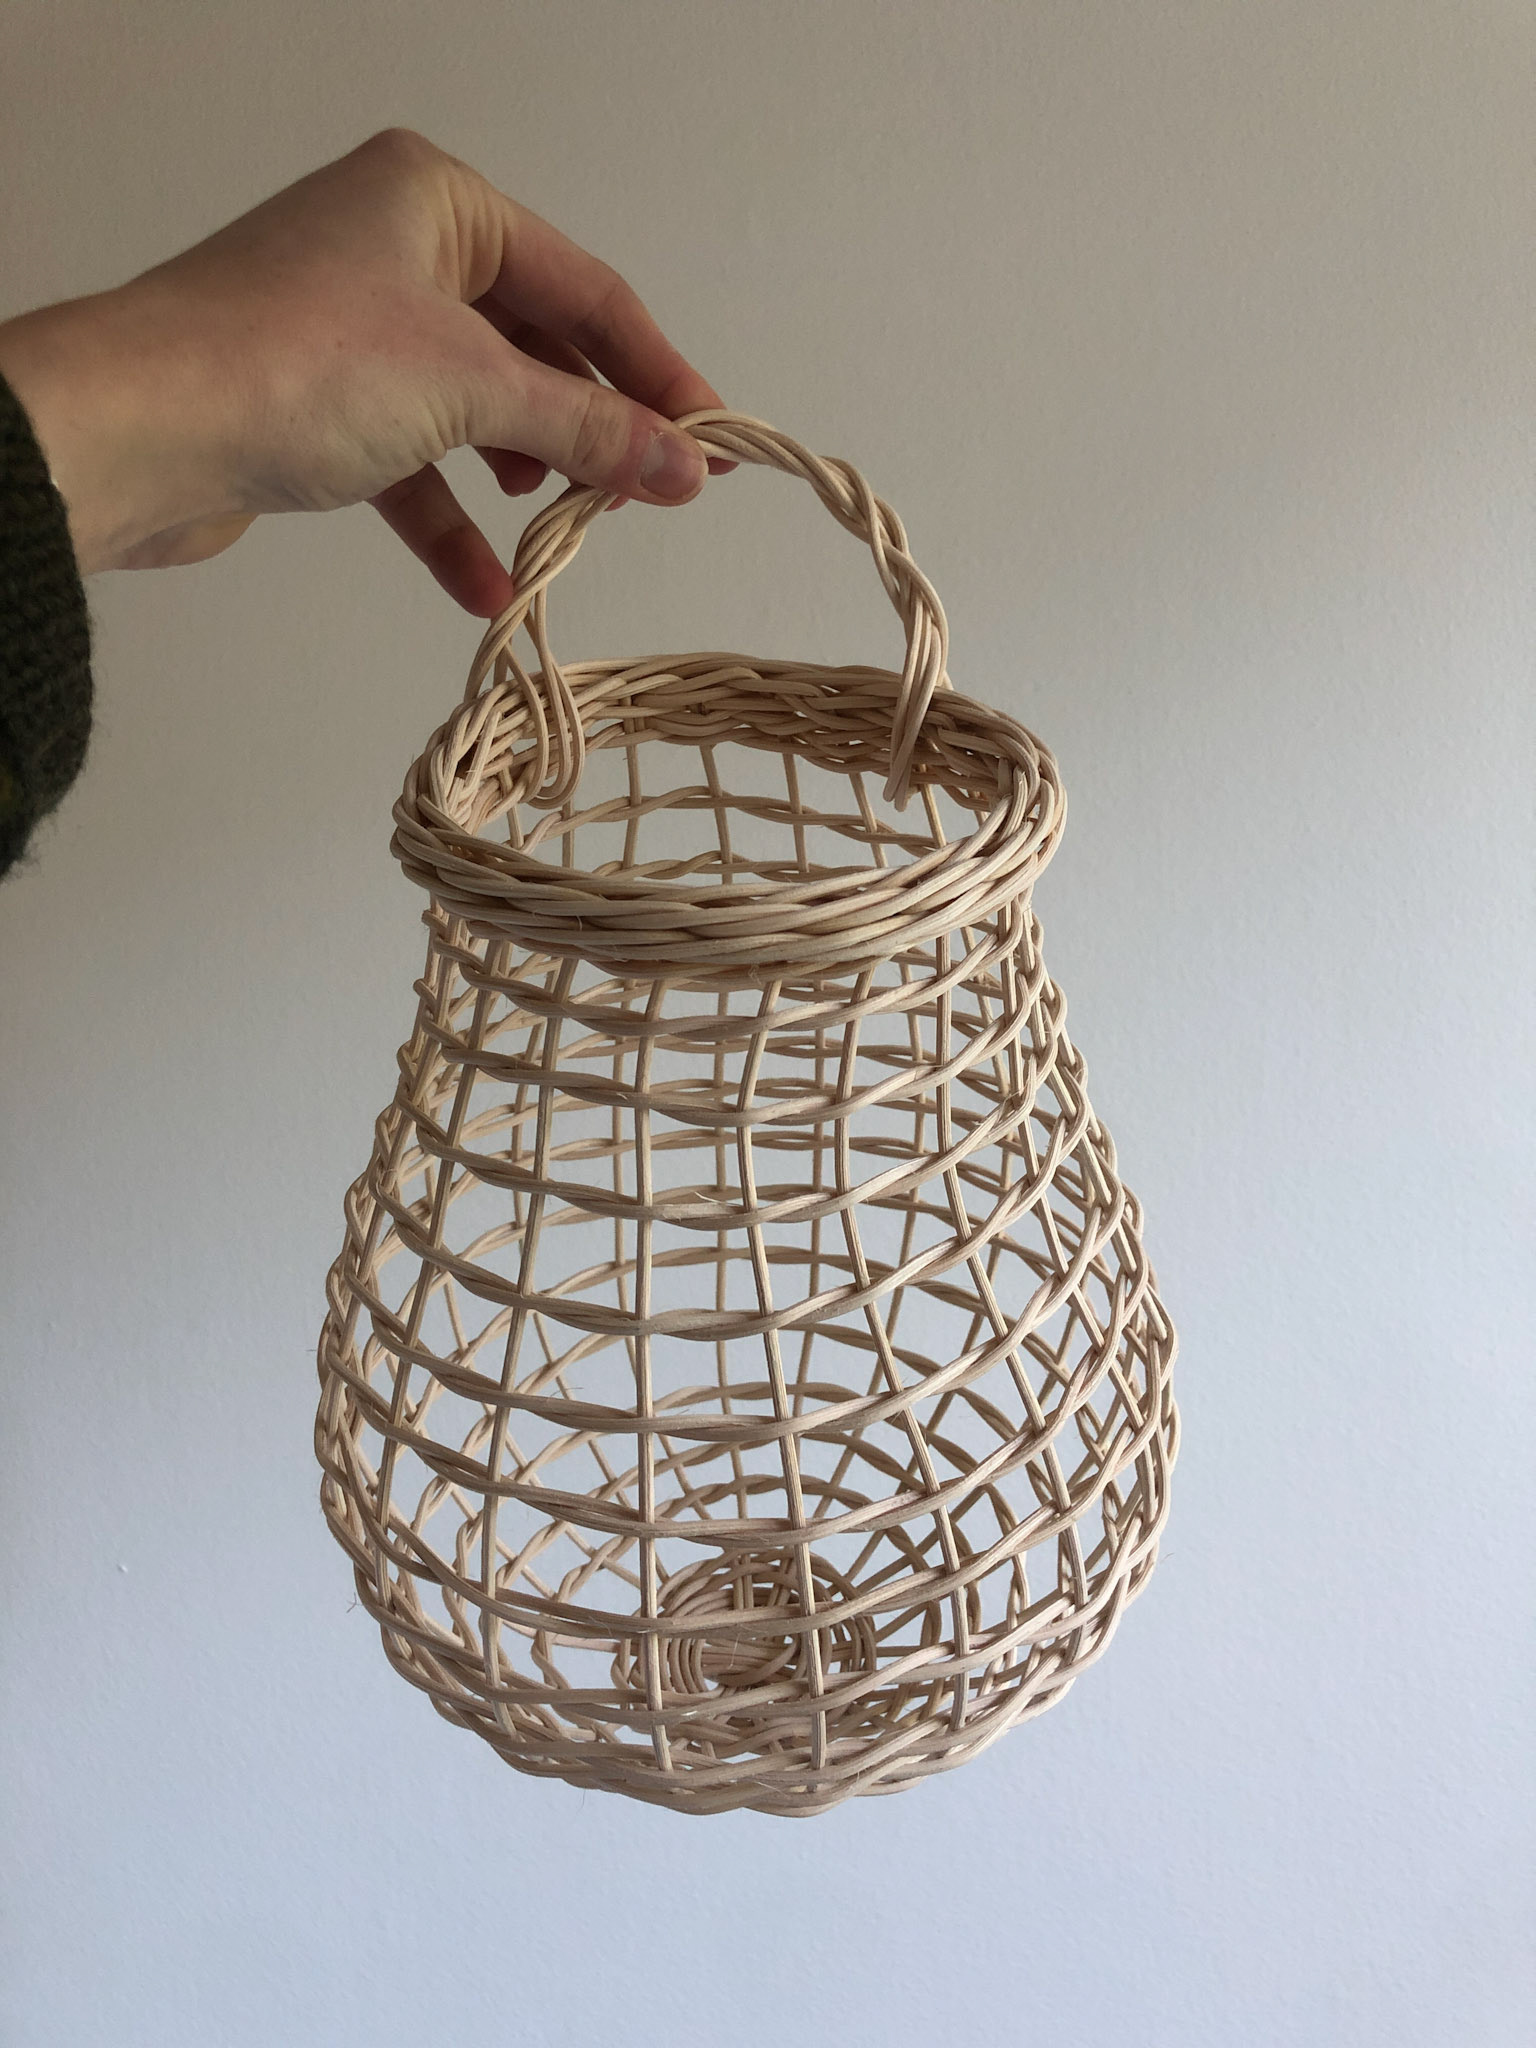
These three baskets were woven using different techiques and different materials.
The red, brown, and white one is called an apple basket. This basket was dyed using beet and birch bark natural dyes.
The basket on the bottom left is called a melon basket due to its shape. The bottom right basket is known as an onion basket, as it is useful to hold onions and other allium vegetables.
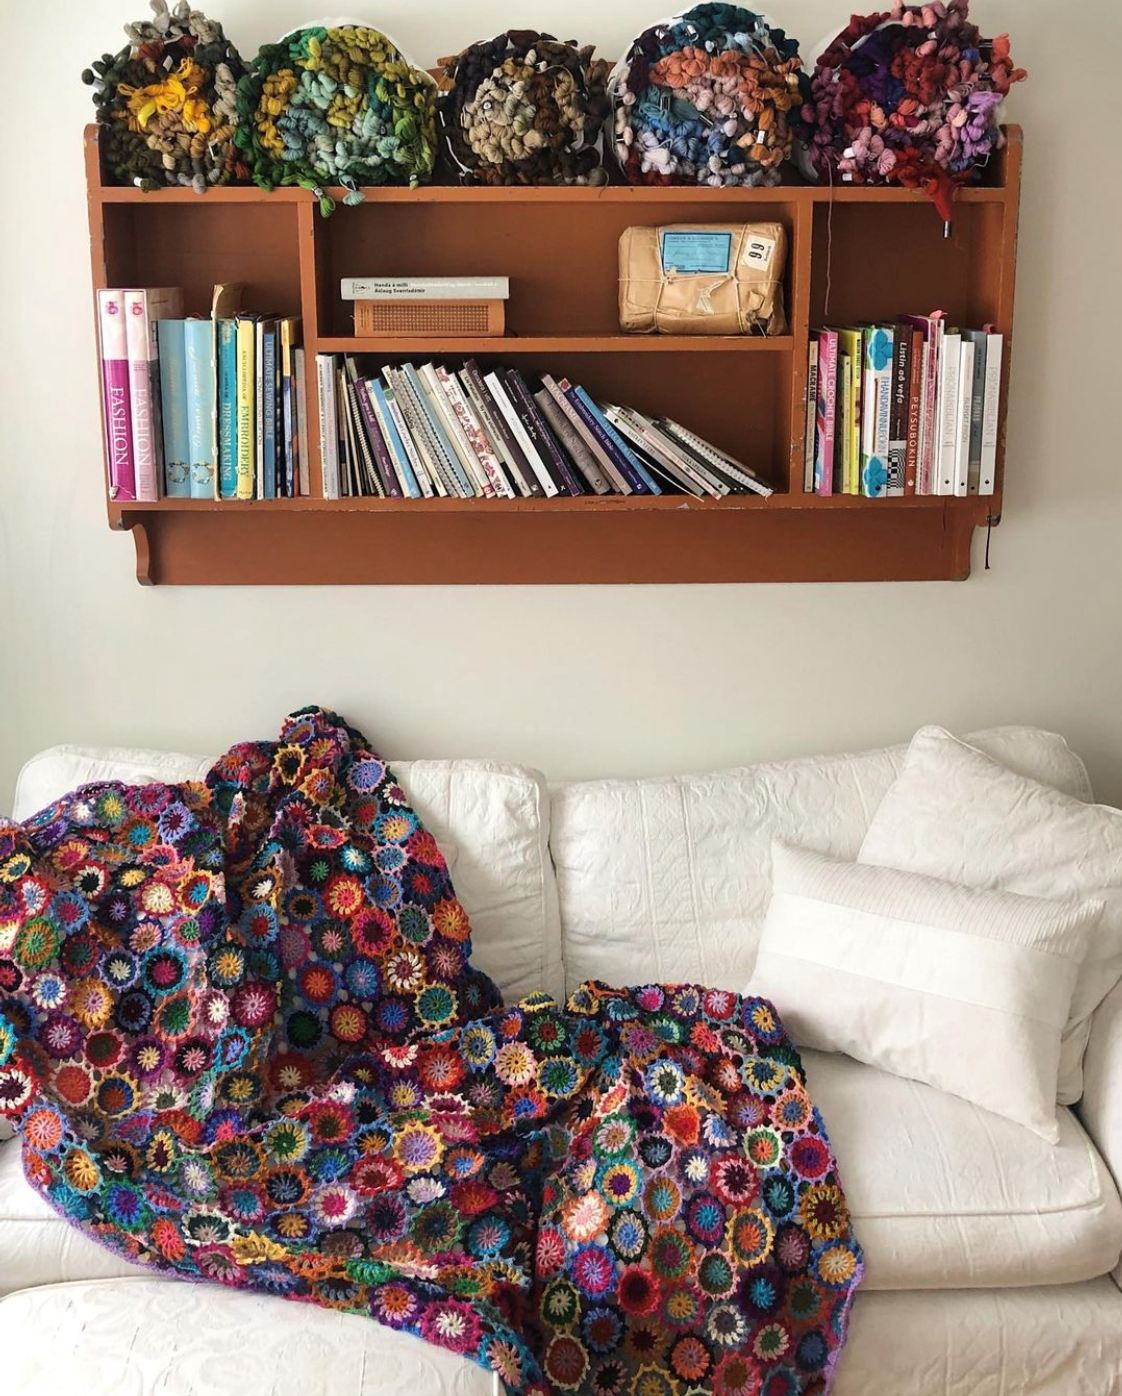
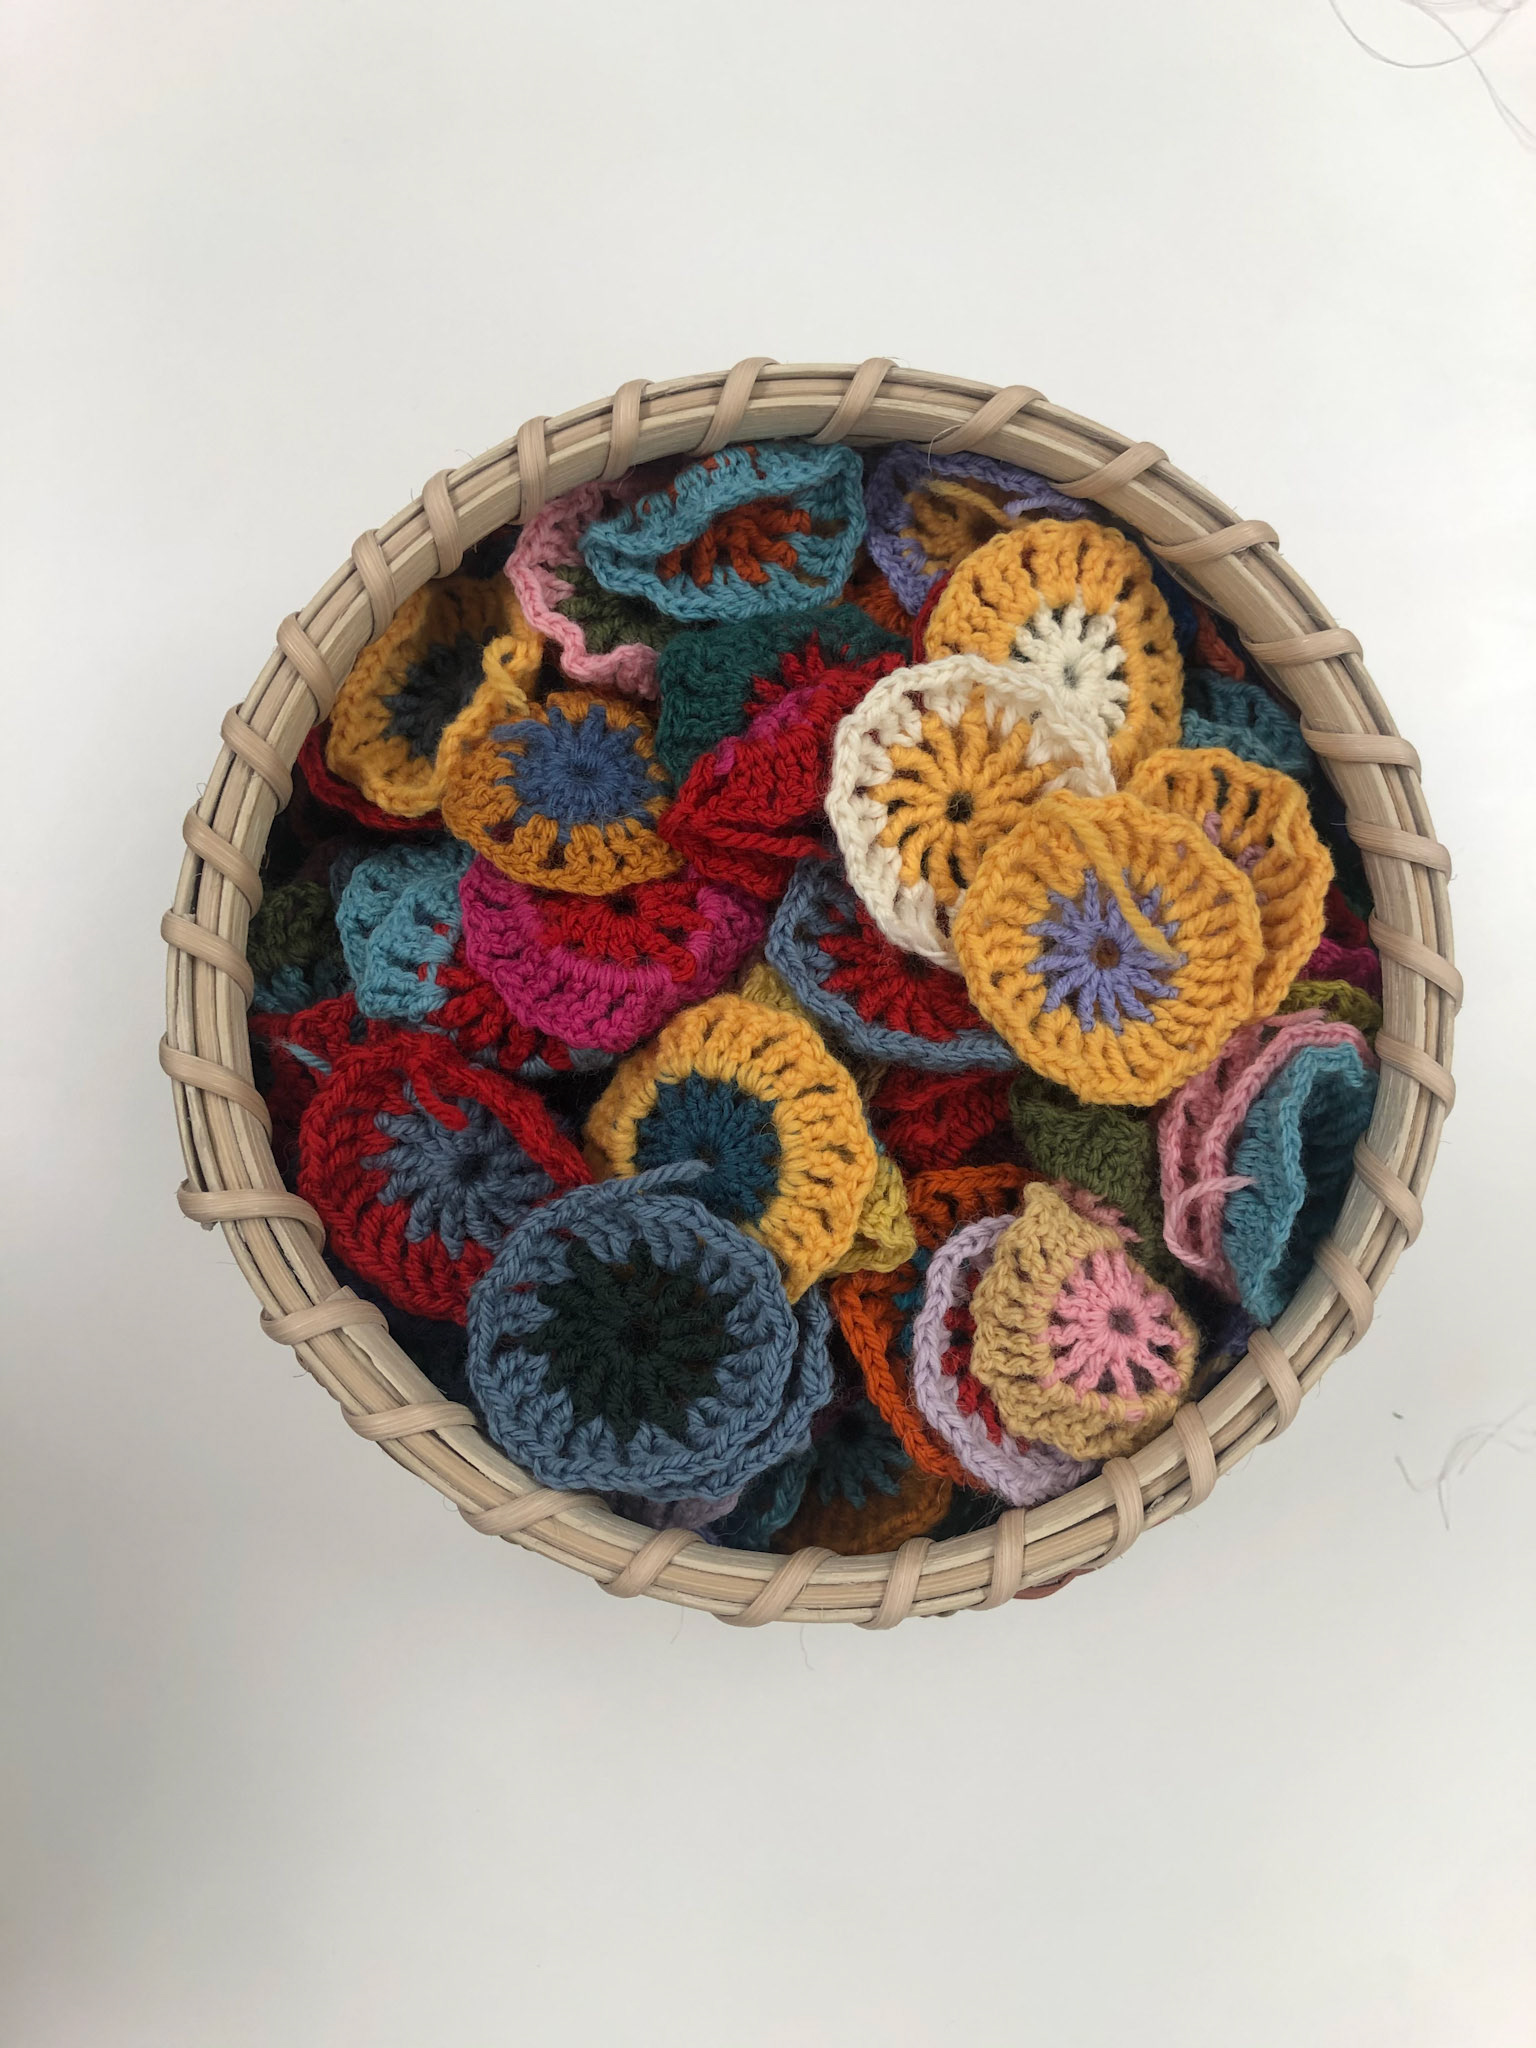
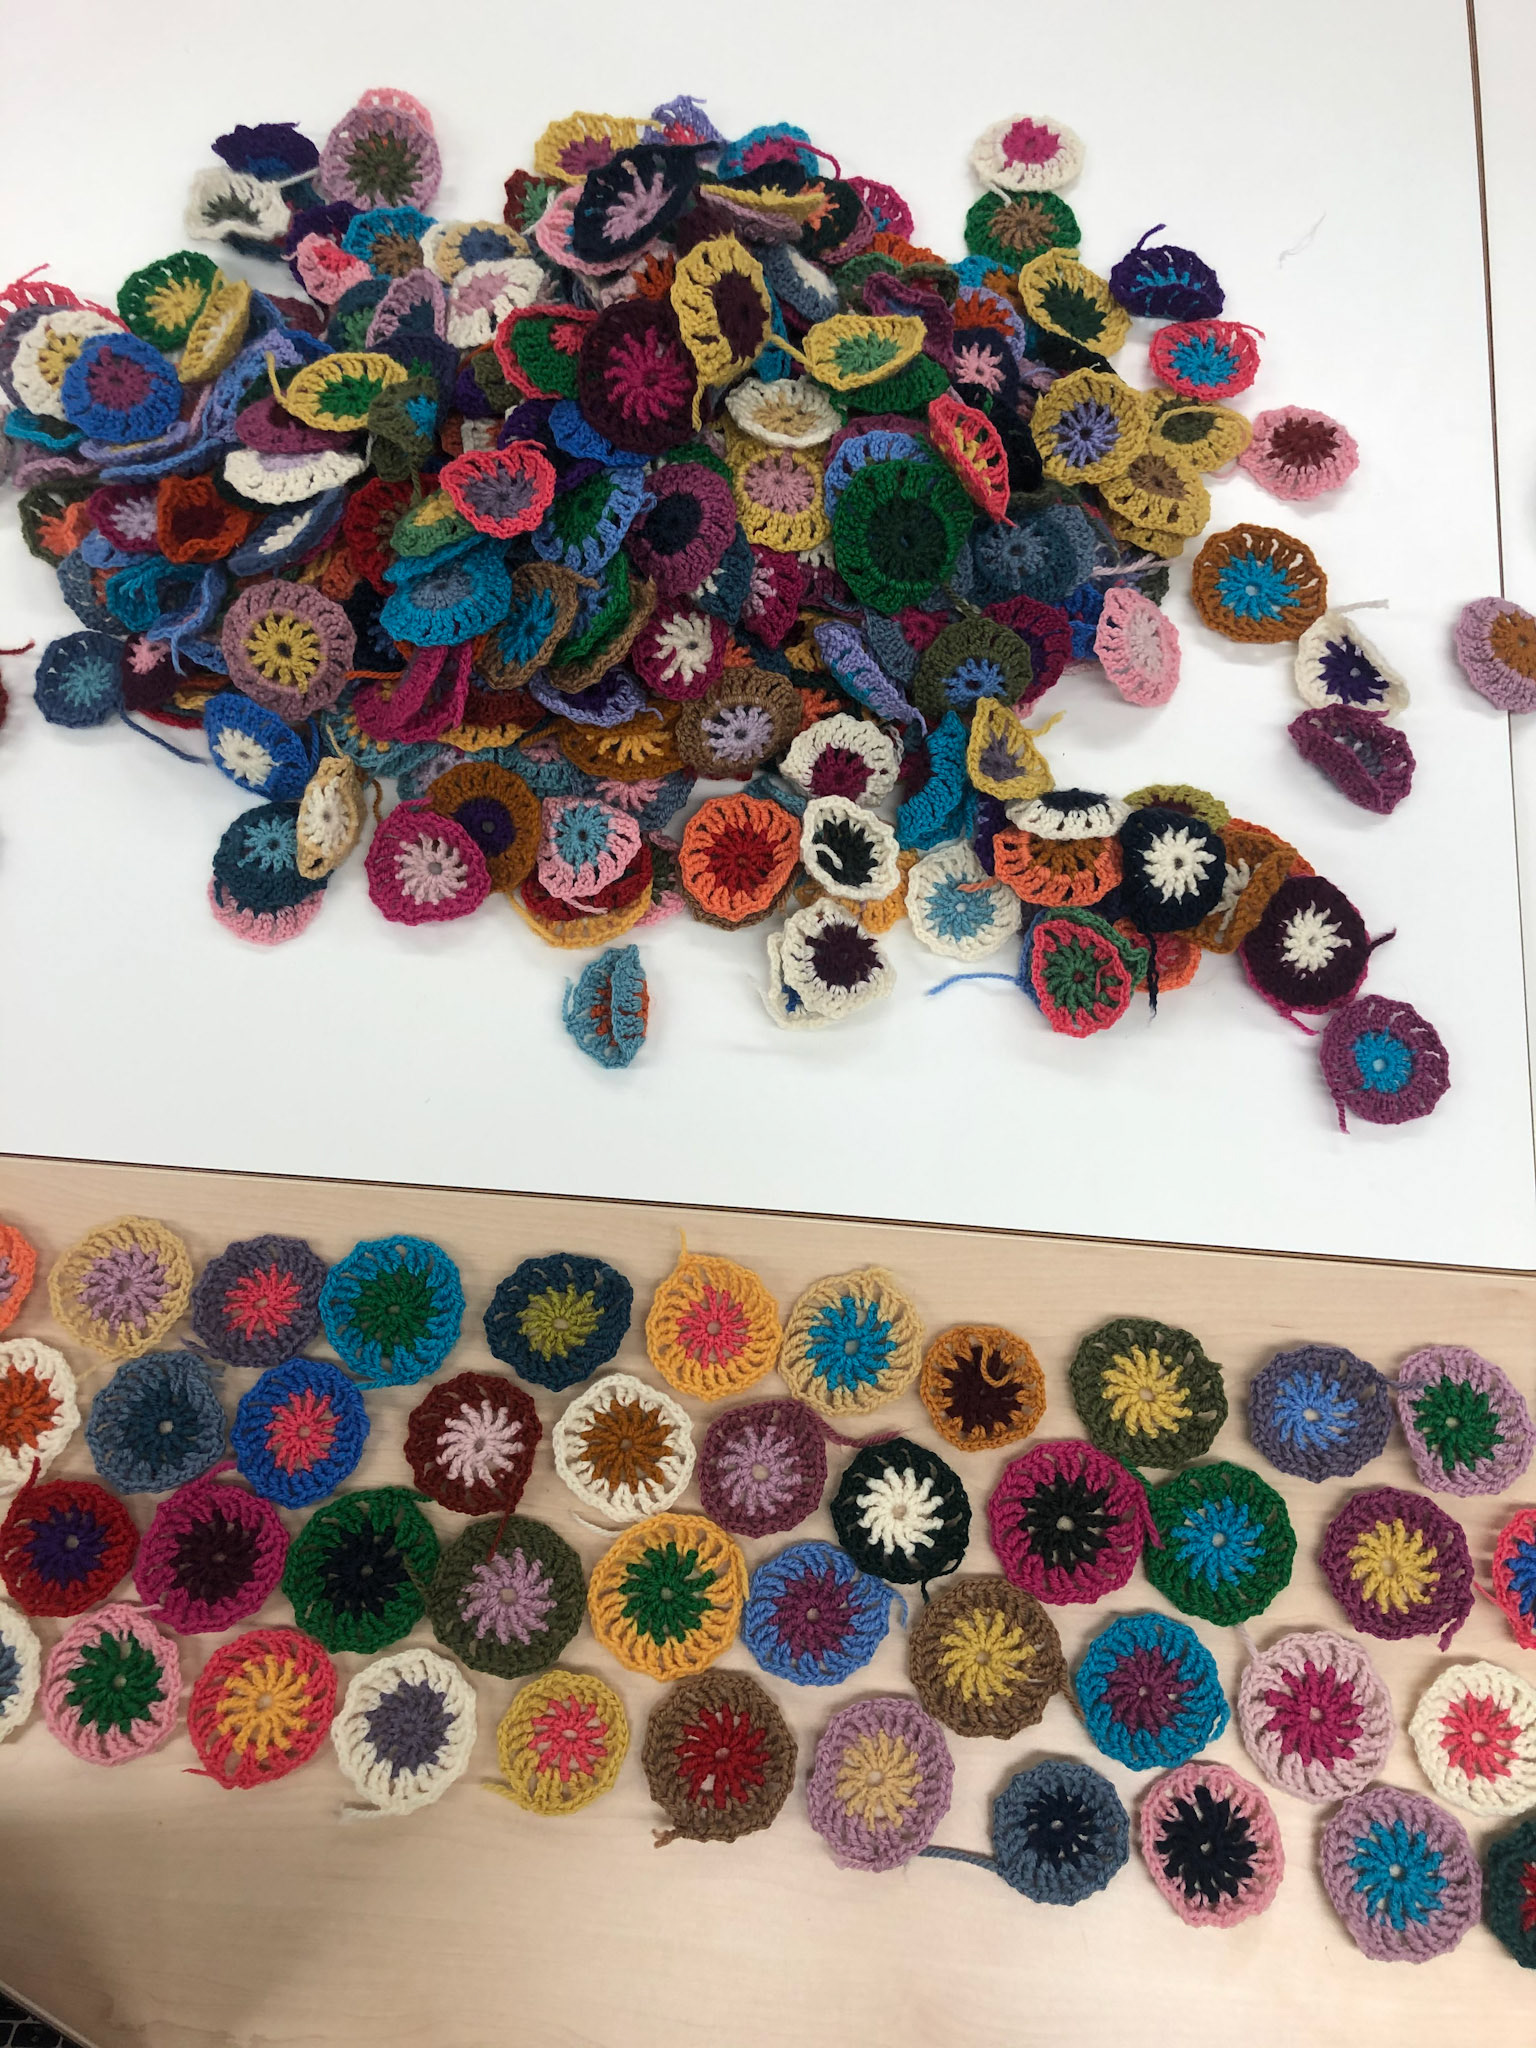
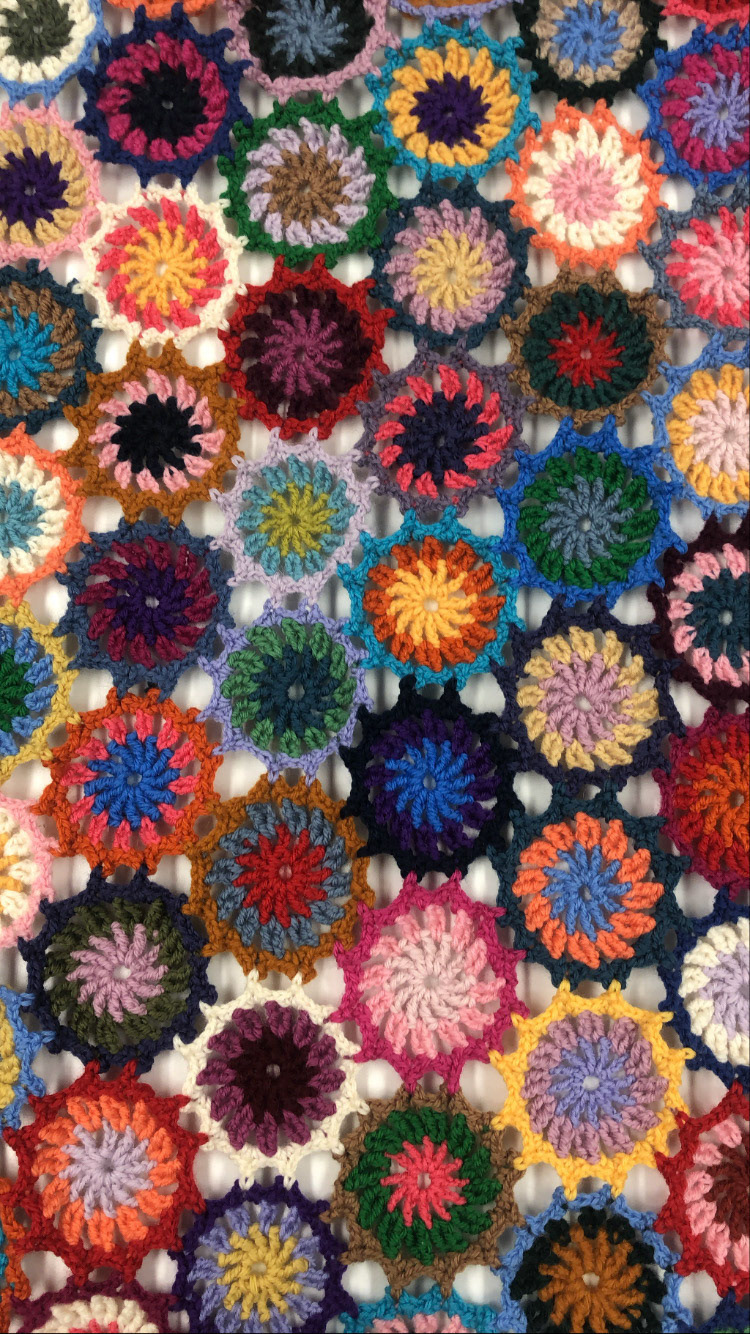
This blanket project was my first crochet project ever. I used only leftover yarn skeins from previous students at Hallormsstadaskoli.
I made 525 full circles and 75 half circles of two-color rings.
The third color on each circle was done as one of the final steps to connect it all together. As the final step, a border was crocheted. Additionally, I arranged the blanket so that no circle is touching another with the same color in it.
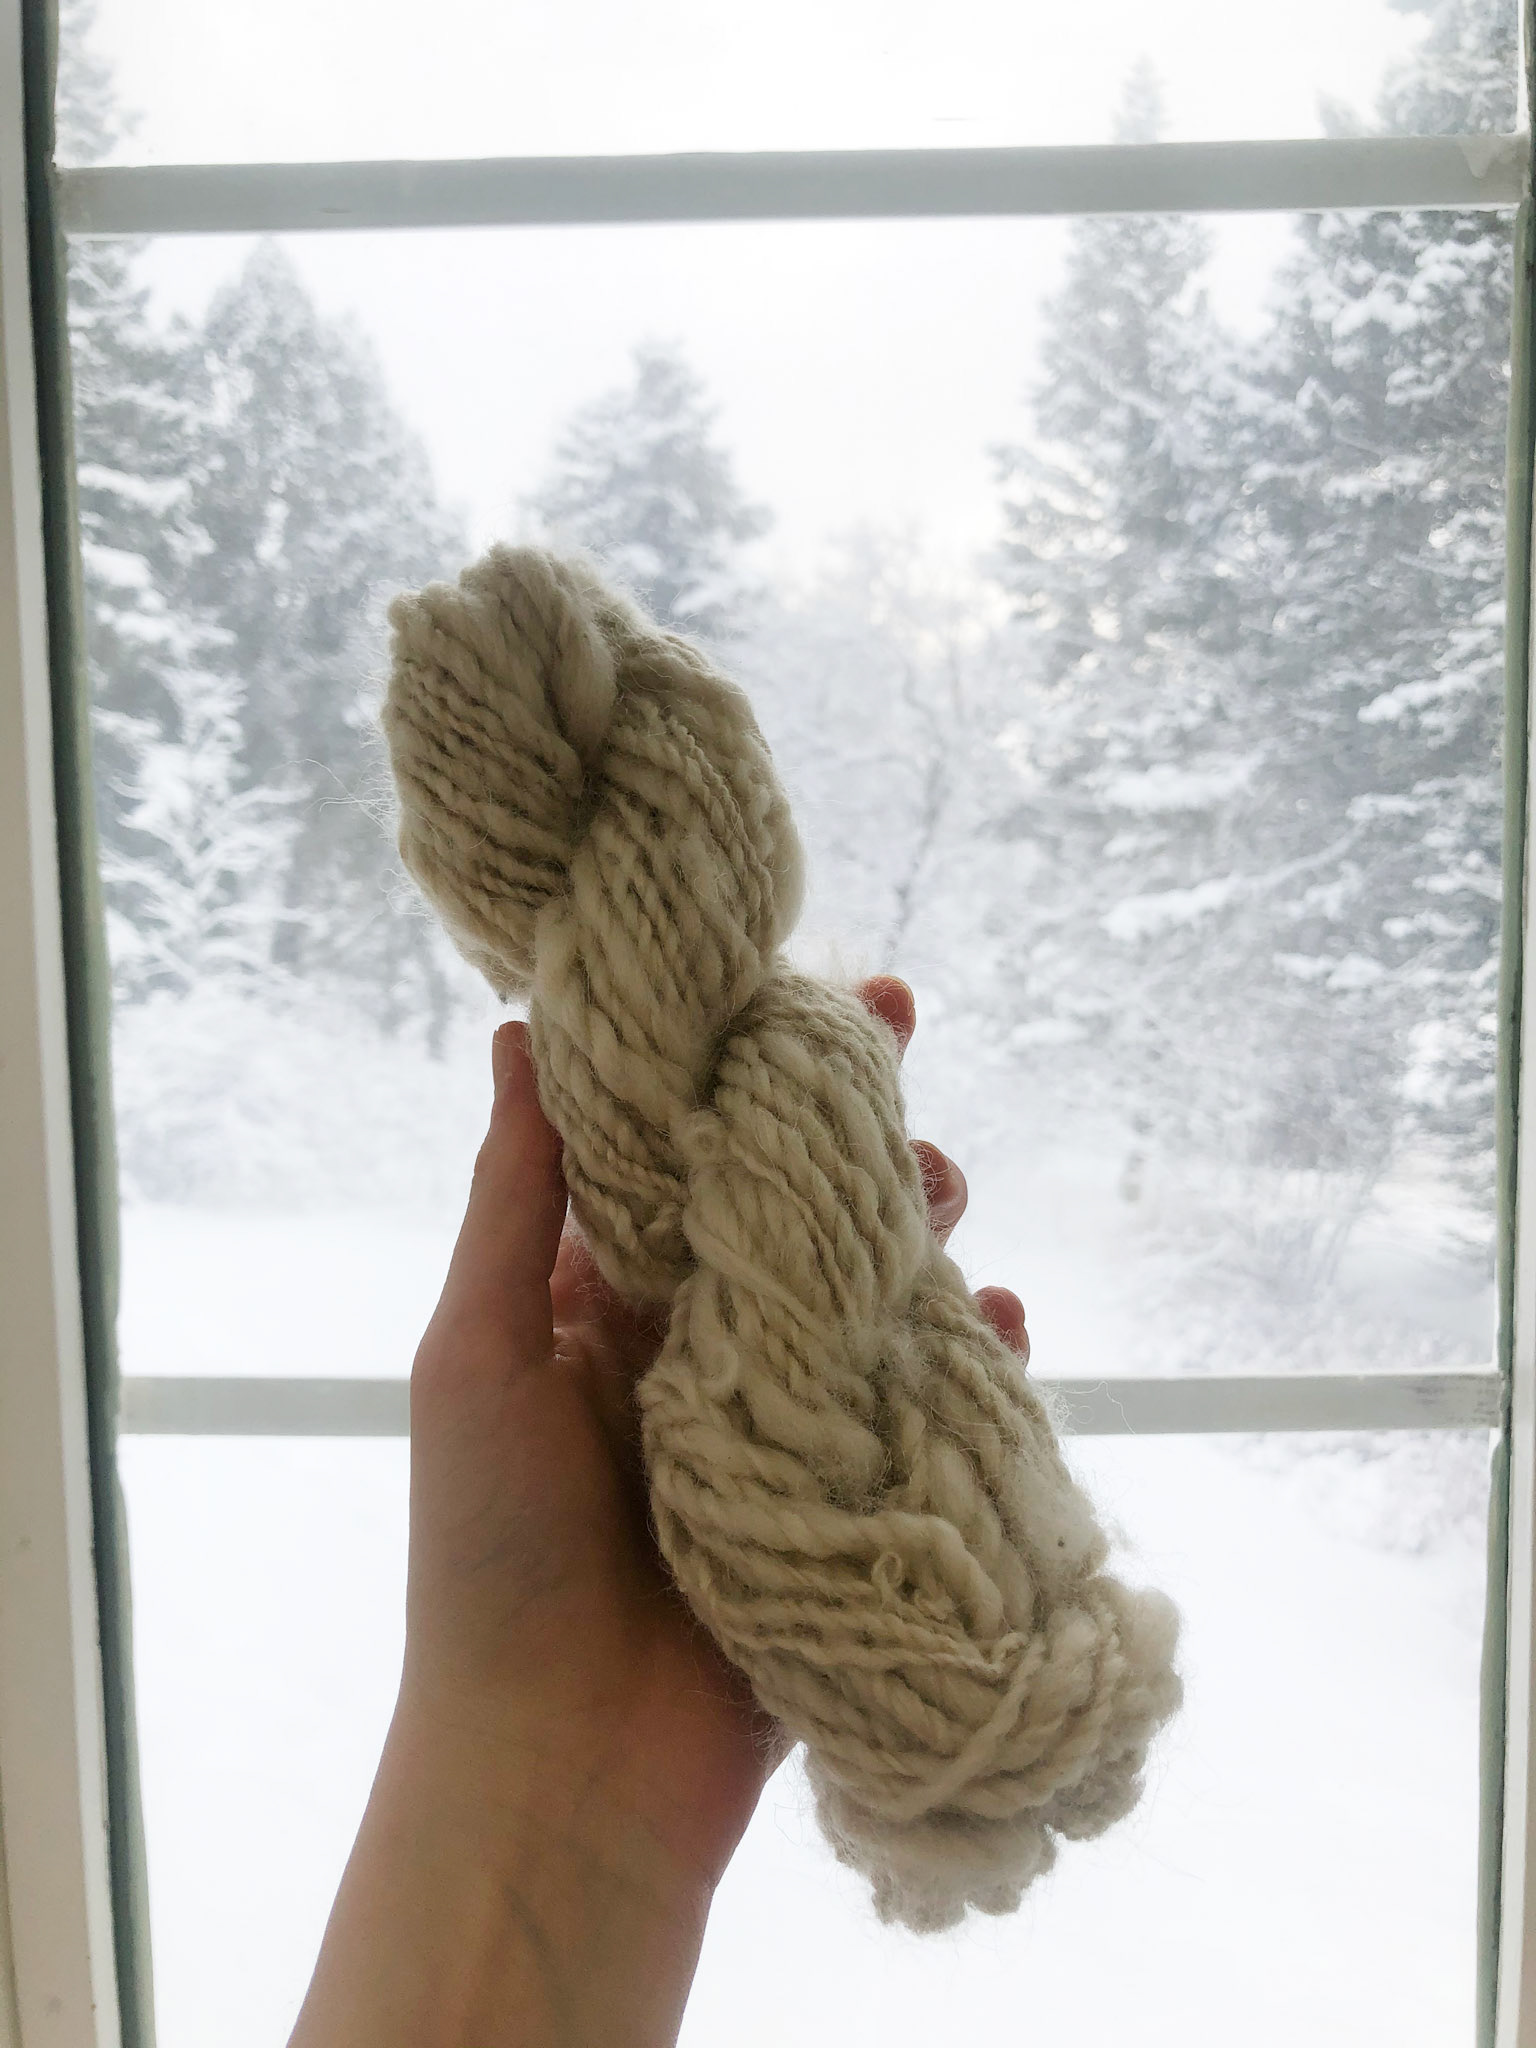
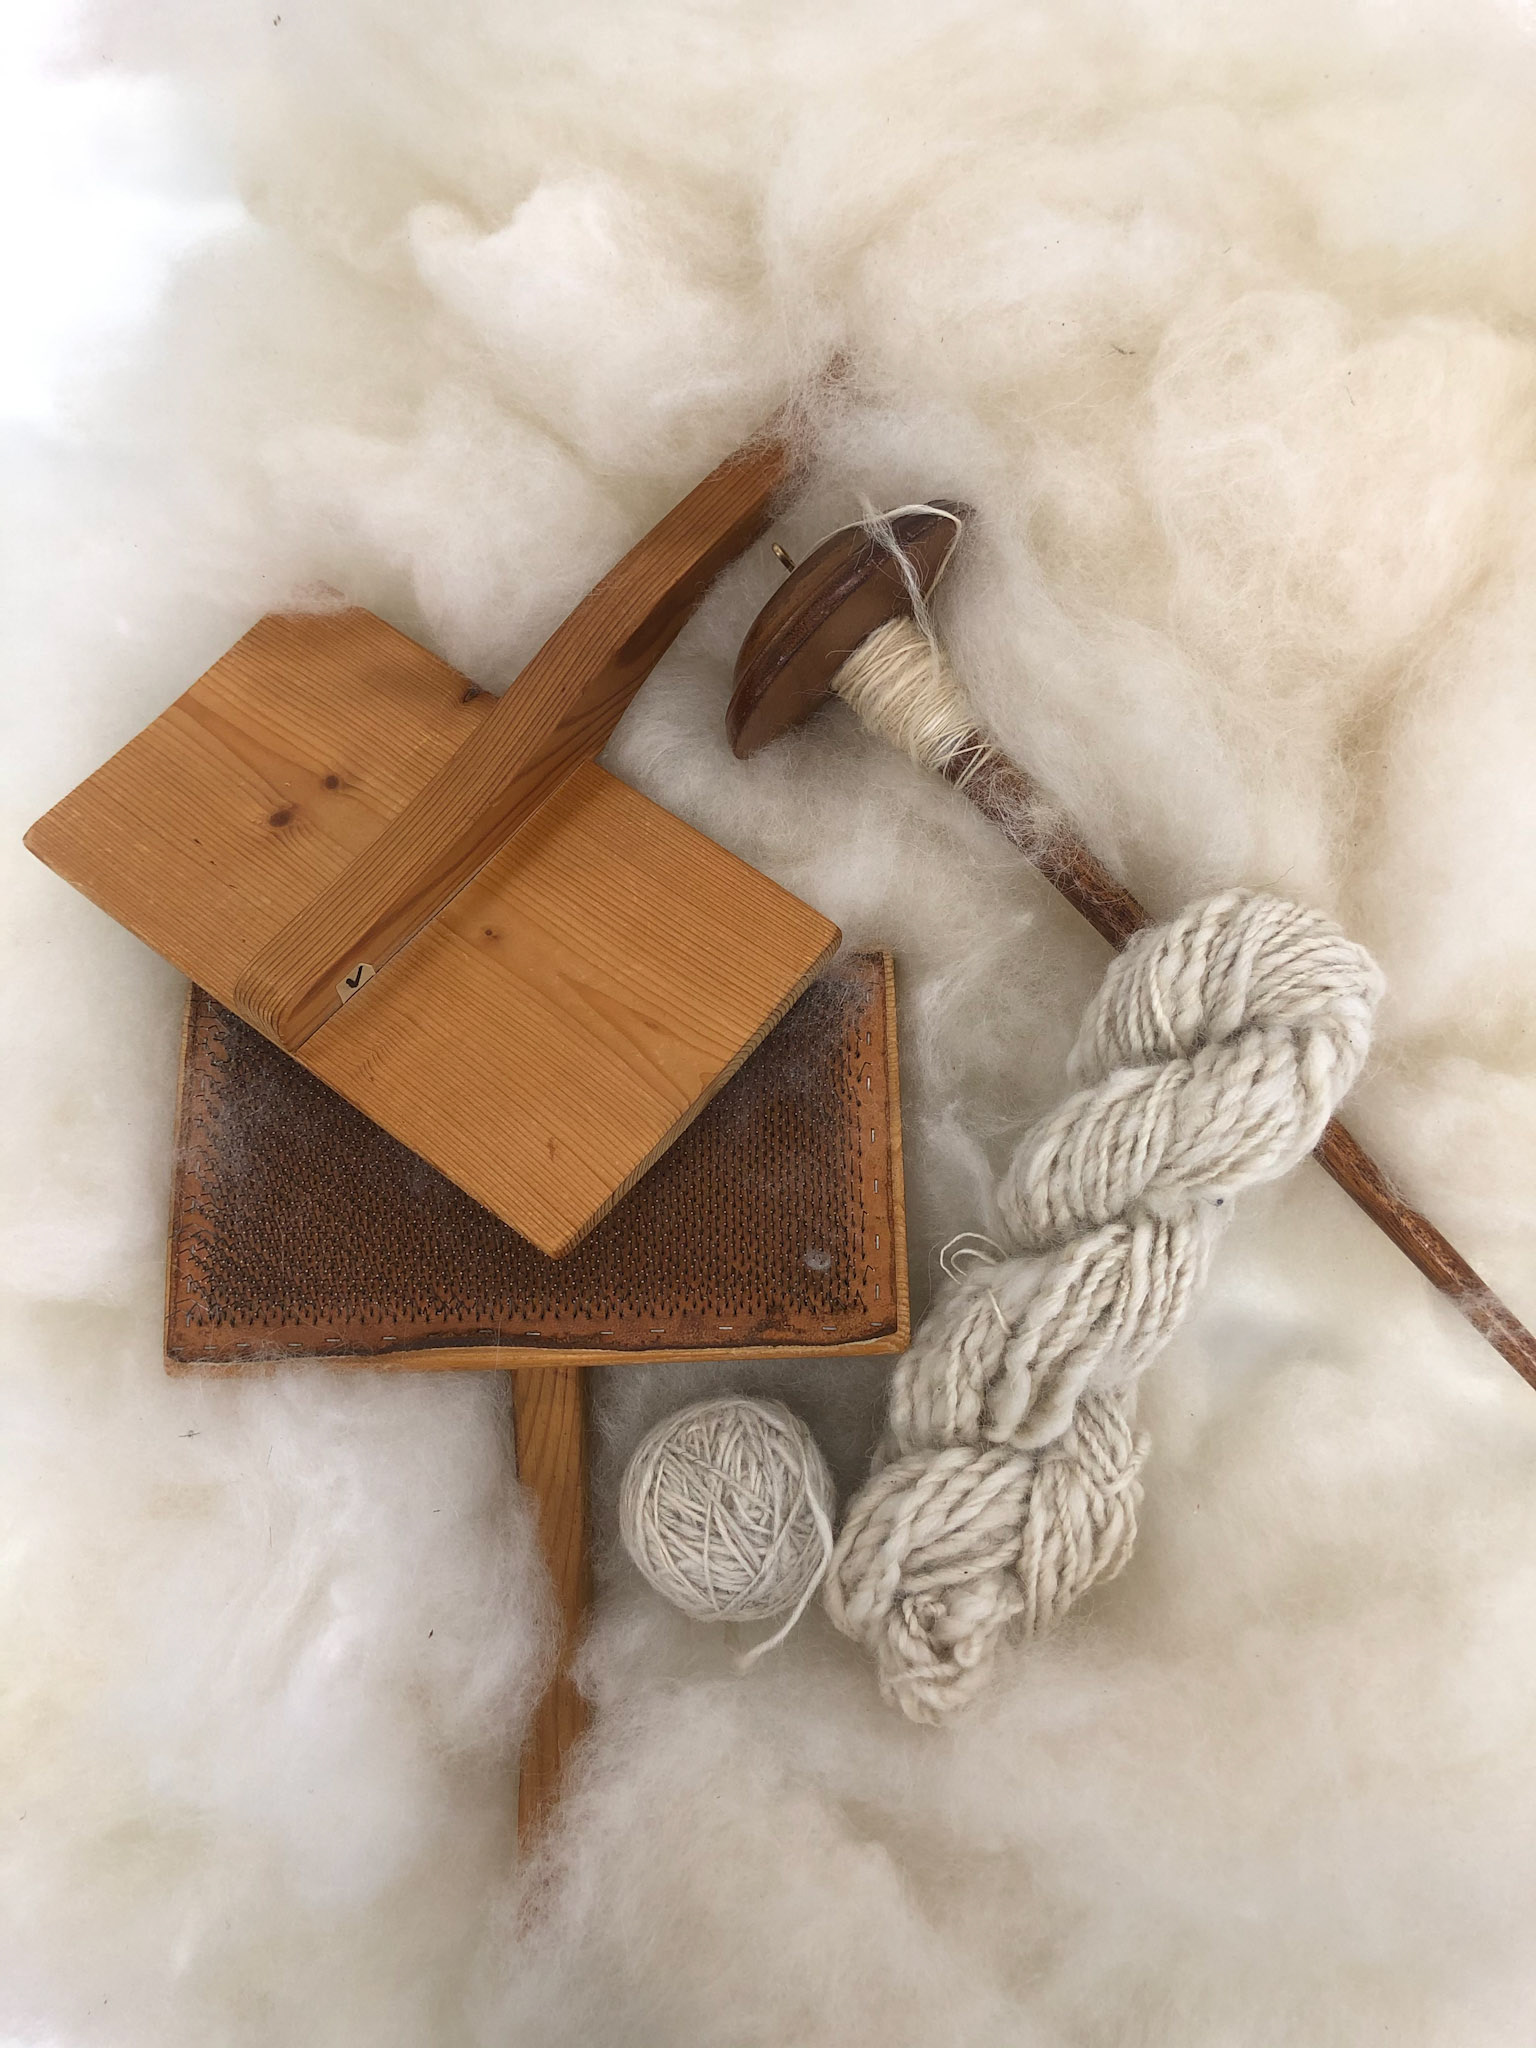
We learned how to spin wool, processing it from its raw form from a nearby farm into a useable yarn.
We started by separating the tog (long & strong outer fibers) from the þel (soft and short inner fibers), which can be used to create different types of wool. To learn, we only used the þel.
We learned how to hand spin the wool with a spindle and how to use a spinning wheel. To the left is a two-ply yarn that I spun using two balls of yarn, shown below the brushes on the photo to the far right, then I twisted them together.

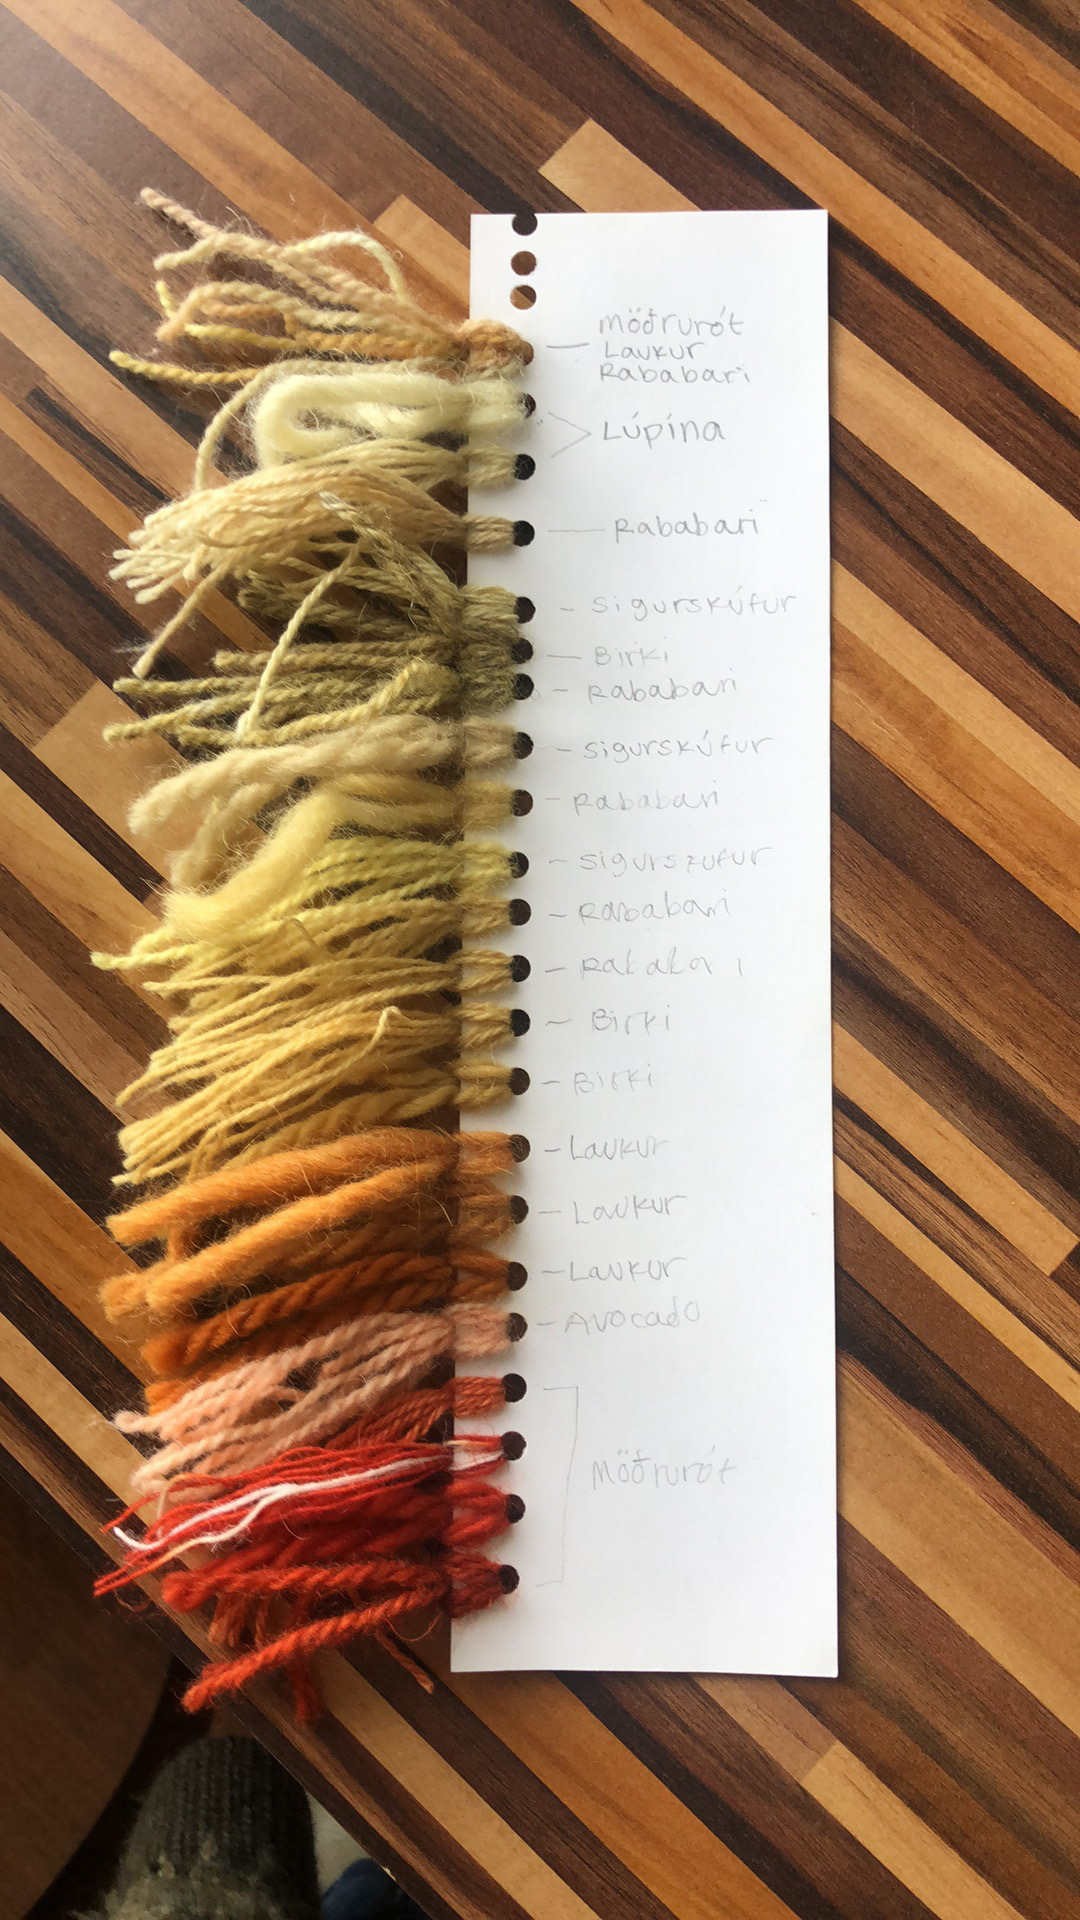
These photos and videos show naturally dyed yarns. The pigments came from a combination of foraged plants and food byproducts. On the bottom left are the colors we created, with the following Icelandic labels: móðurrót =mother root, laukur=onion, and rabarari=rubarb, lupina=lupine, sigurskúfur=fireweed, birki=birch, avocado= avocado.
In addition to the naturally dyed wool in the video below, there are some eco-printed fabrics. Eco-printing is a process that uses the natural pigments from the plant material and transfers it to textiles or paper. We hammered the plants on top of the fabric, which transferred the pigments from the plants to the fabric.
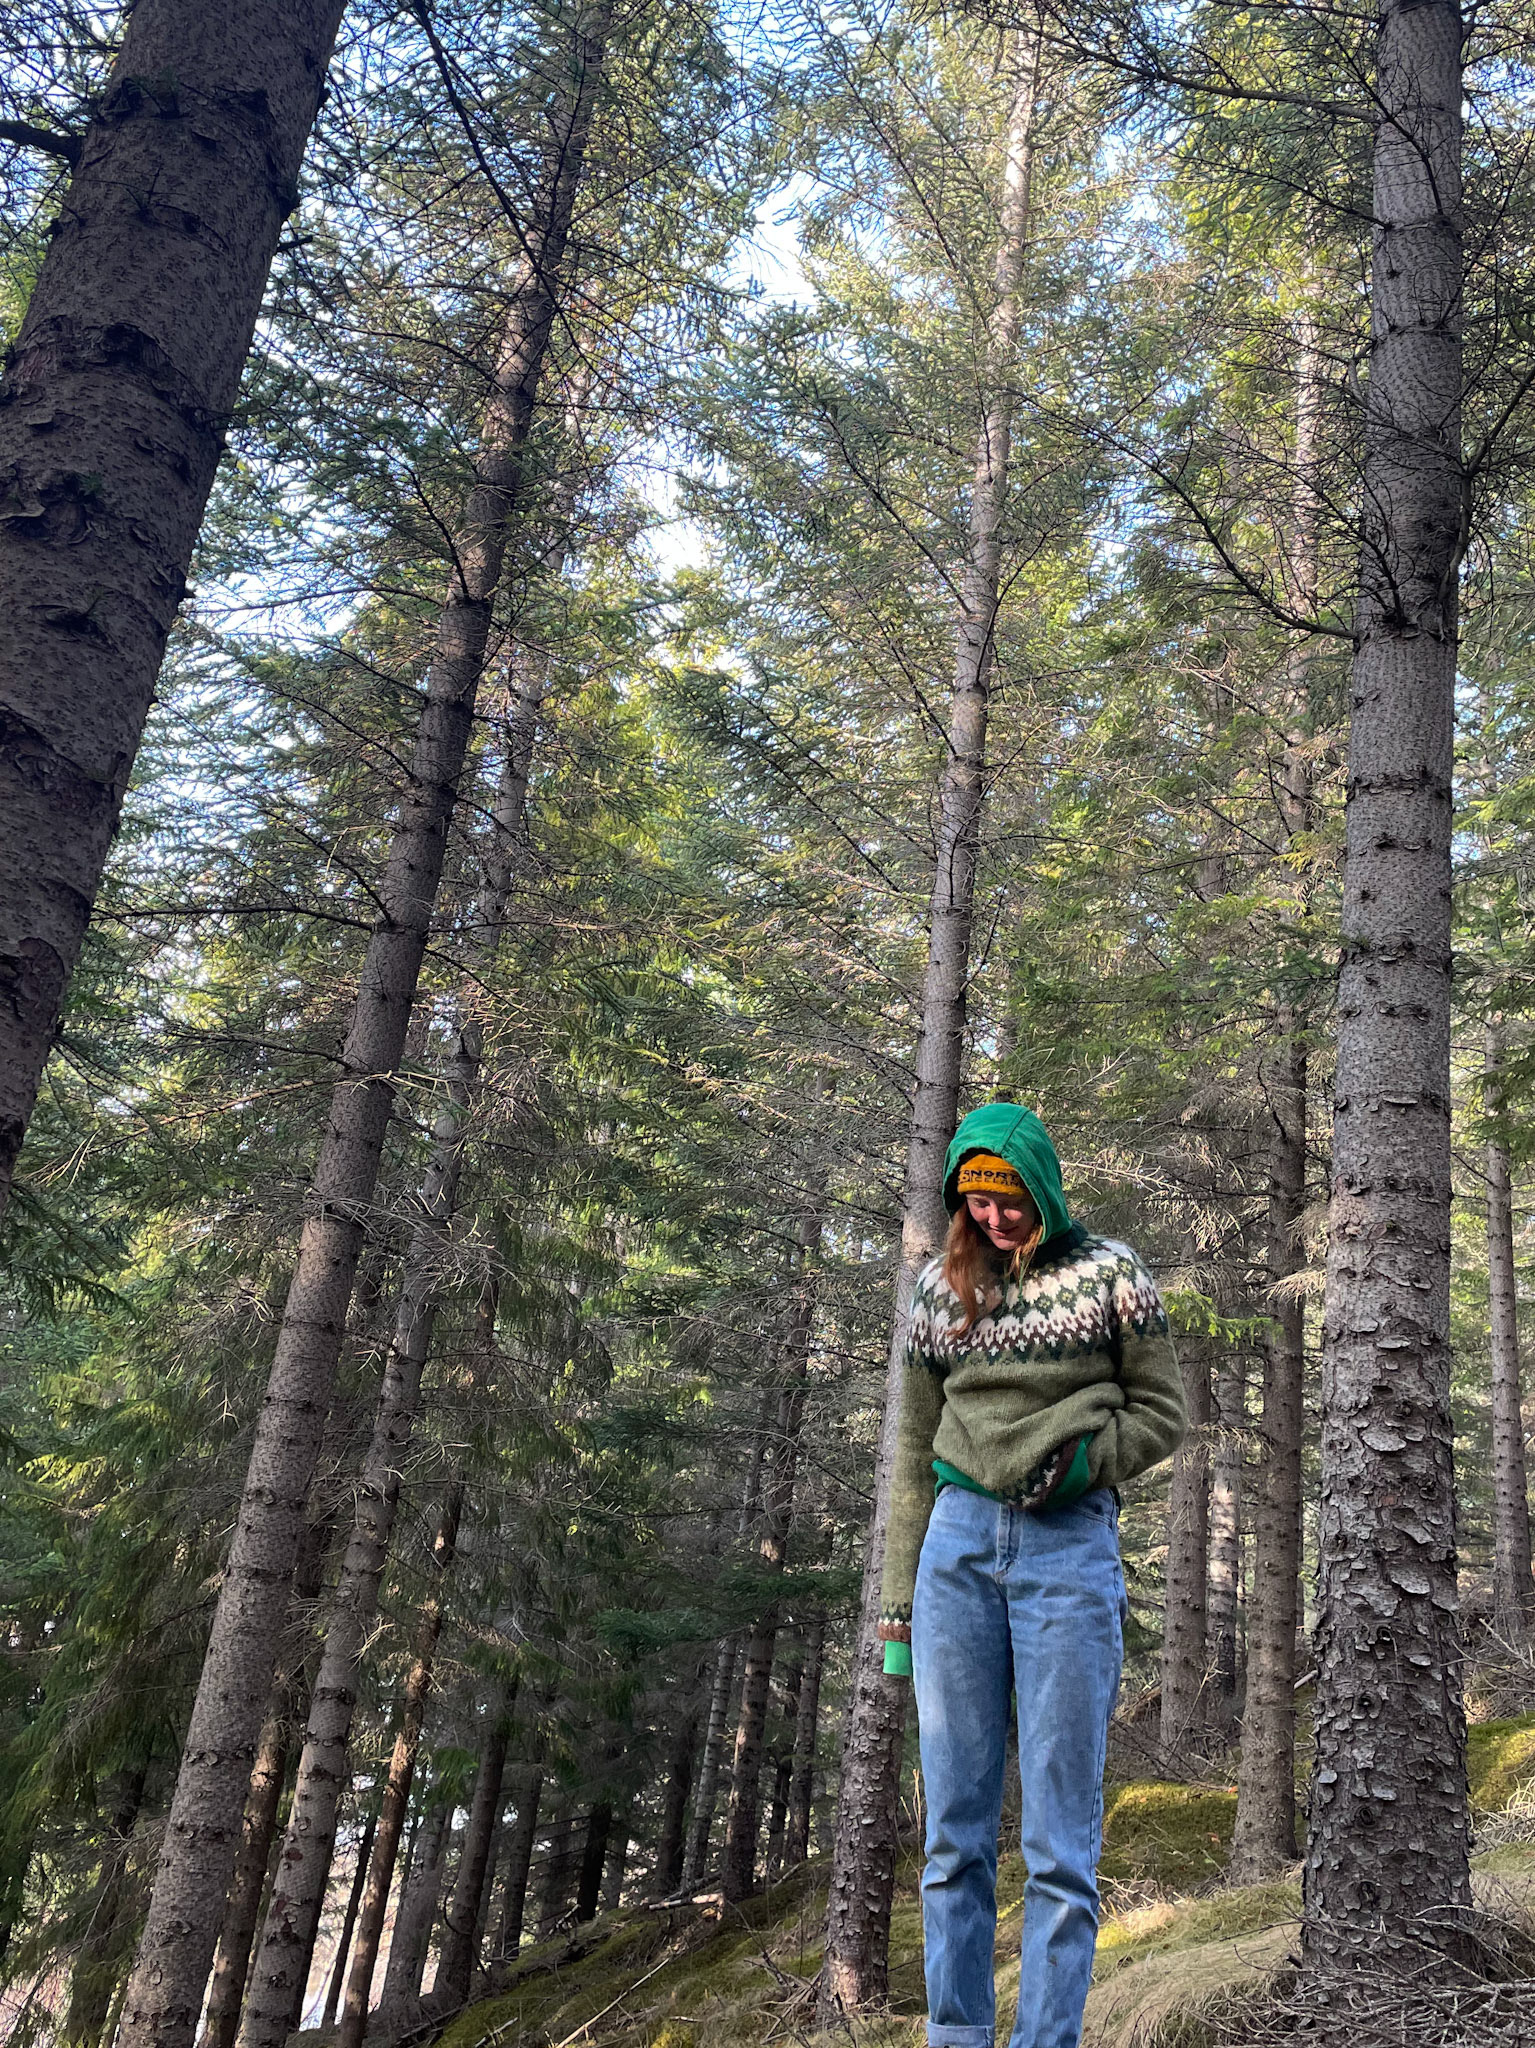
This is the second lopapeysa I knit. For this one, I tried a more complex pattern and added a trim pattern to the arm and bottom hems in addition to the yoke (chest) pattern.
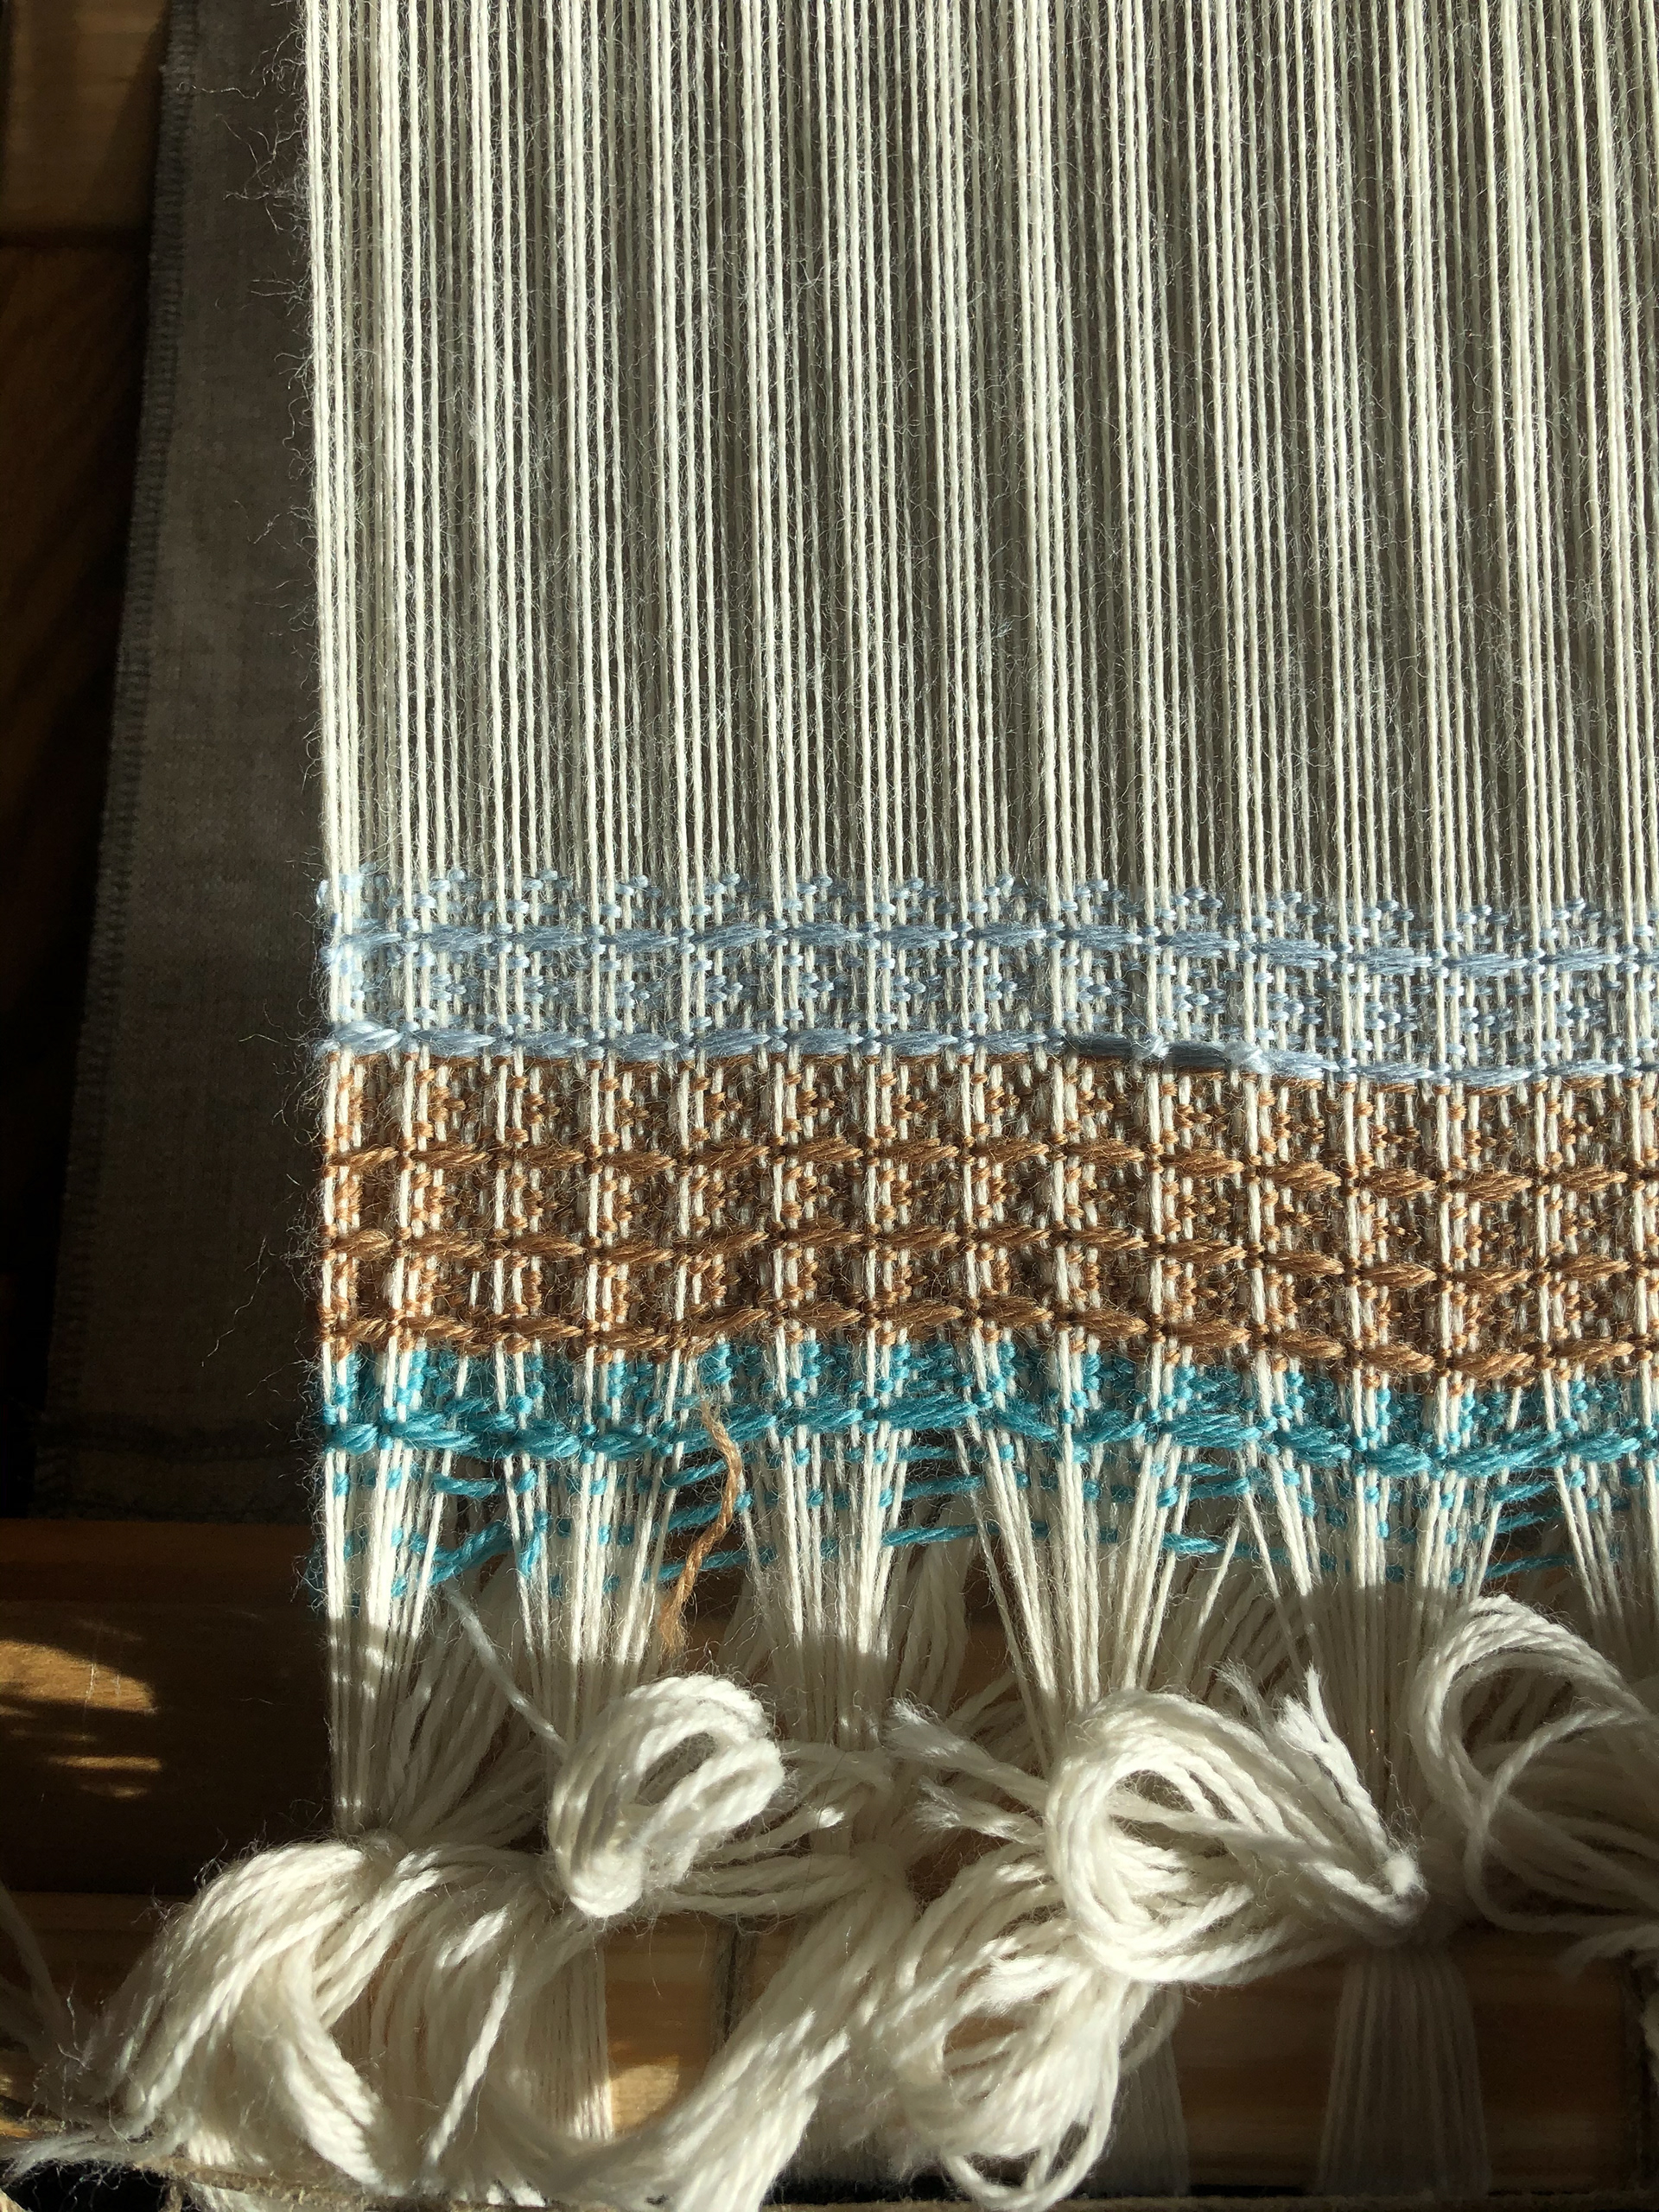
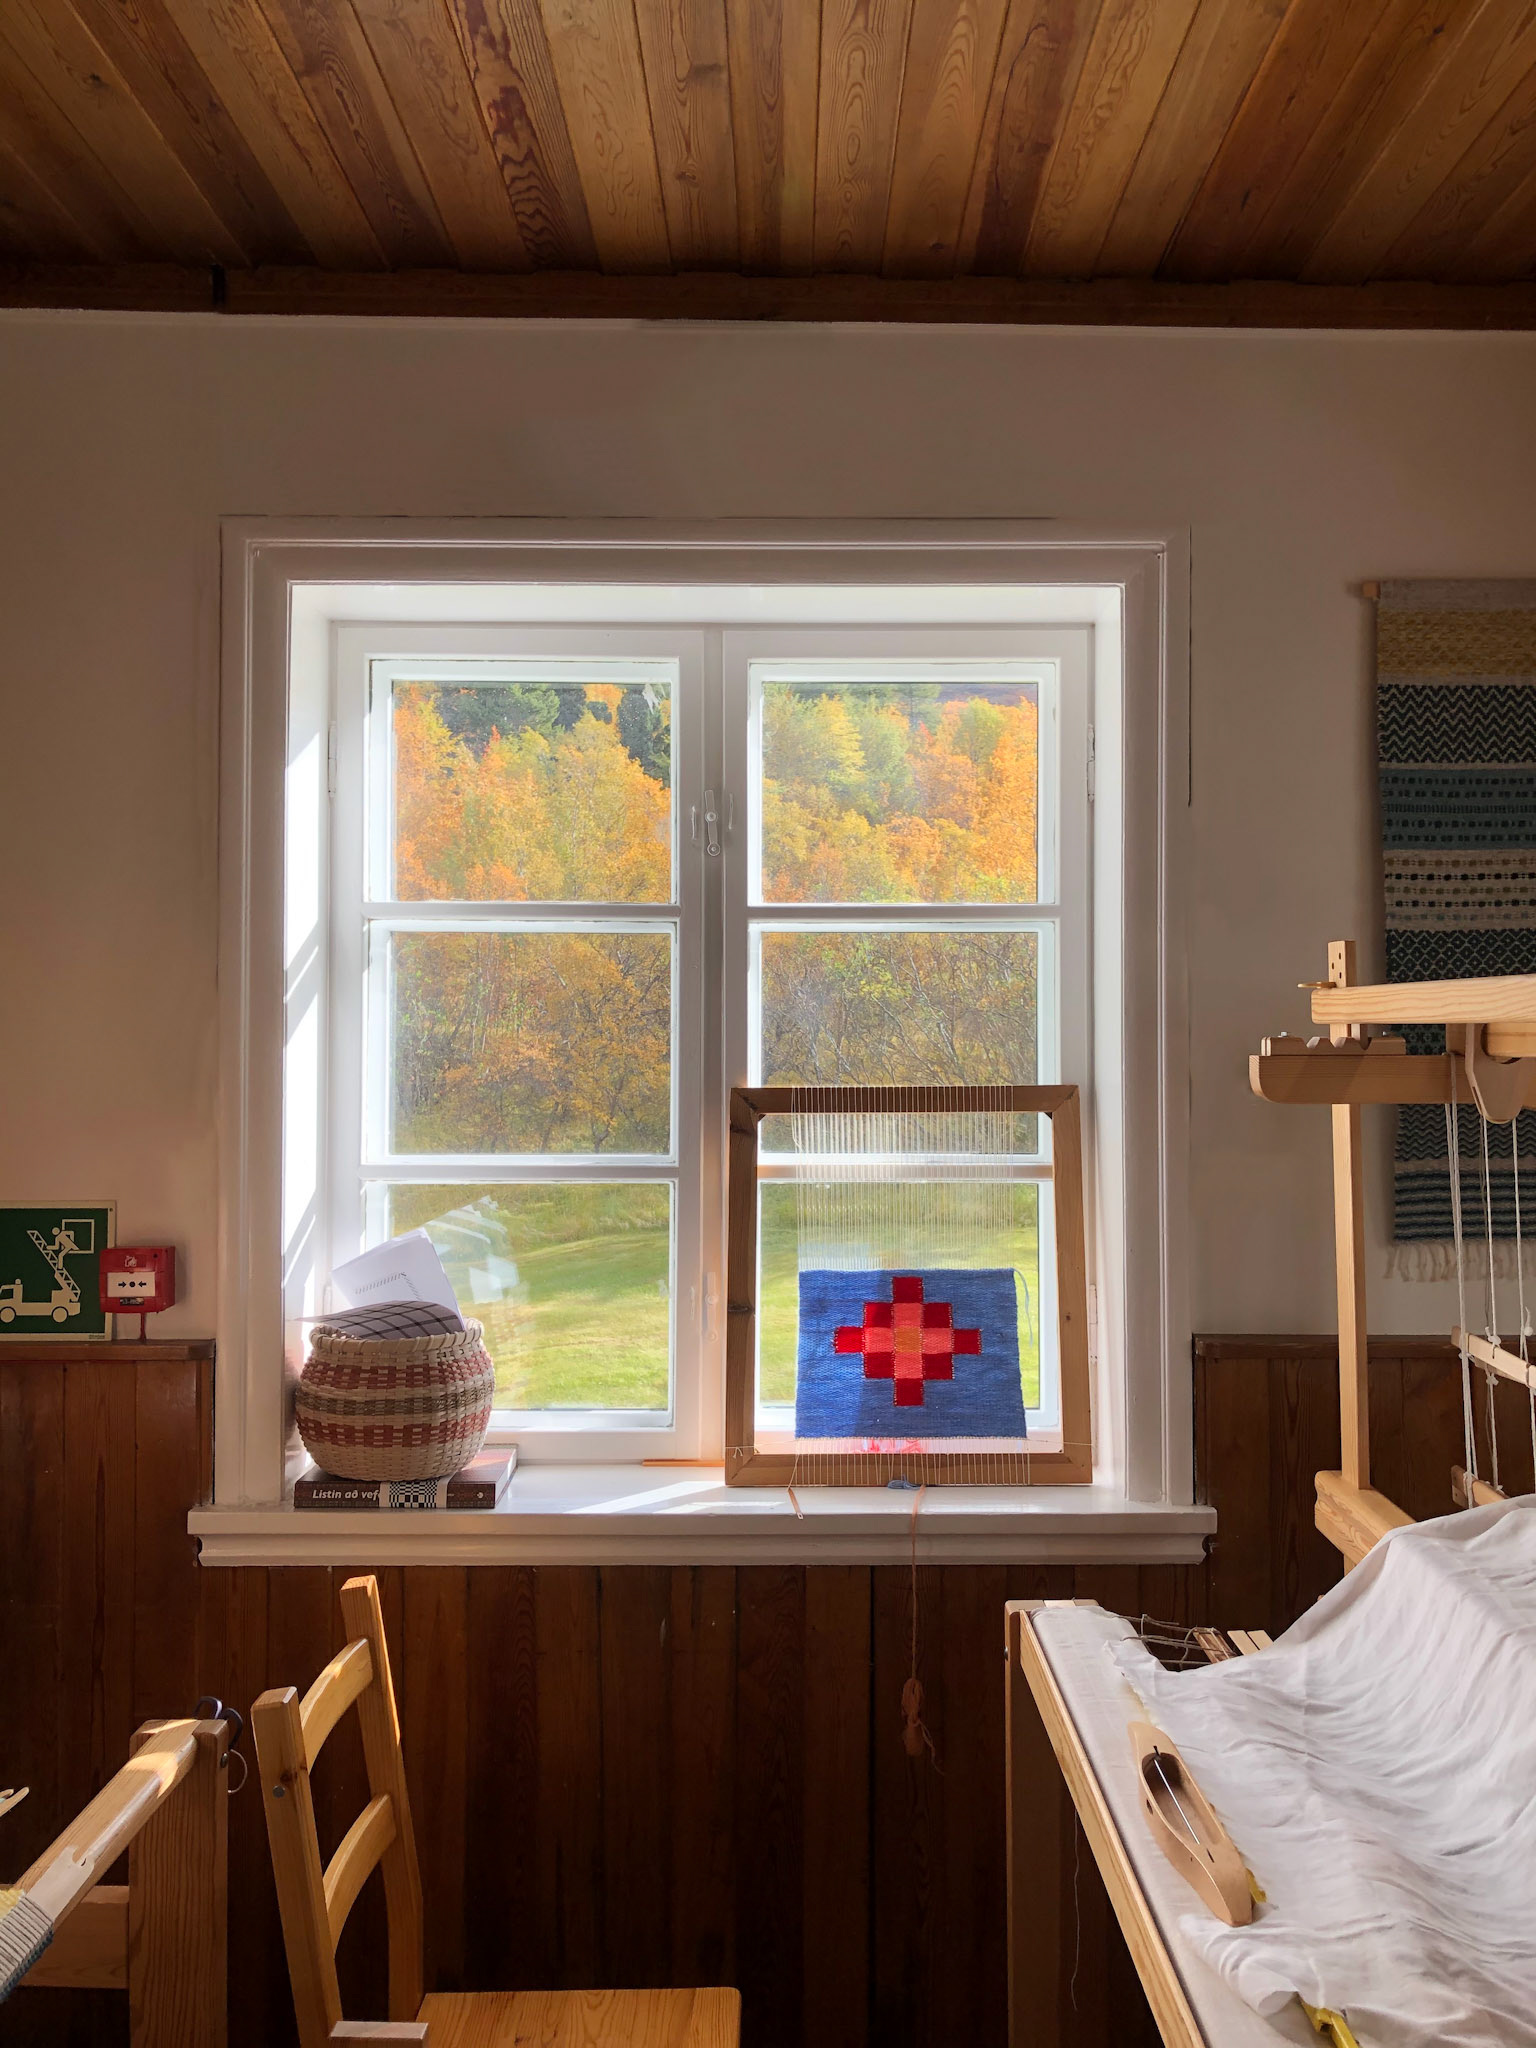
Four practice weaving samples, two waffle pattern on the left, and two with varying patterns on the right.
These were started to practice inital weaving, specifically on keeping it uniform, making sure the edges stayed straight, and not tightening the rows too much.
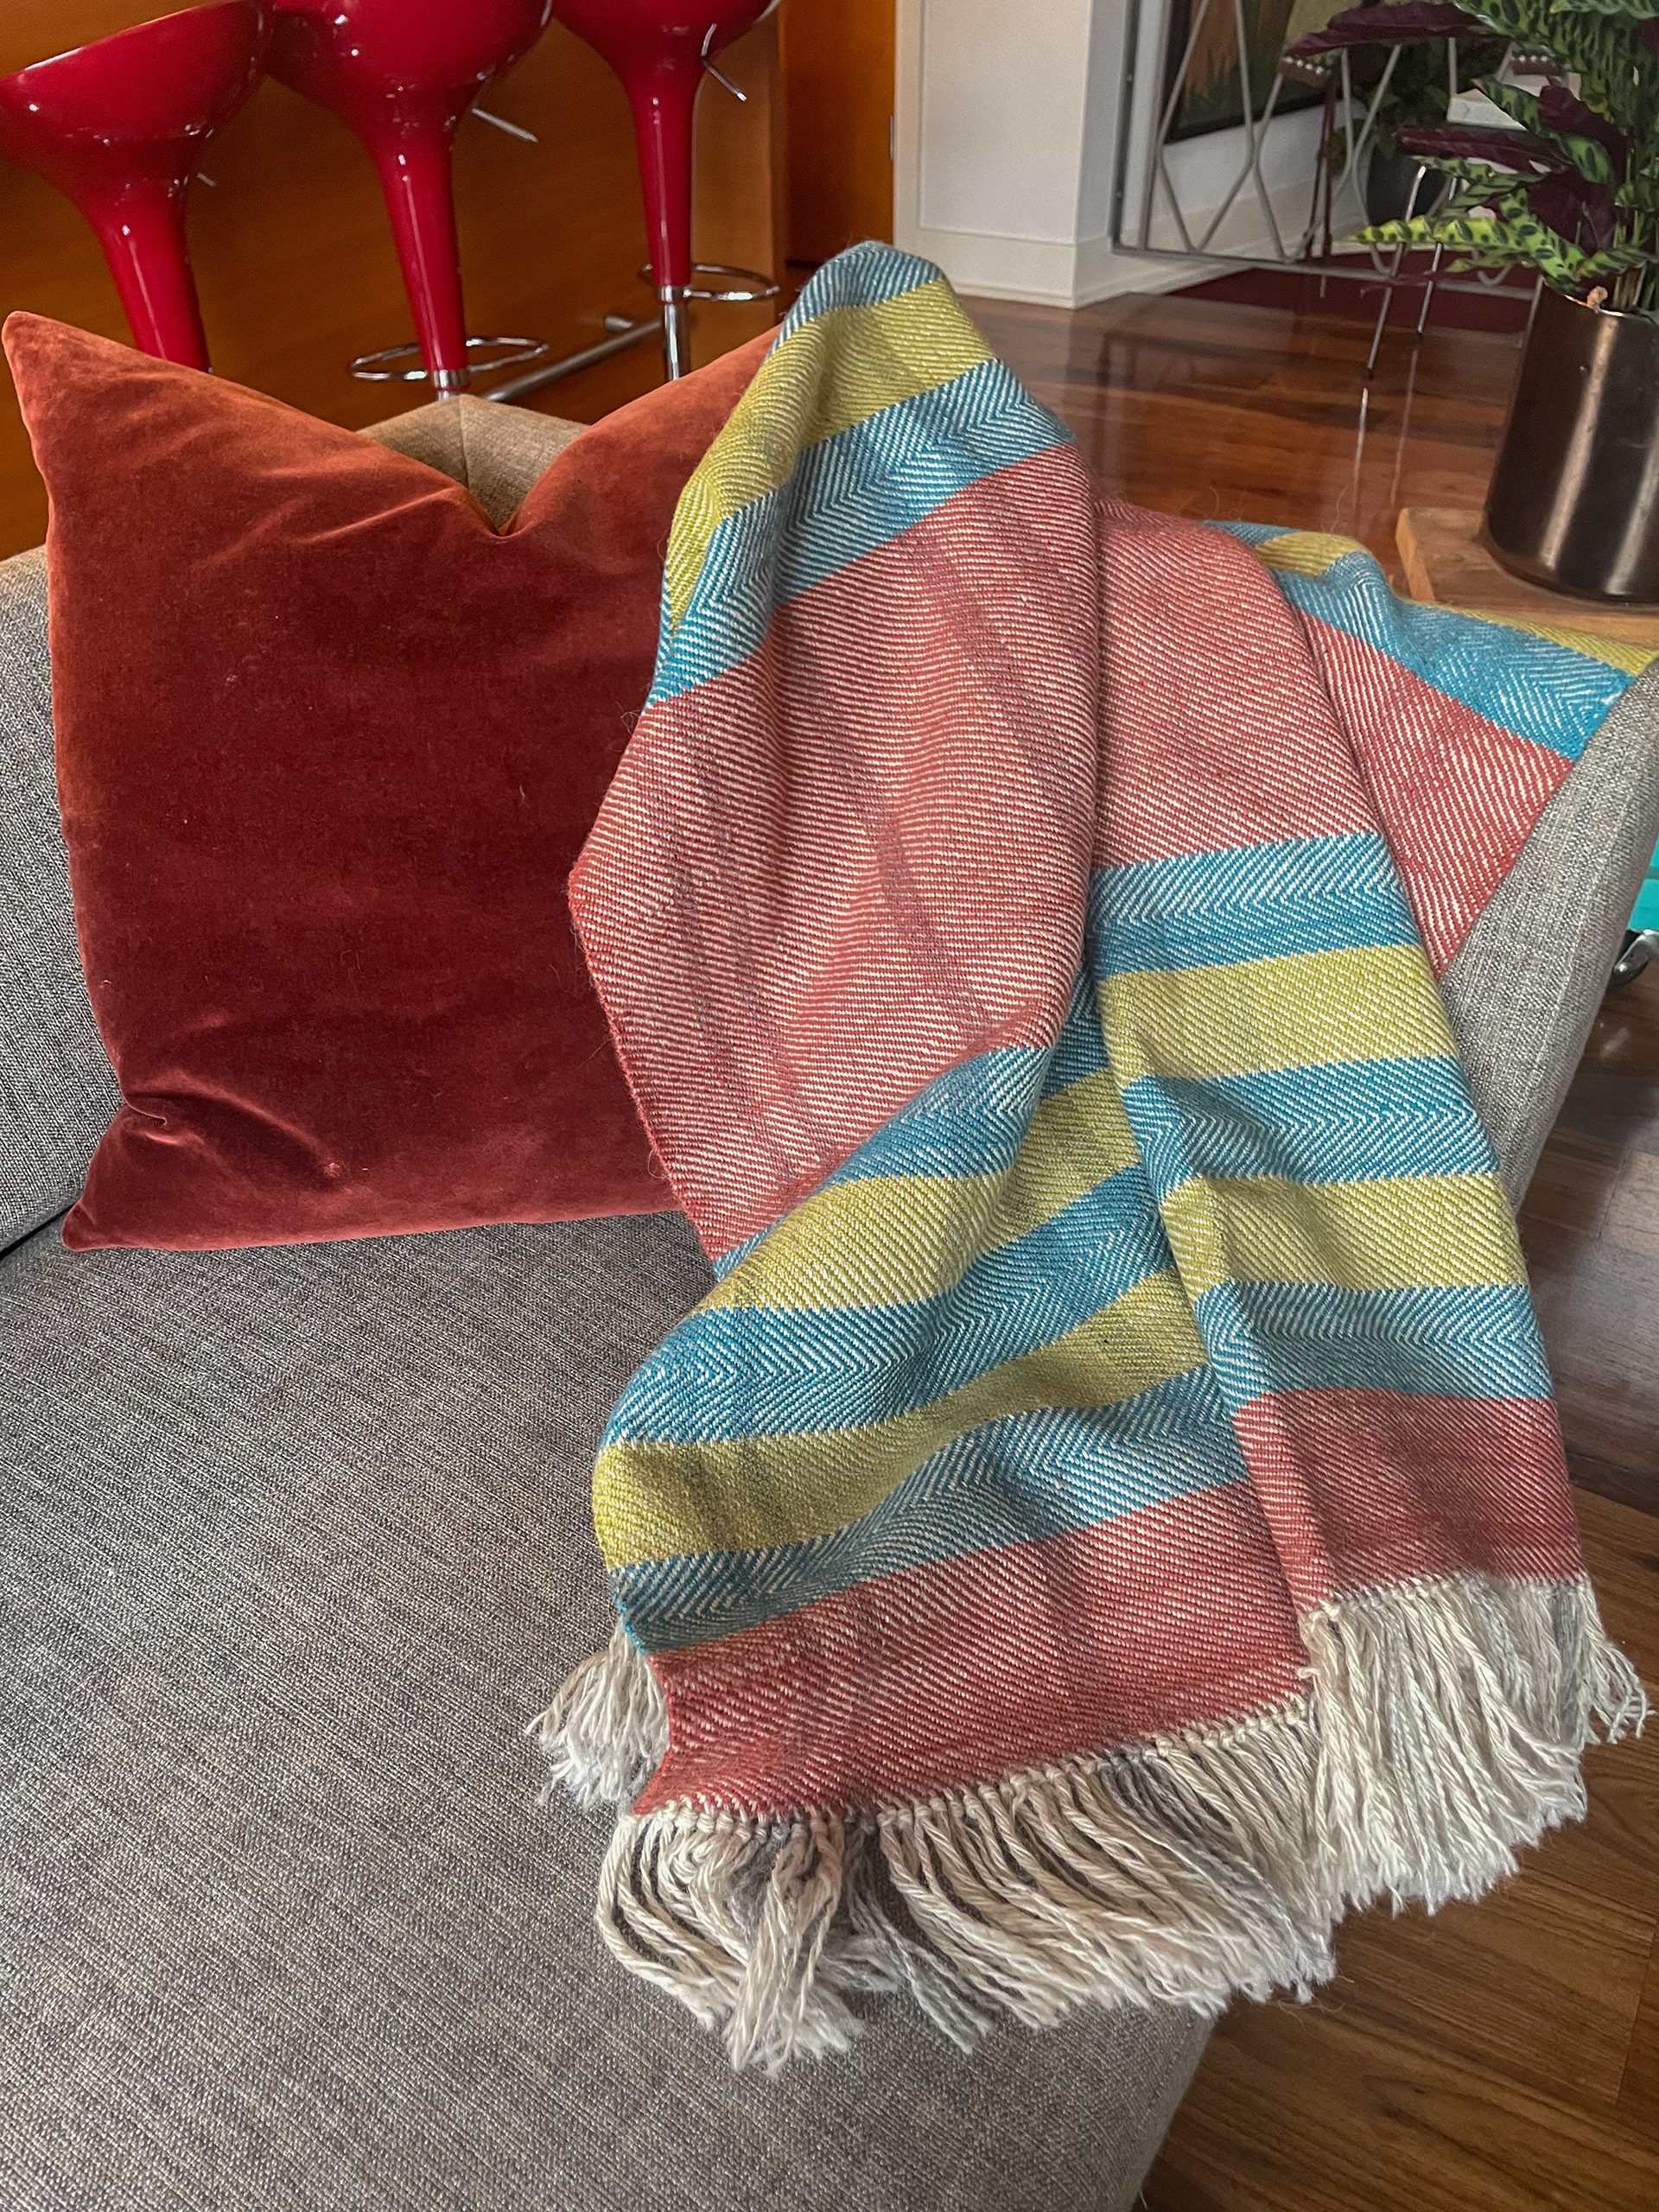
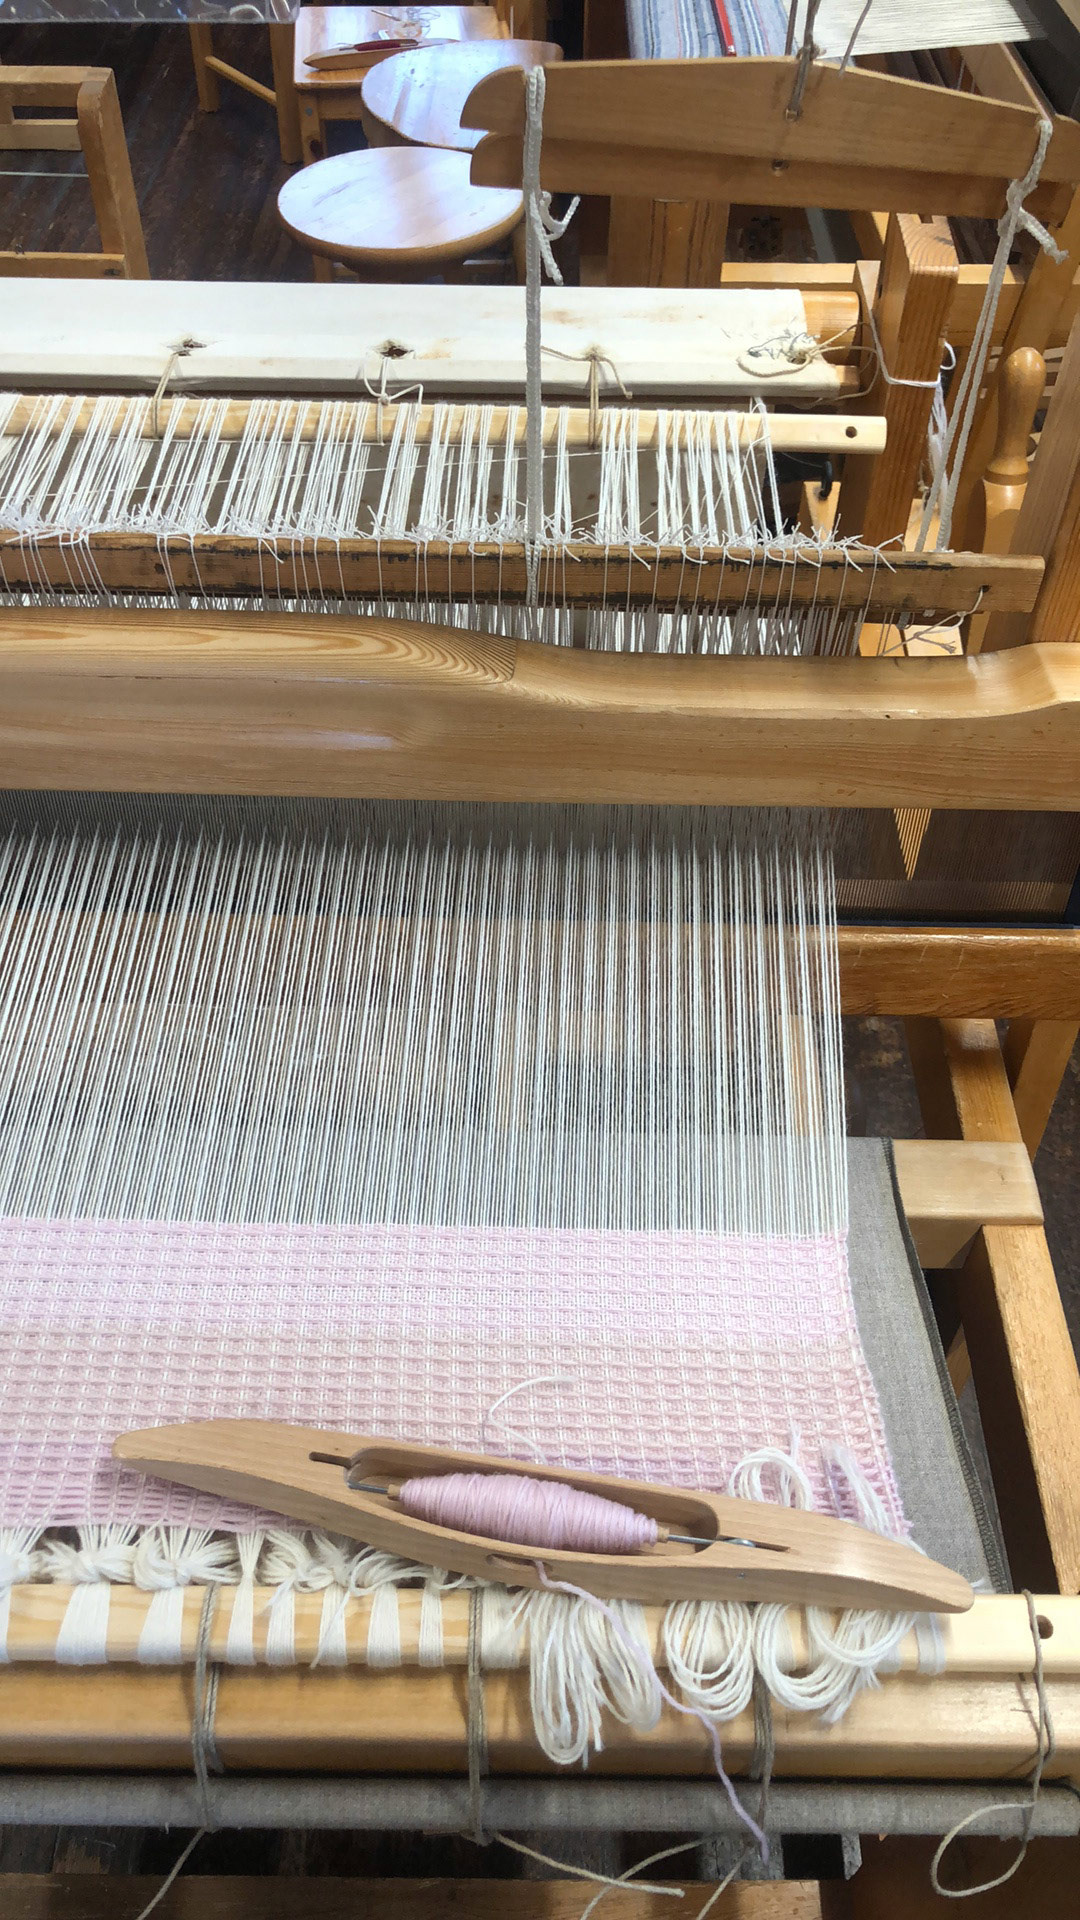
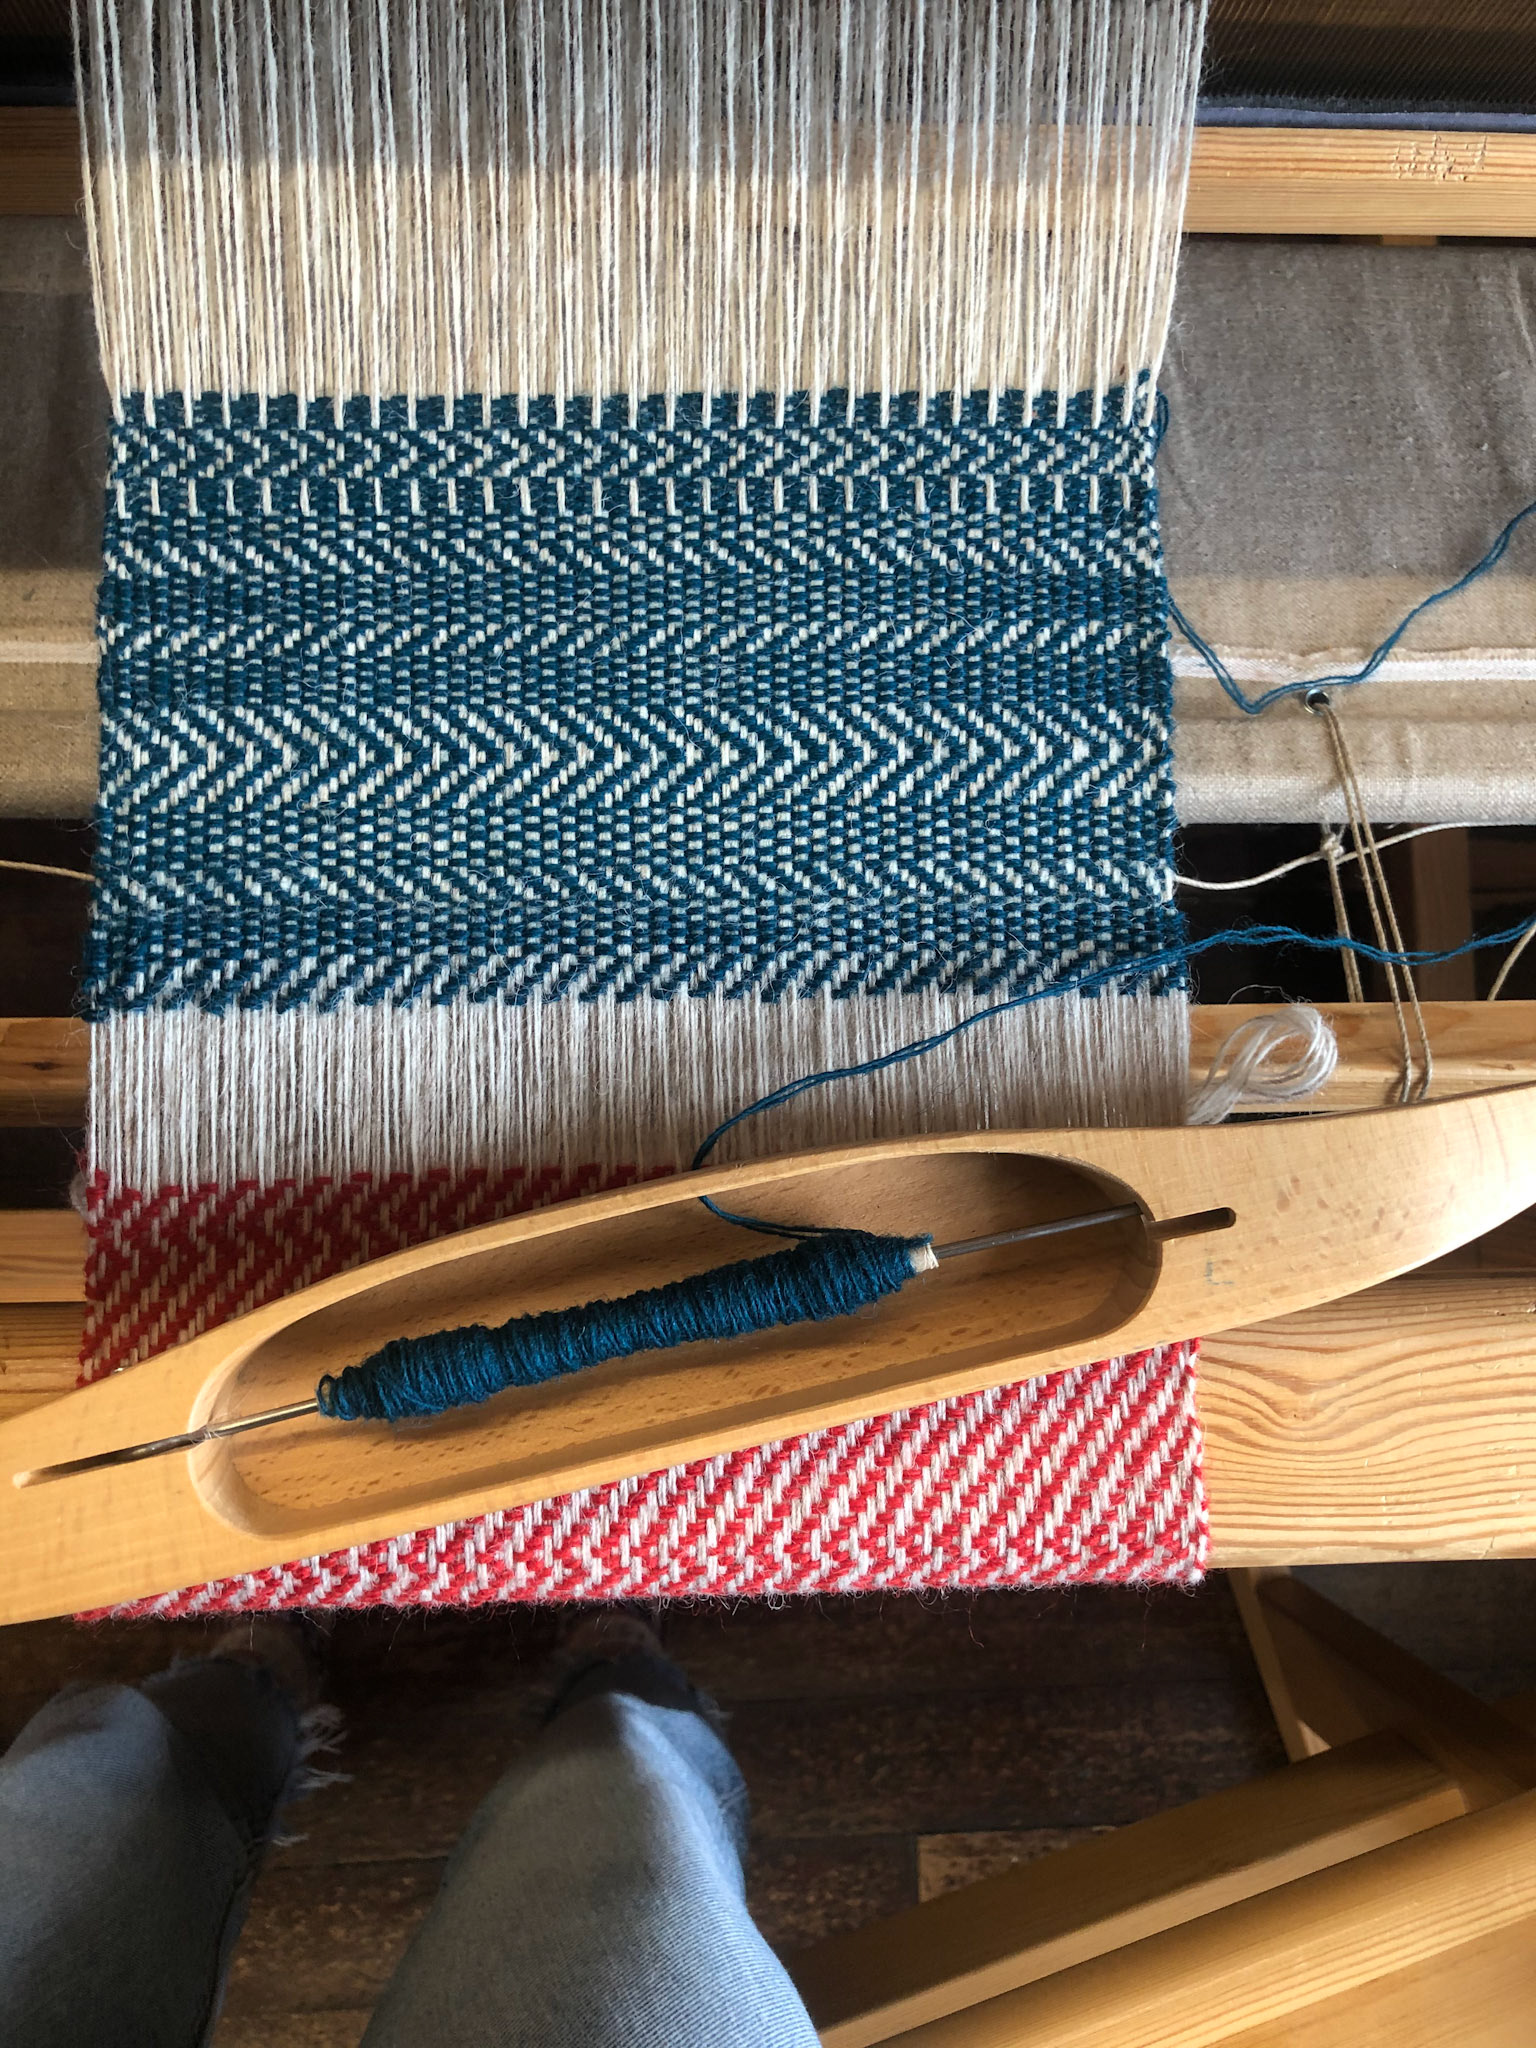
This was my first large scale weaving project on a loom. Above on the left is a time-lapse of part of me weaving this blanket. I set up the loom with five other students with a warp (the wool vertically on the loom) that was long enough for six blankets.
We had to work together to choose warp colors and a common pattern, then to set up the loom. We then each individually chose colors and wove our own blankets, leaving enough space in between them to have tassels on each, if chosen. The timelapse to the left shows the cutting down and tying off of the blankets from the loom.
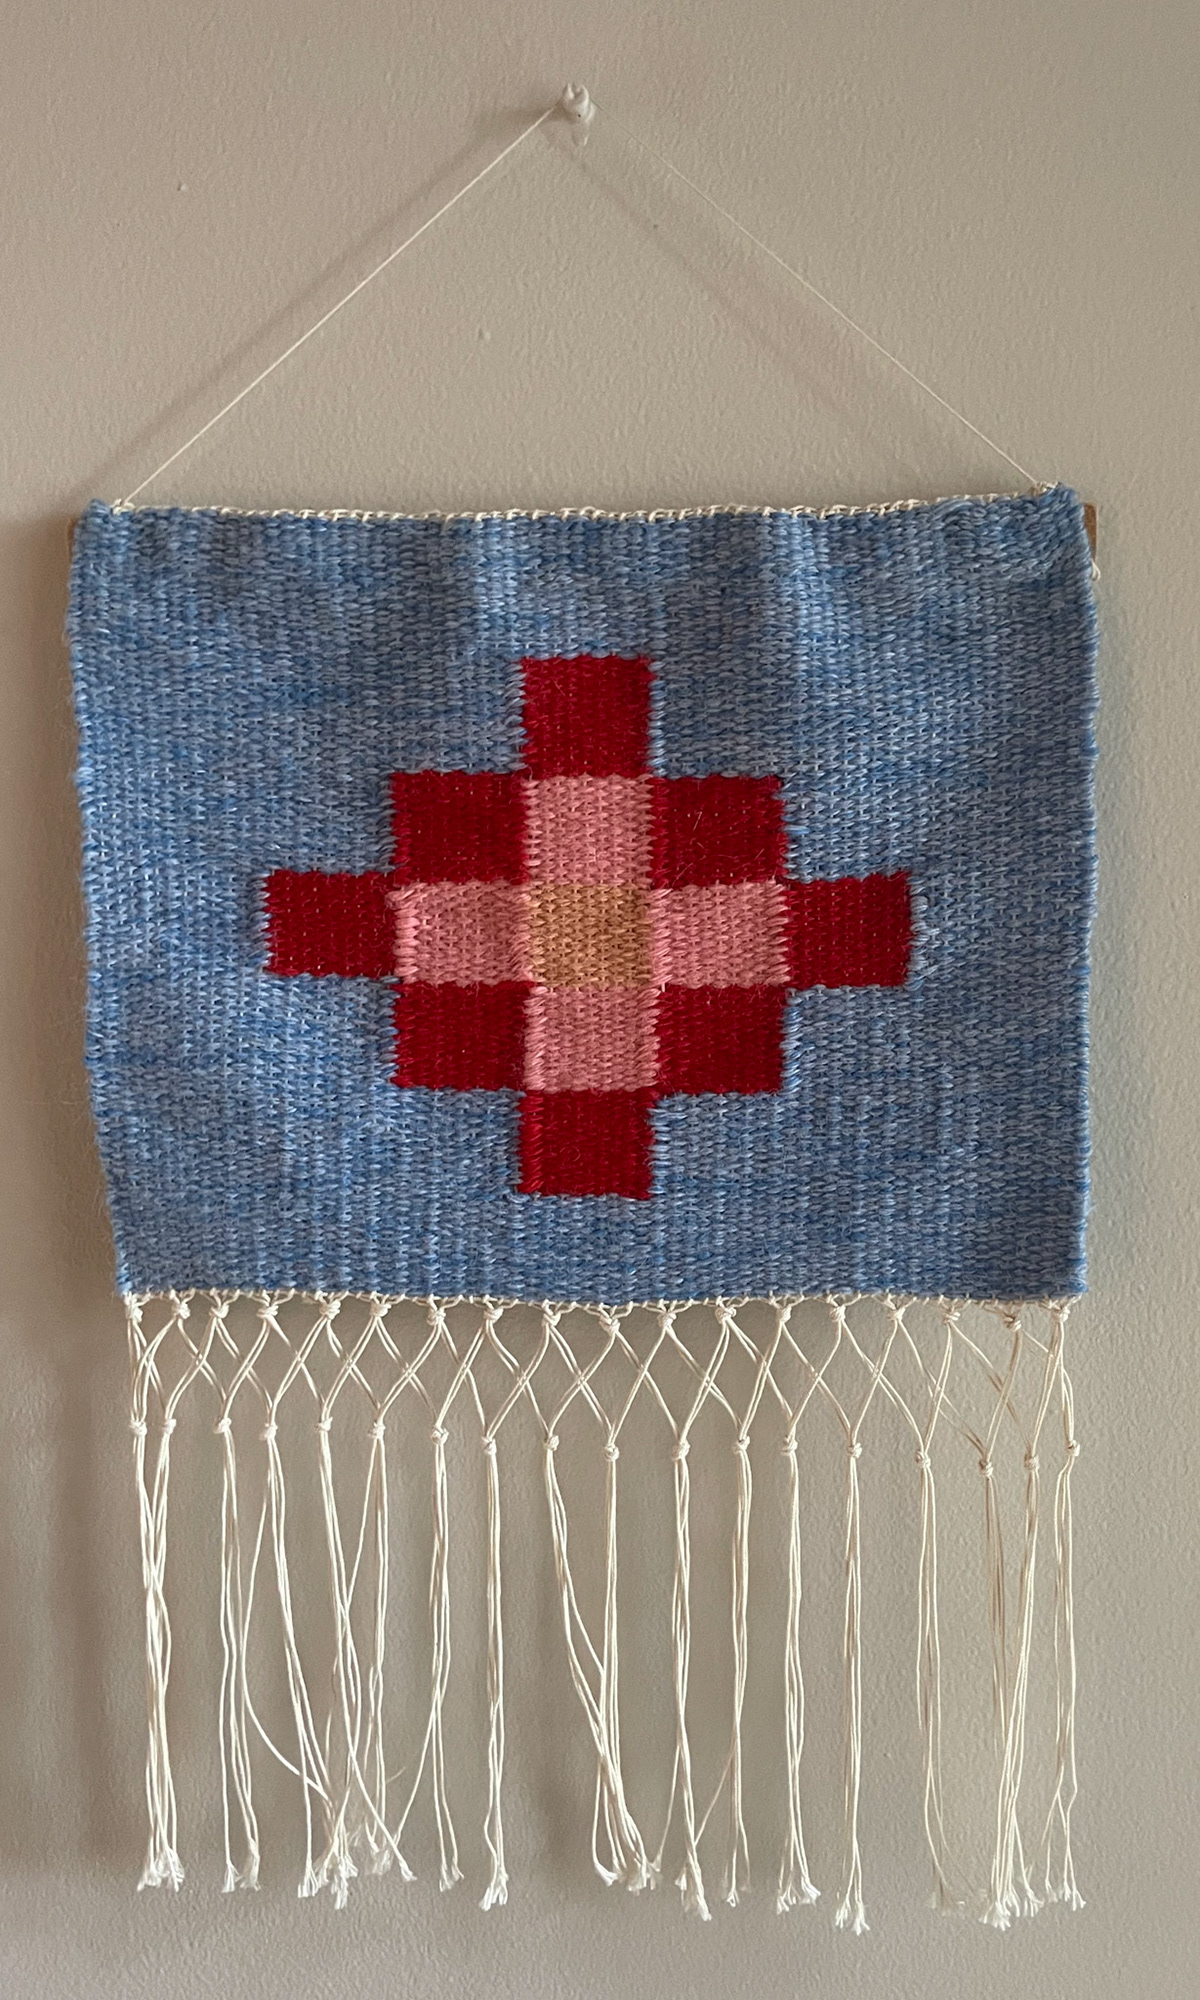
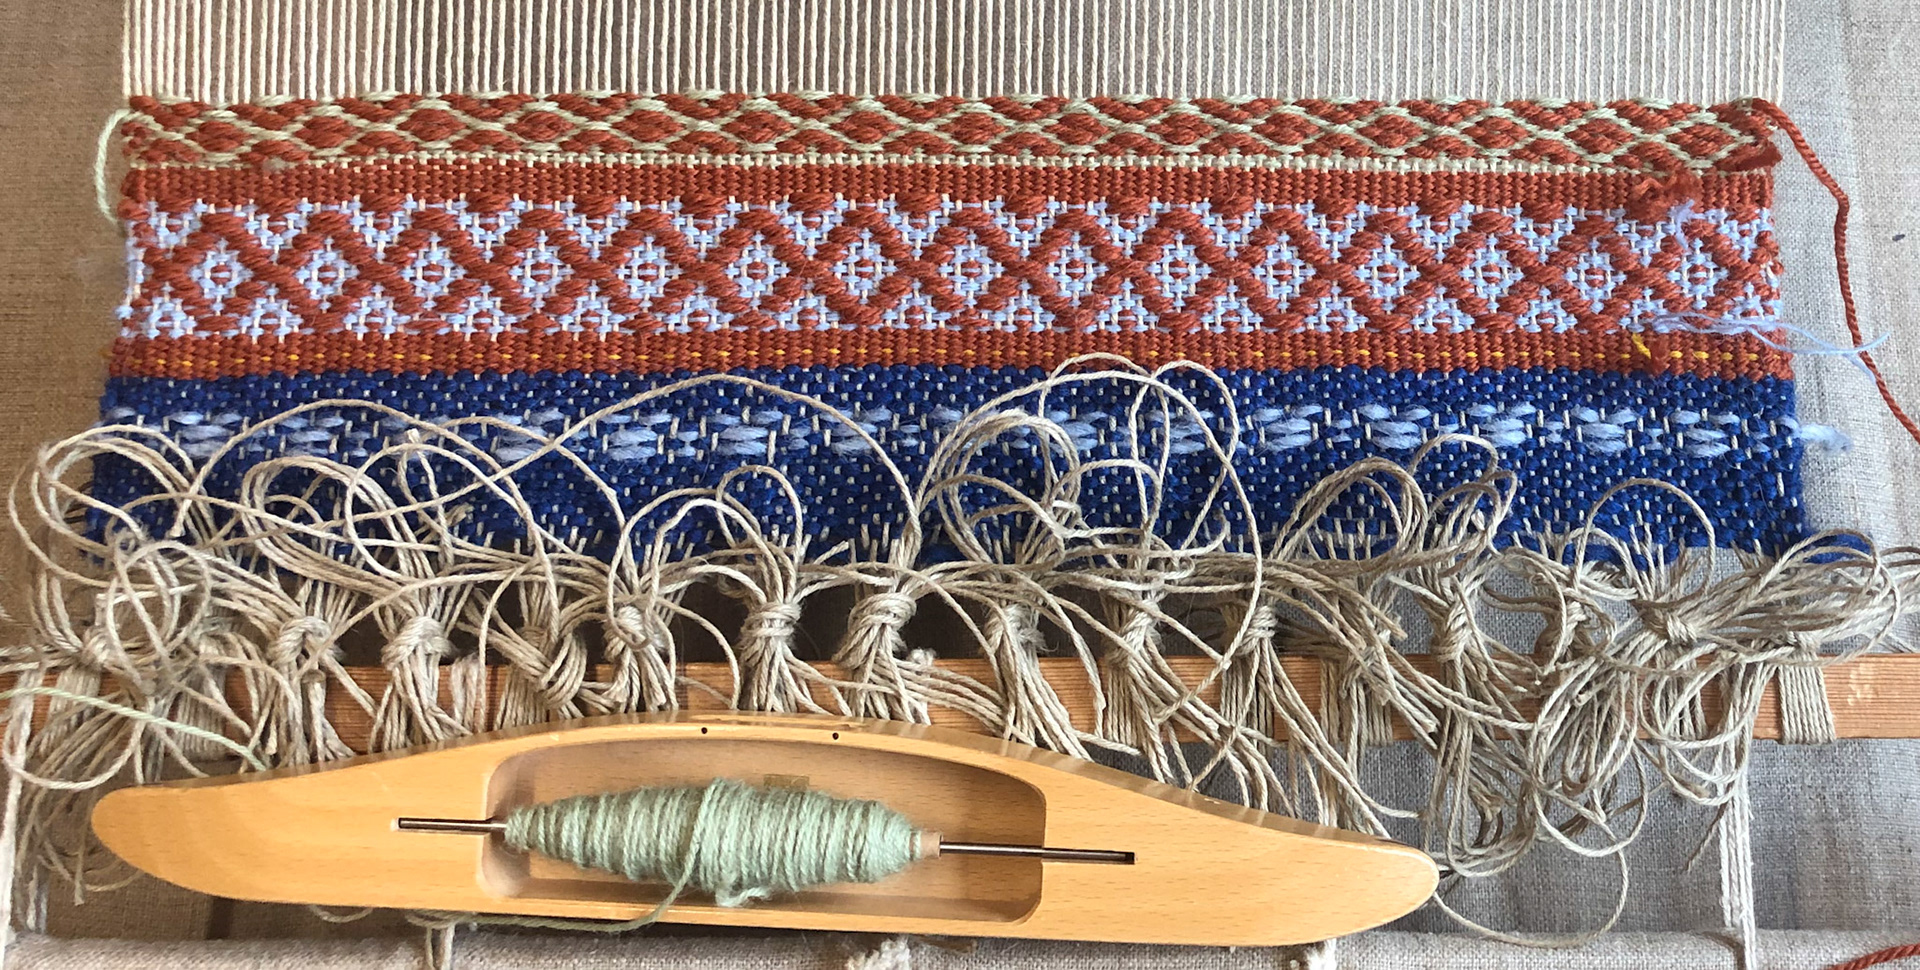
This is the first tapestry that I wove. I created a simple pattern and used I made some simple knots for the tassels and added a piece of wood and string so that it can be hung up.
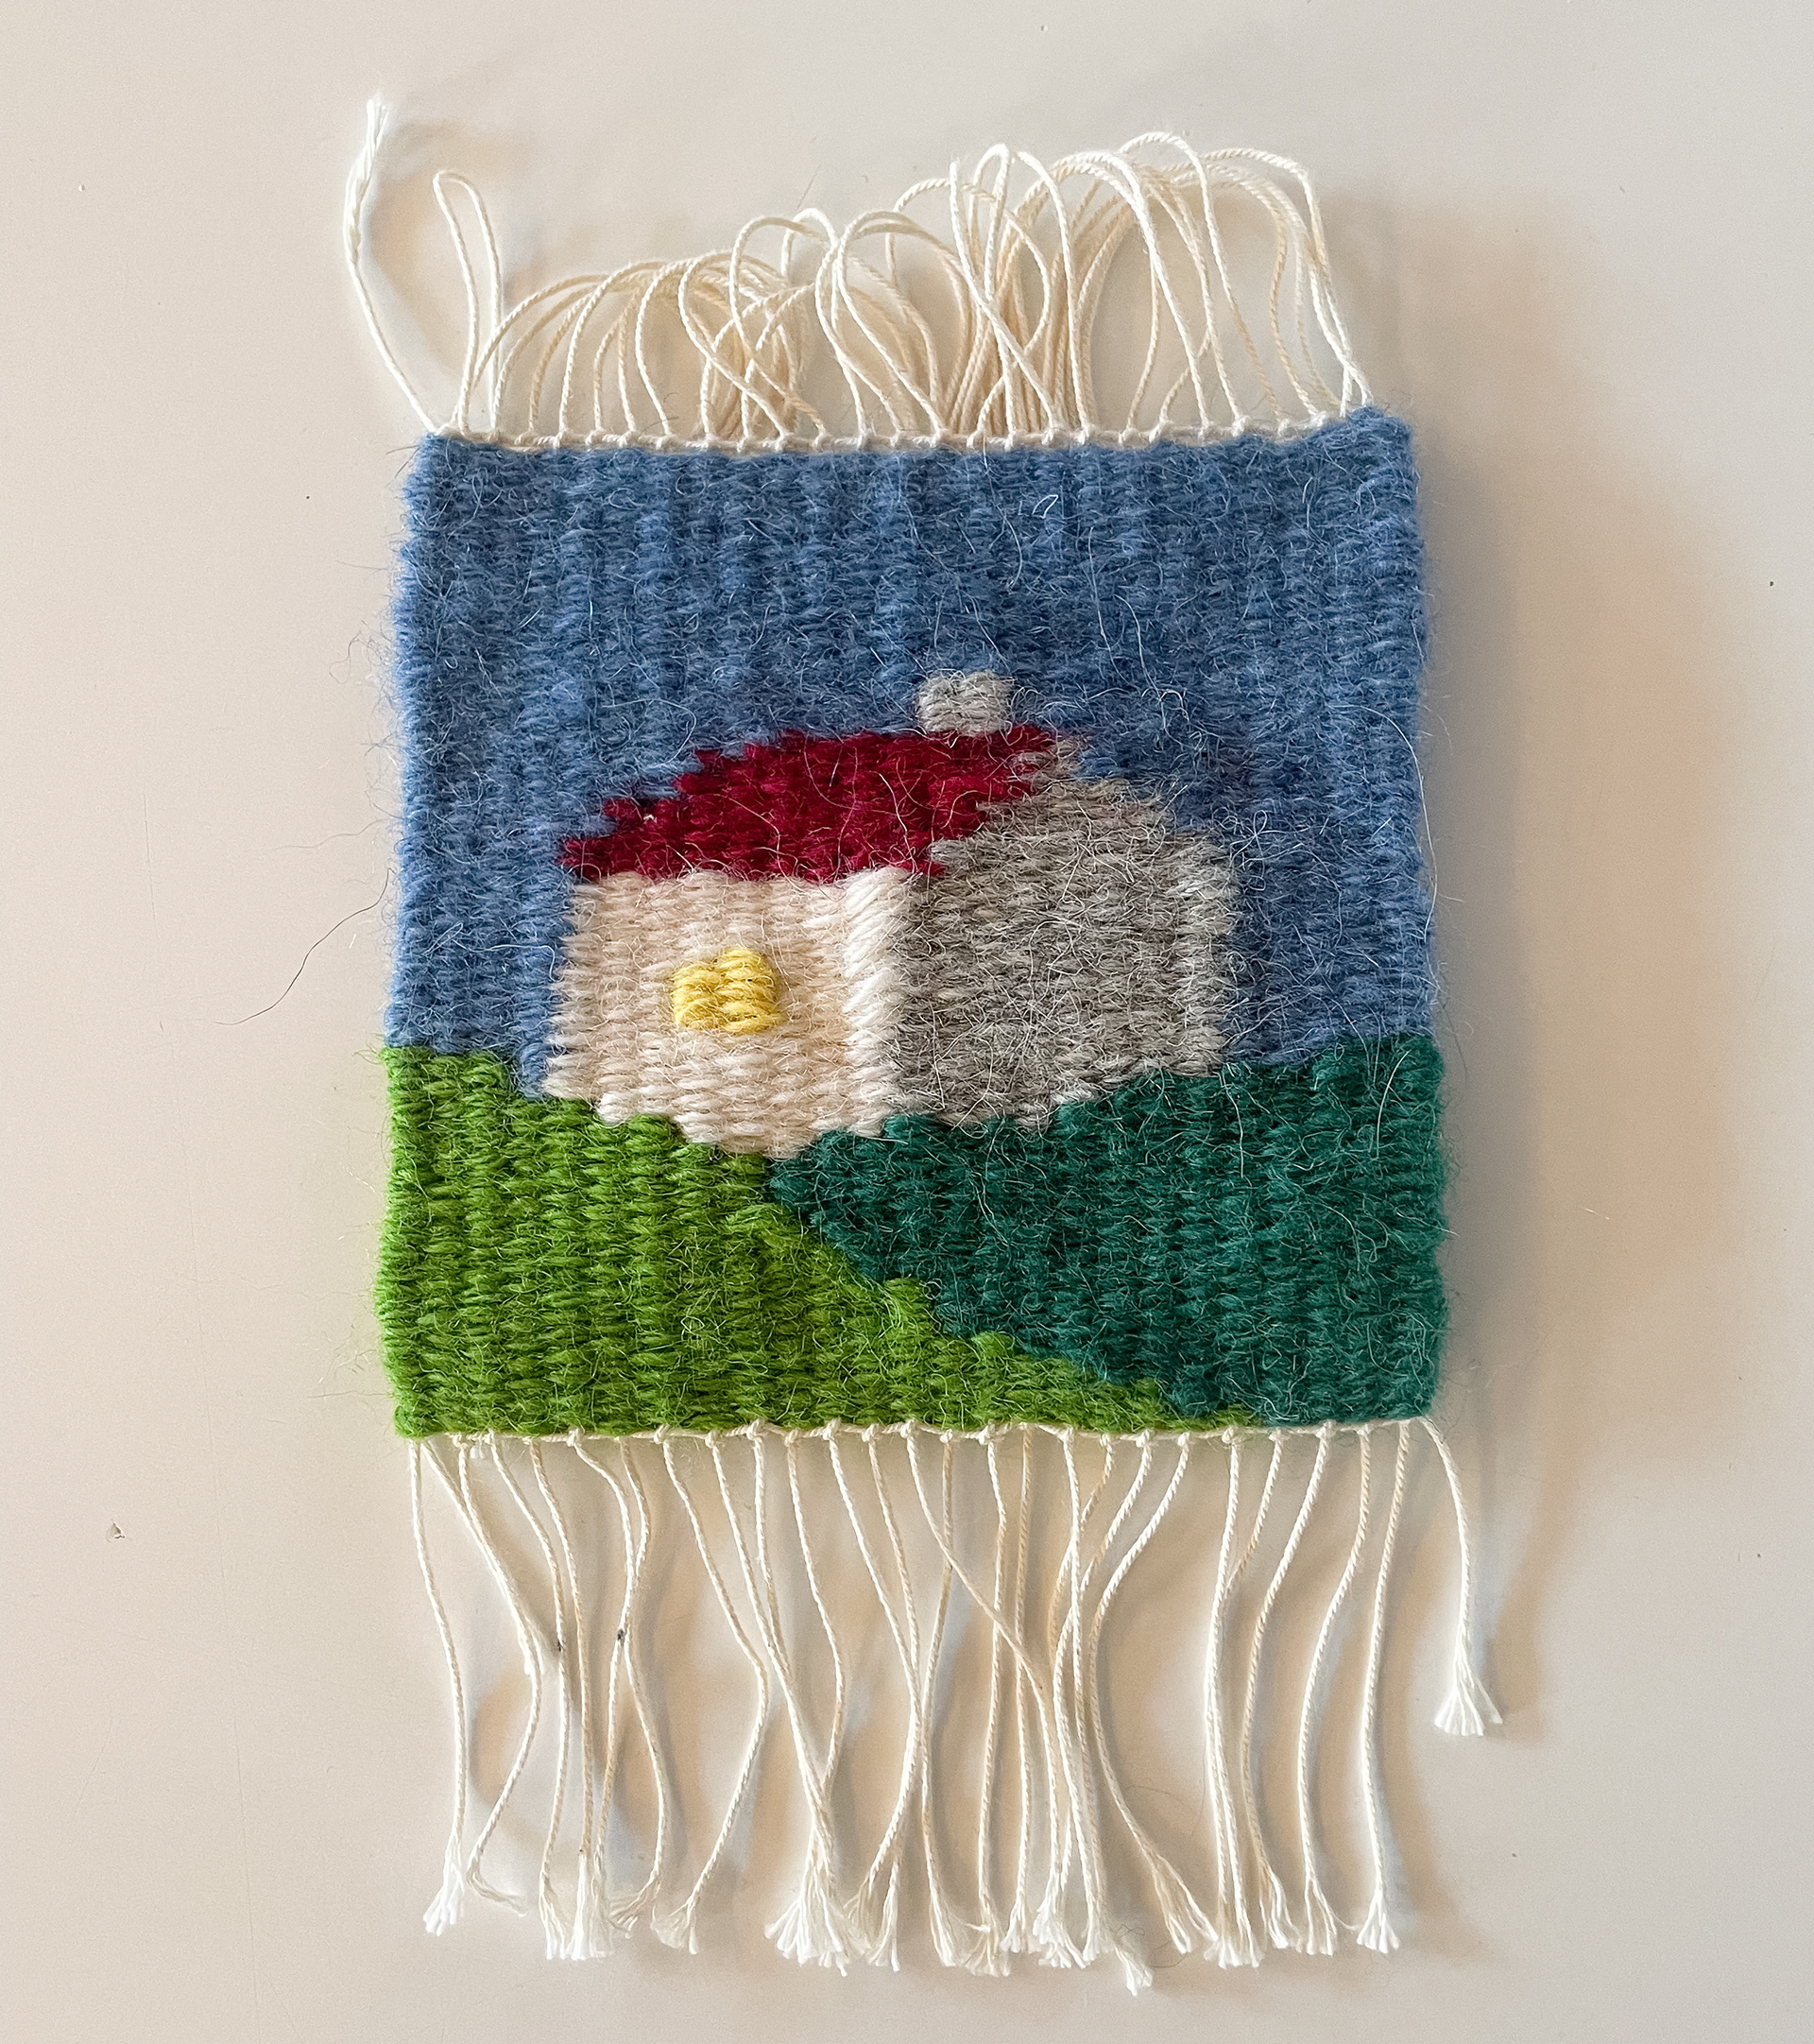
This is the second tapestry I wove. I improvised a pattern as I went and was inspired by traditional icelandic paintings, specifically ones that my mother used to paint when I was younger.
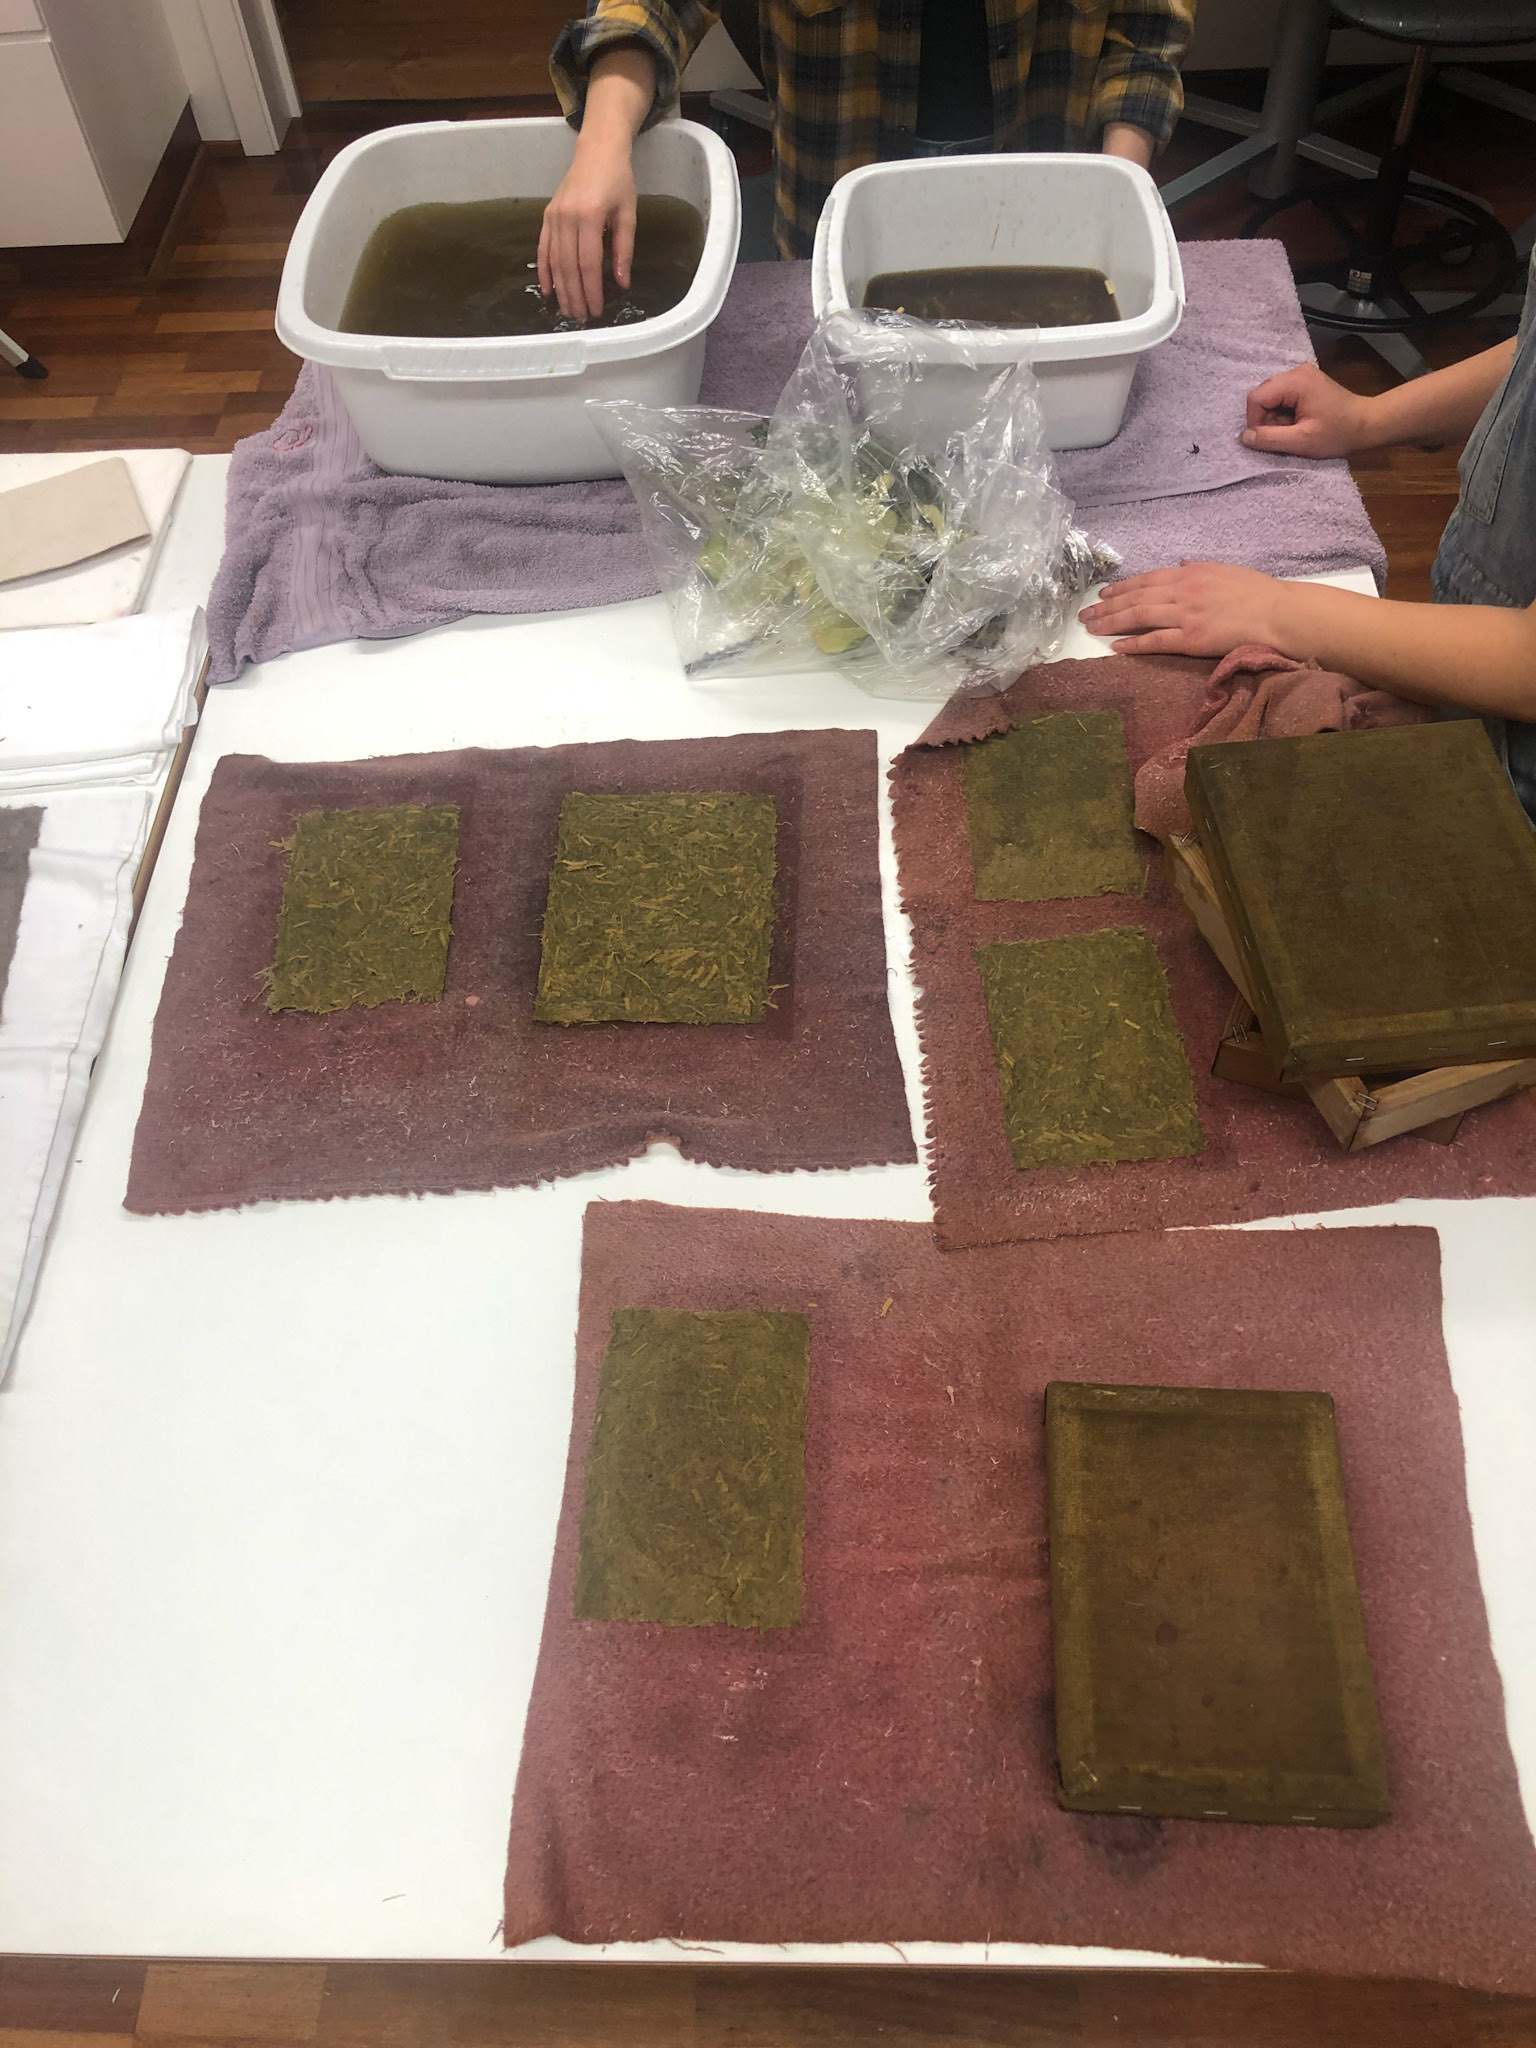
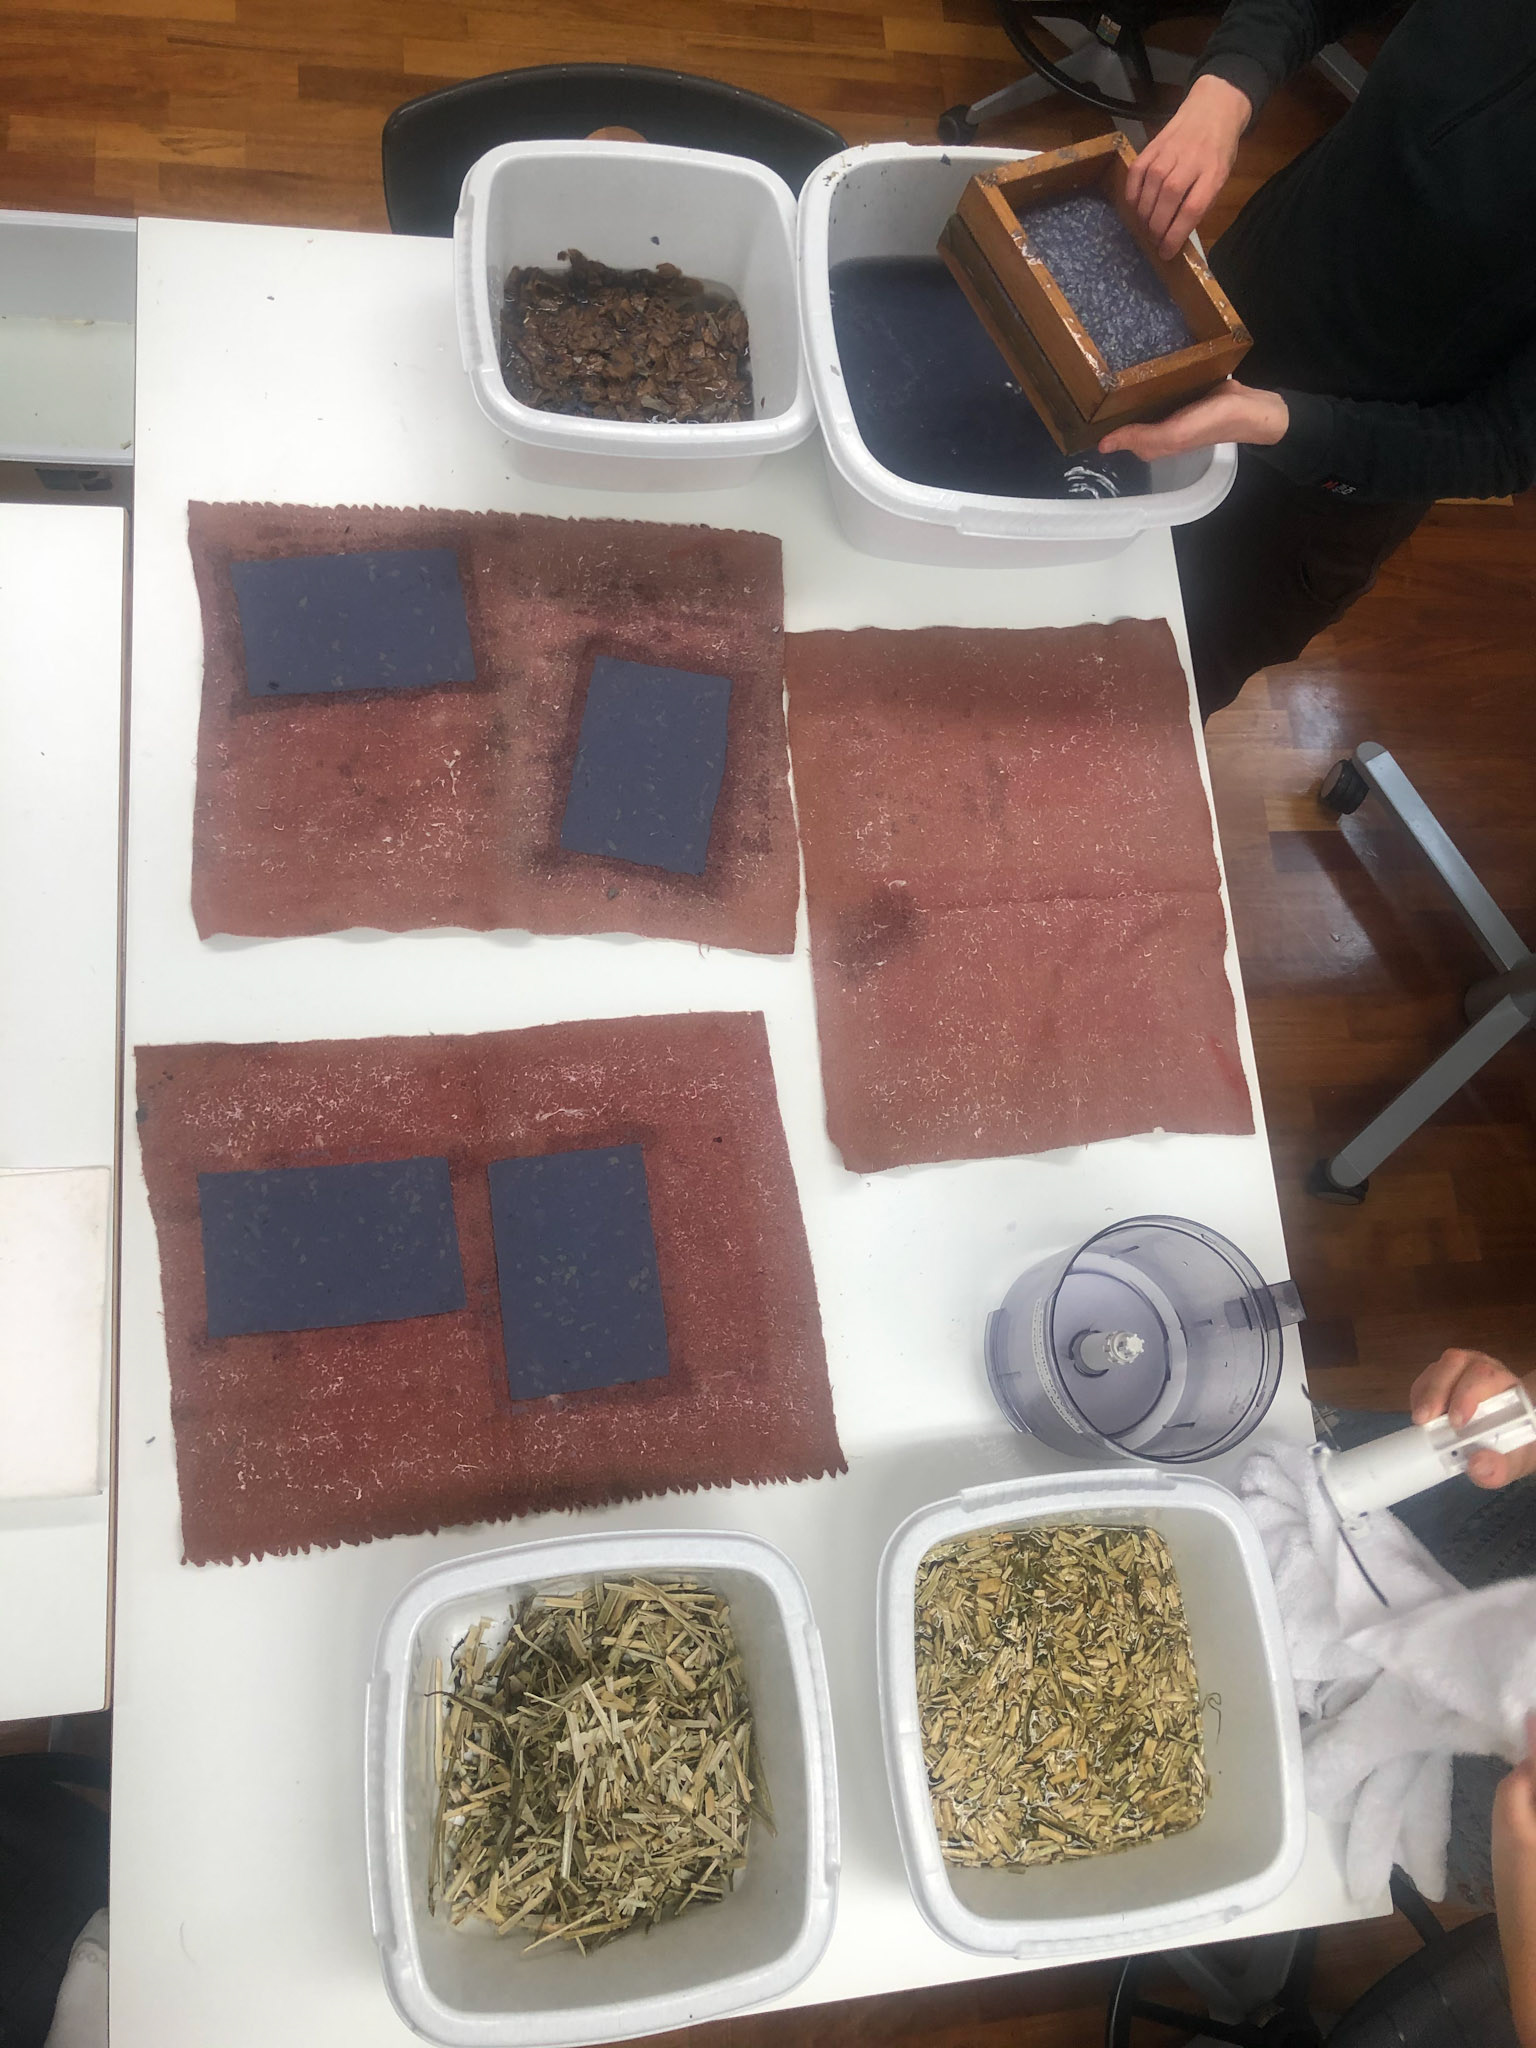
These are the first attempts that I had making paper with a few of my peers. The photo to the left shows the initial attempt at using hemp hurds (the tough inside of the hemp stalk) to make paper. On bottom right, you can see the hurds before wetting. I was very inspired by this paper making with the hemp, and went on to make my final project a book made completely out of hemp, including the paper (fibers), twine to bind it (fibers), and covers (hurds).
The blue pages were made from recycled paper, as well as some flowers and plants that we added to some of them for decoration.
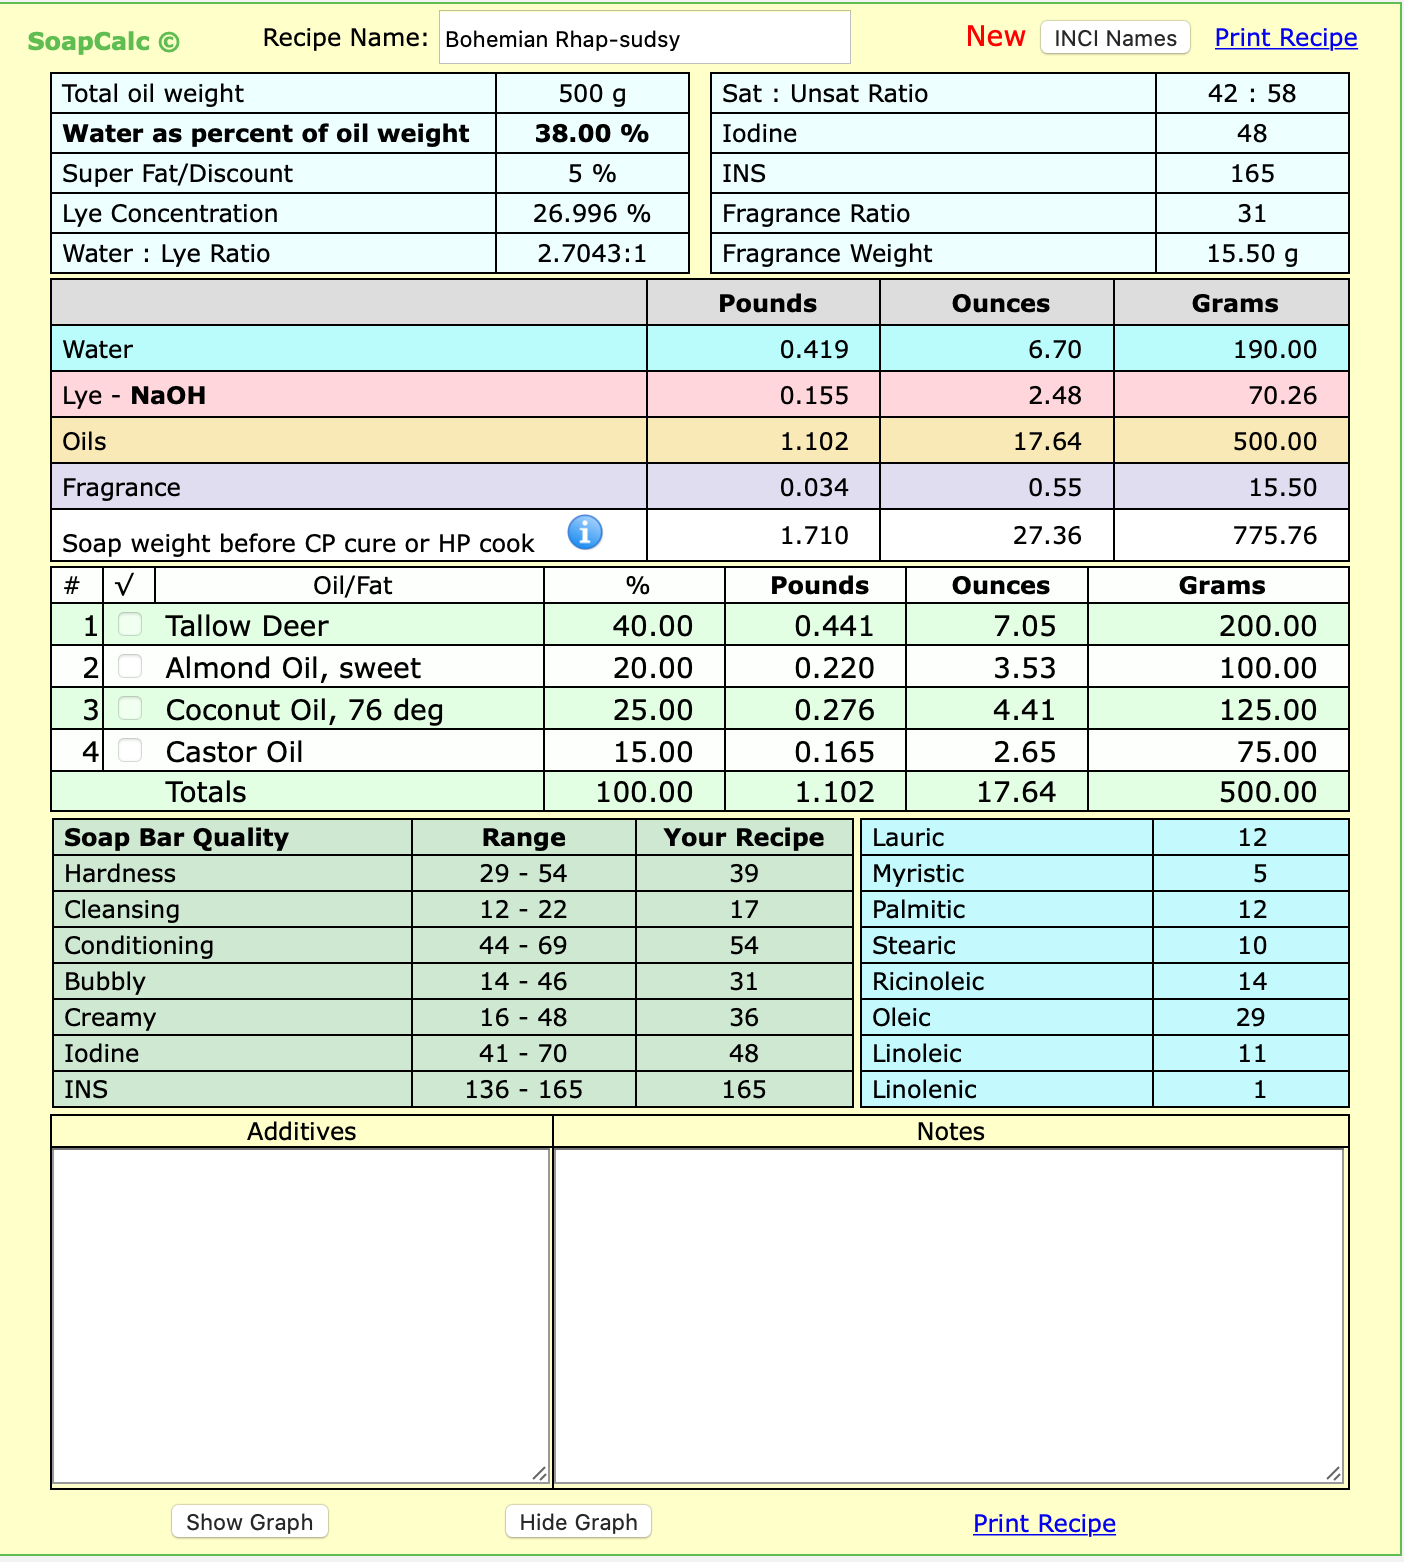
A guest. teacher came to teach us how to make soap, which we used various oils, reindeer fat, lye, and water to make. To the right is a template from SoapCalc which helps calculate the ingredients and qualities of soap recipies using different ratios and ingredients.
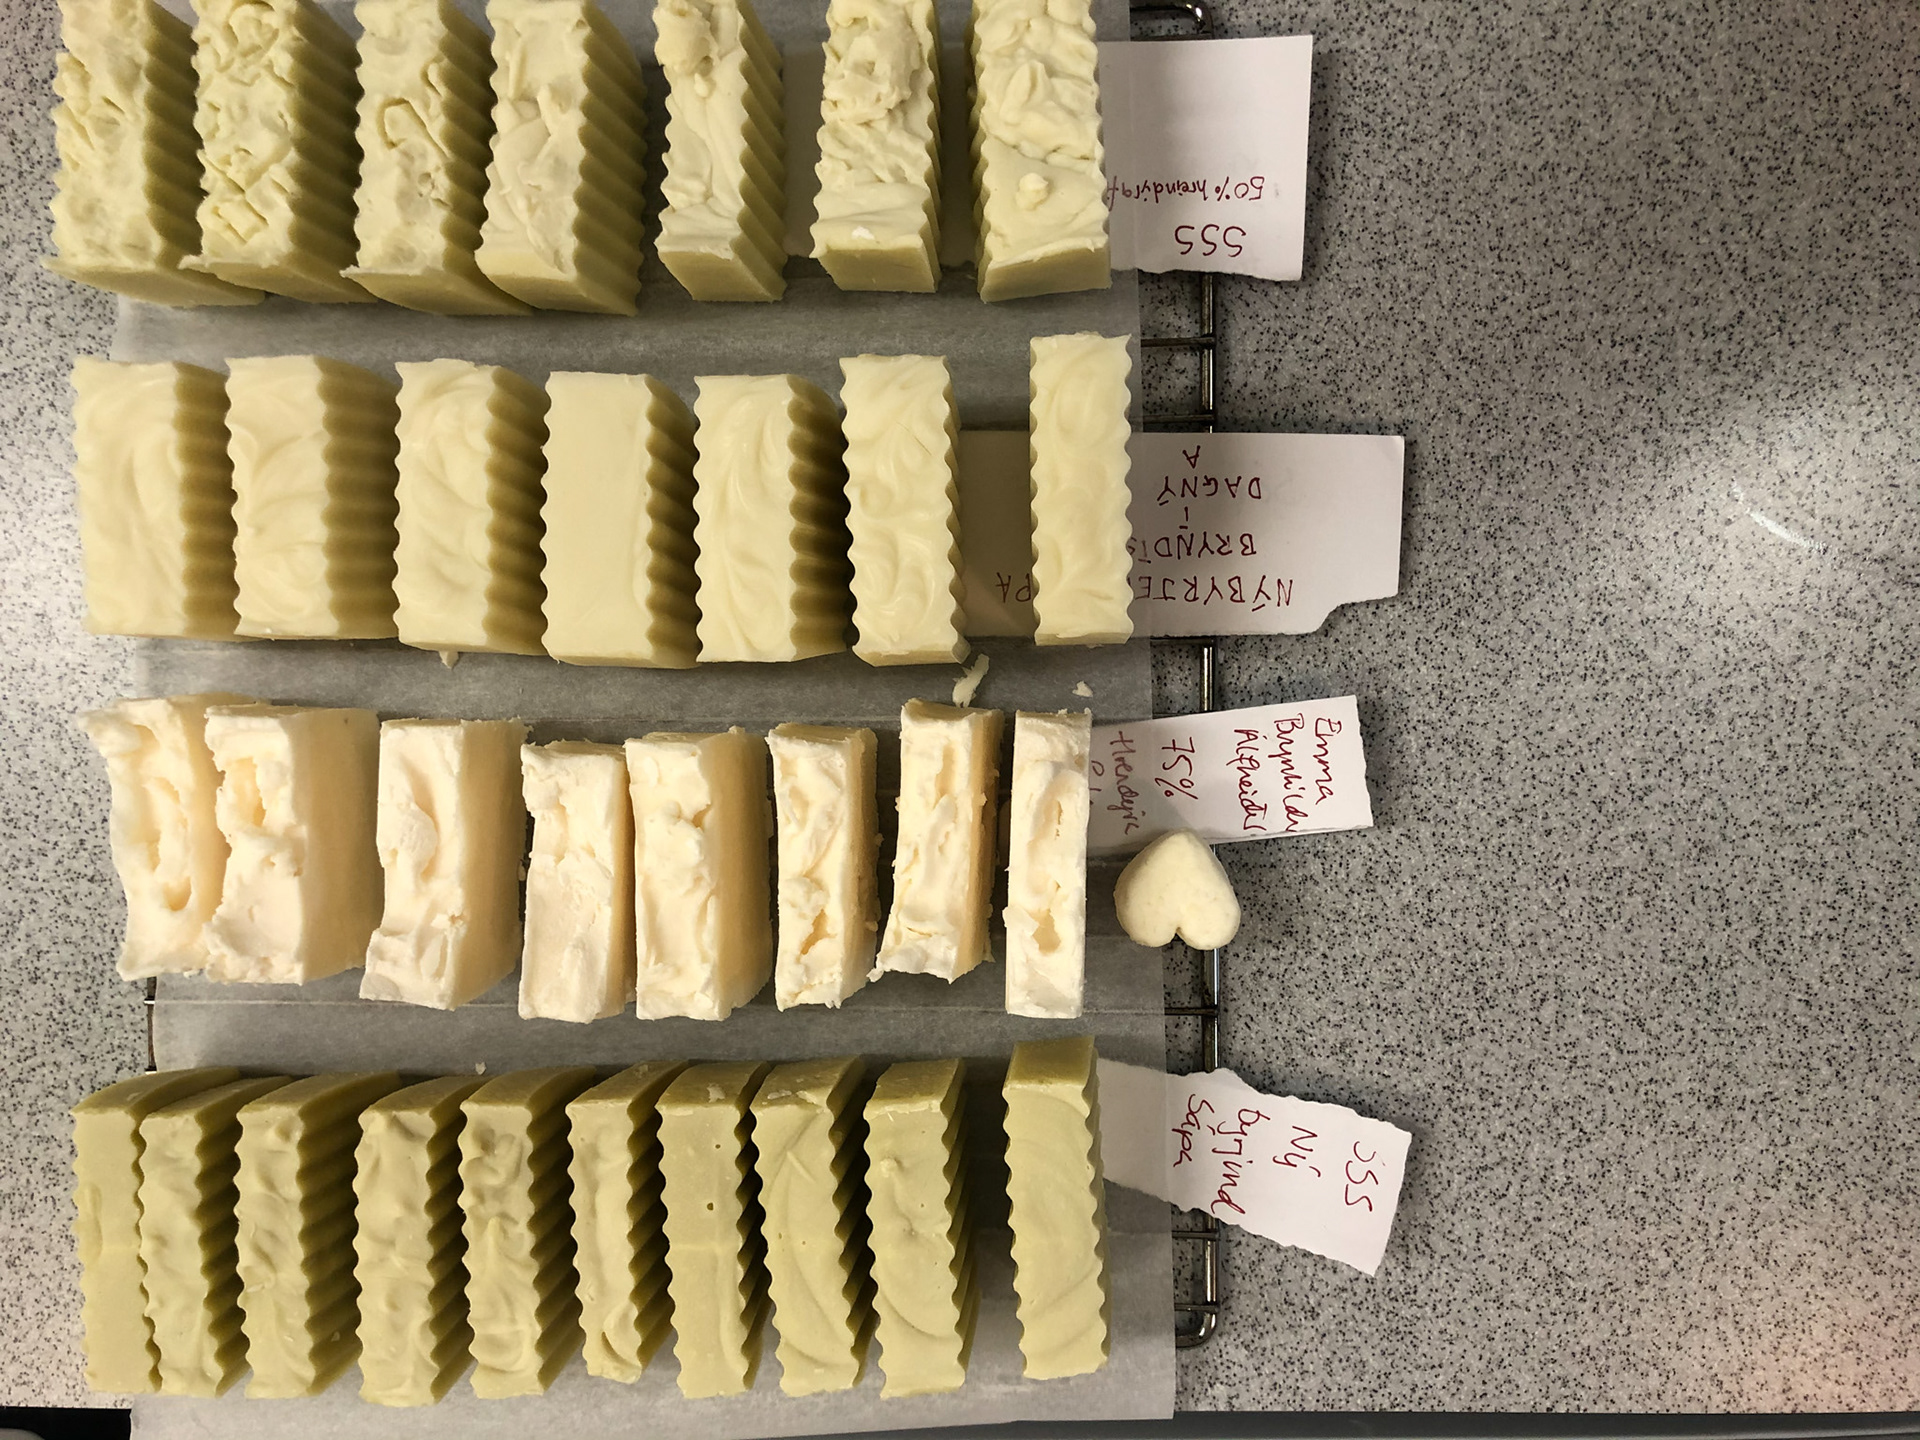
The below video and the image show the soaps. Each group decided what essential oils they wanted to add to their recipes, and some chose to use natural dyes to give them slightly different colors. We learned cold process, hot process, and milling- creating some harsh soaps to only use for cleaning, and some soaps that we could use for washing our hands.
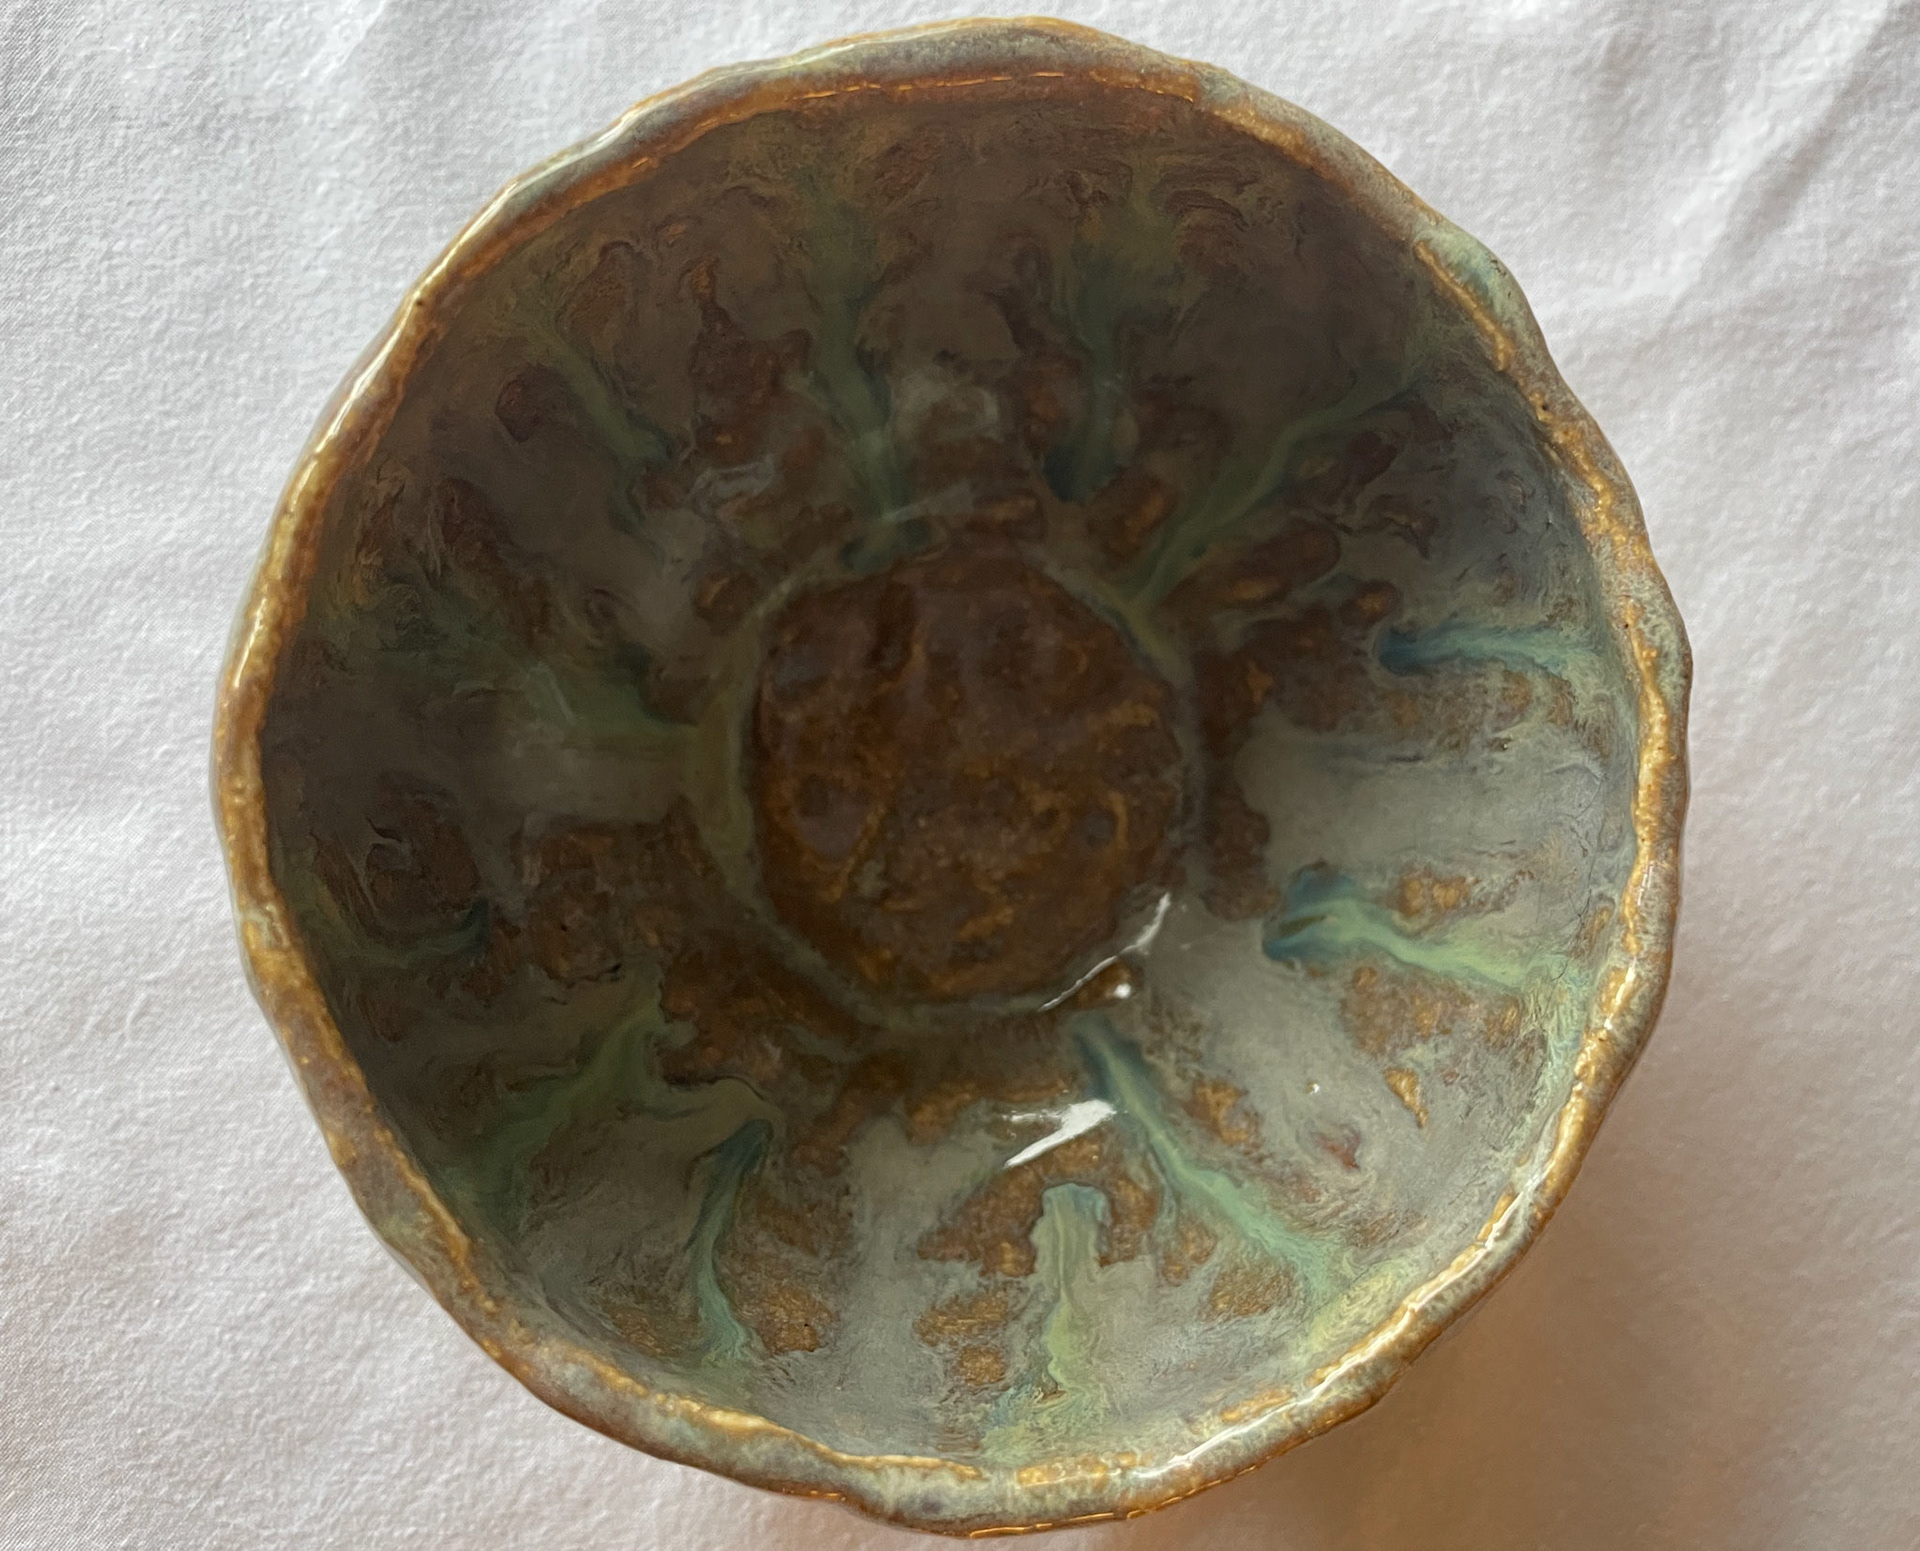
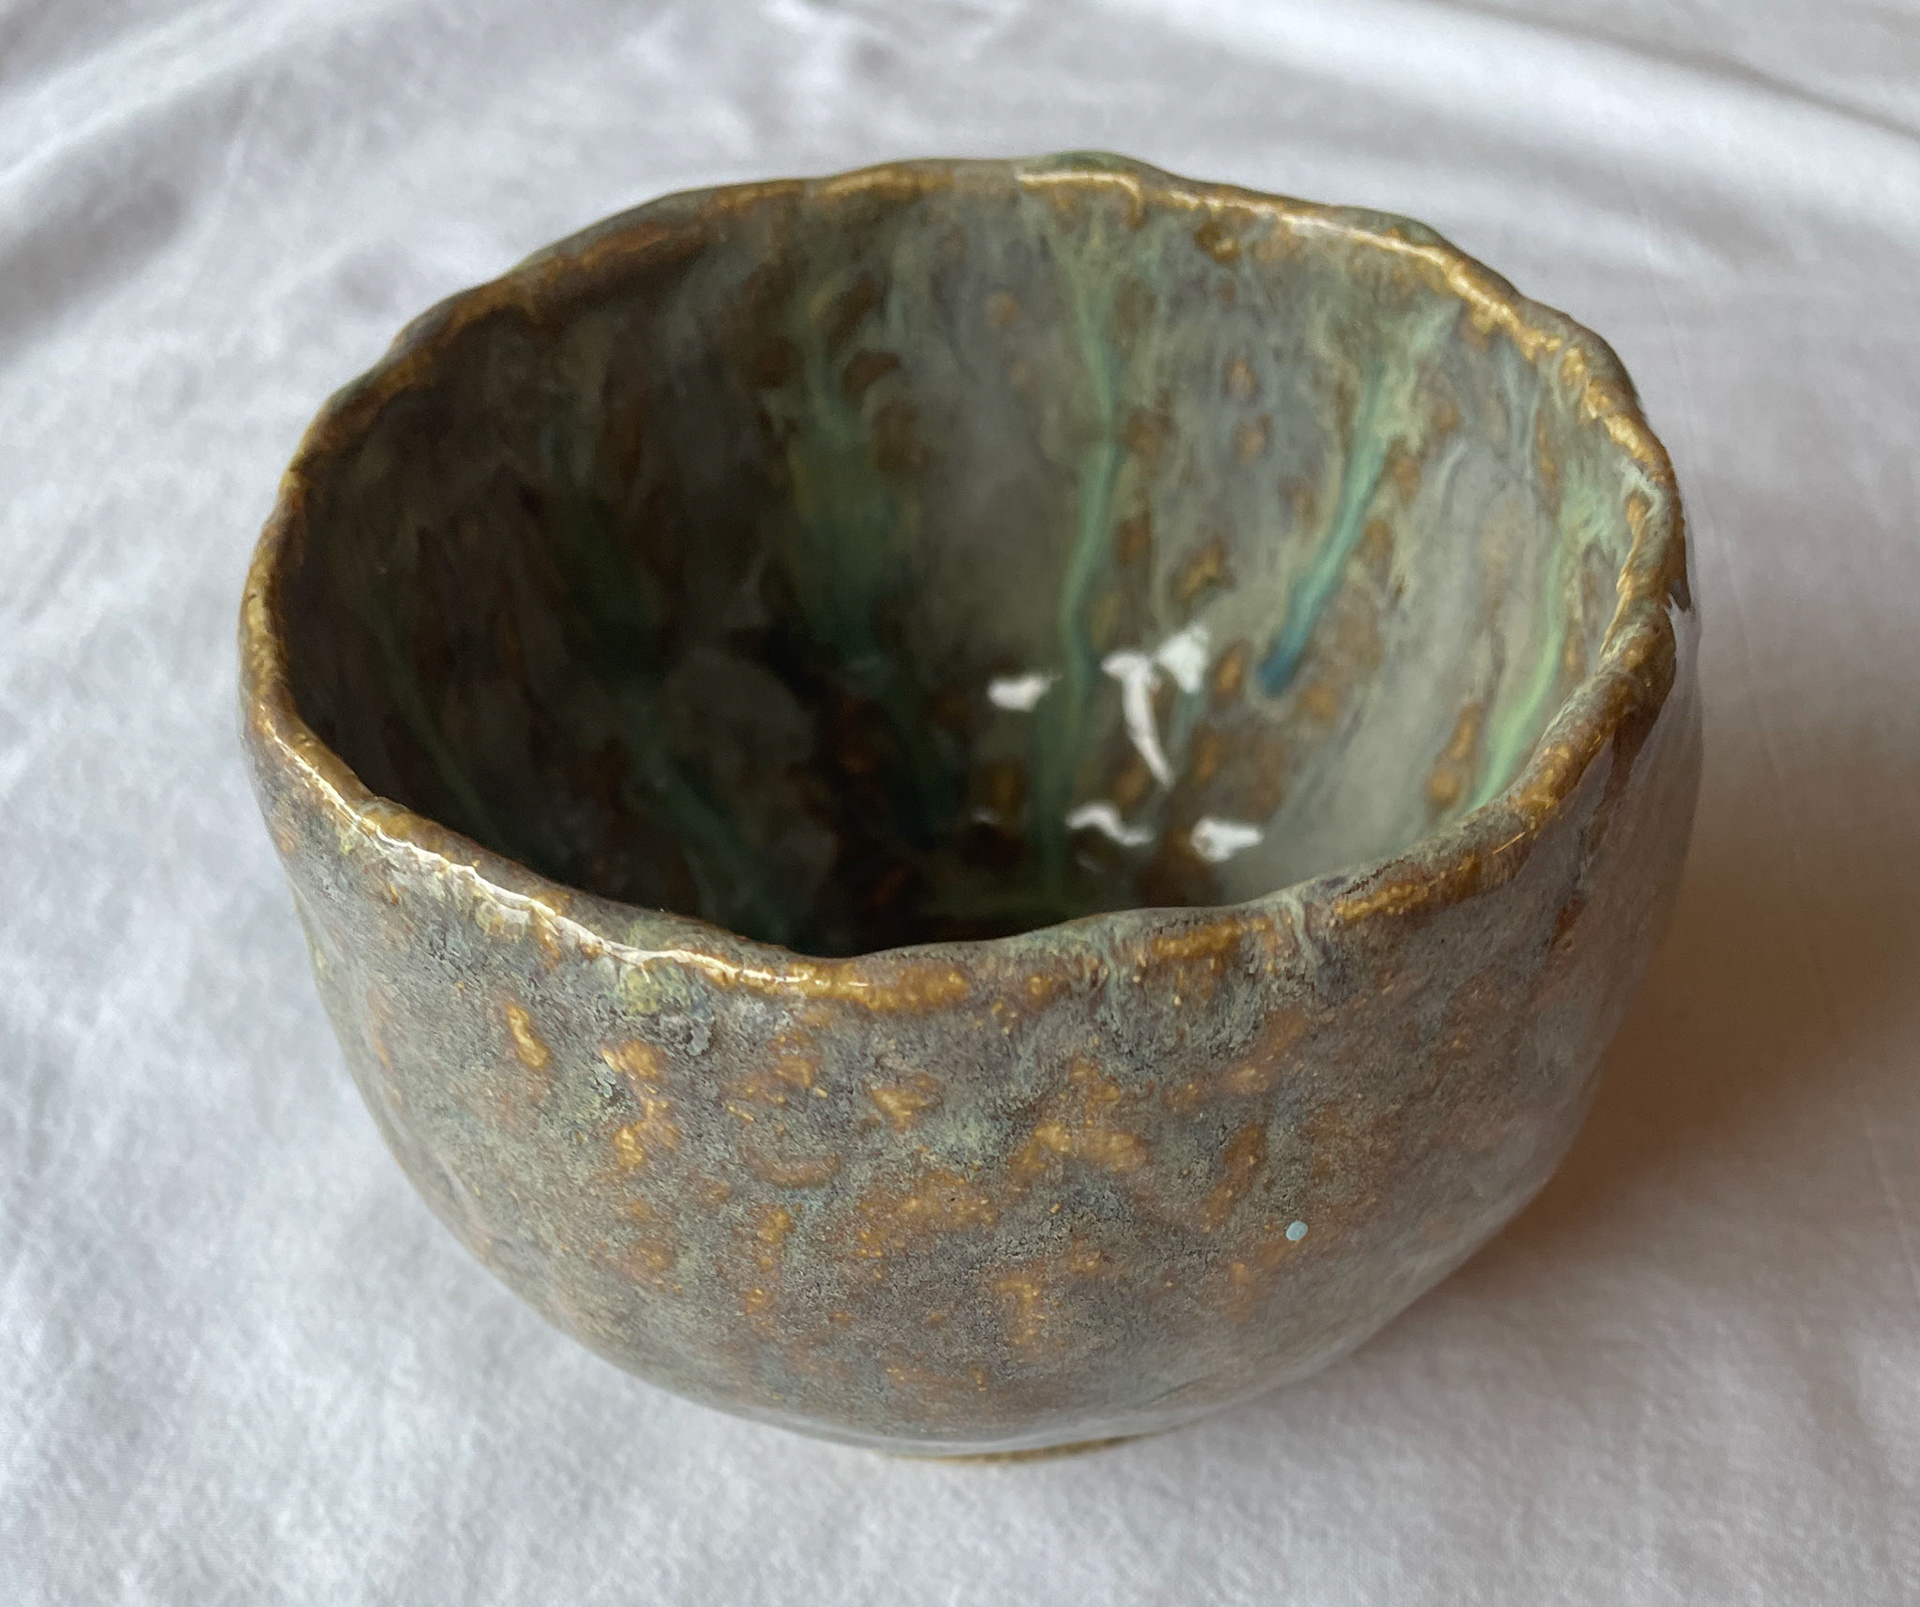
This is a bowl/mug that I created at a pottery studio that we visited. Once the pieces had been bique fired, we went back to glaze them.
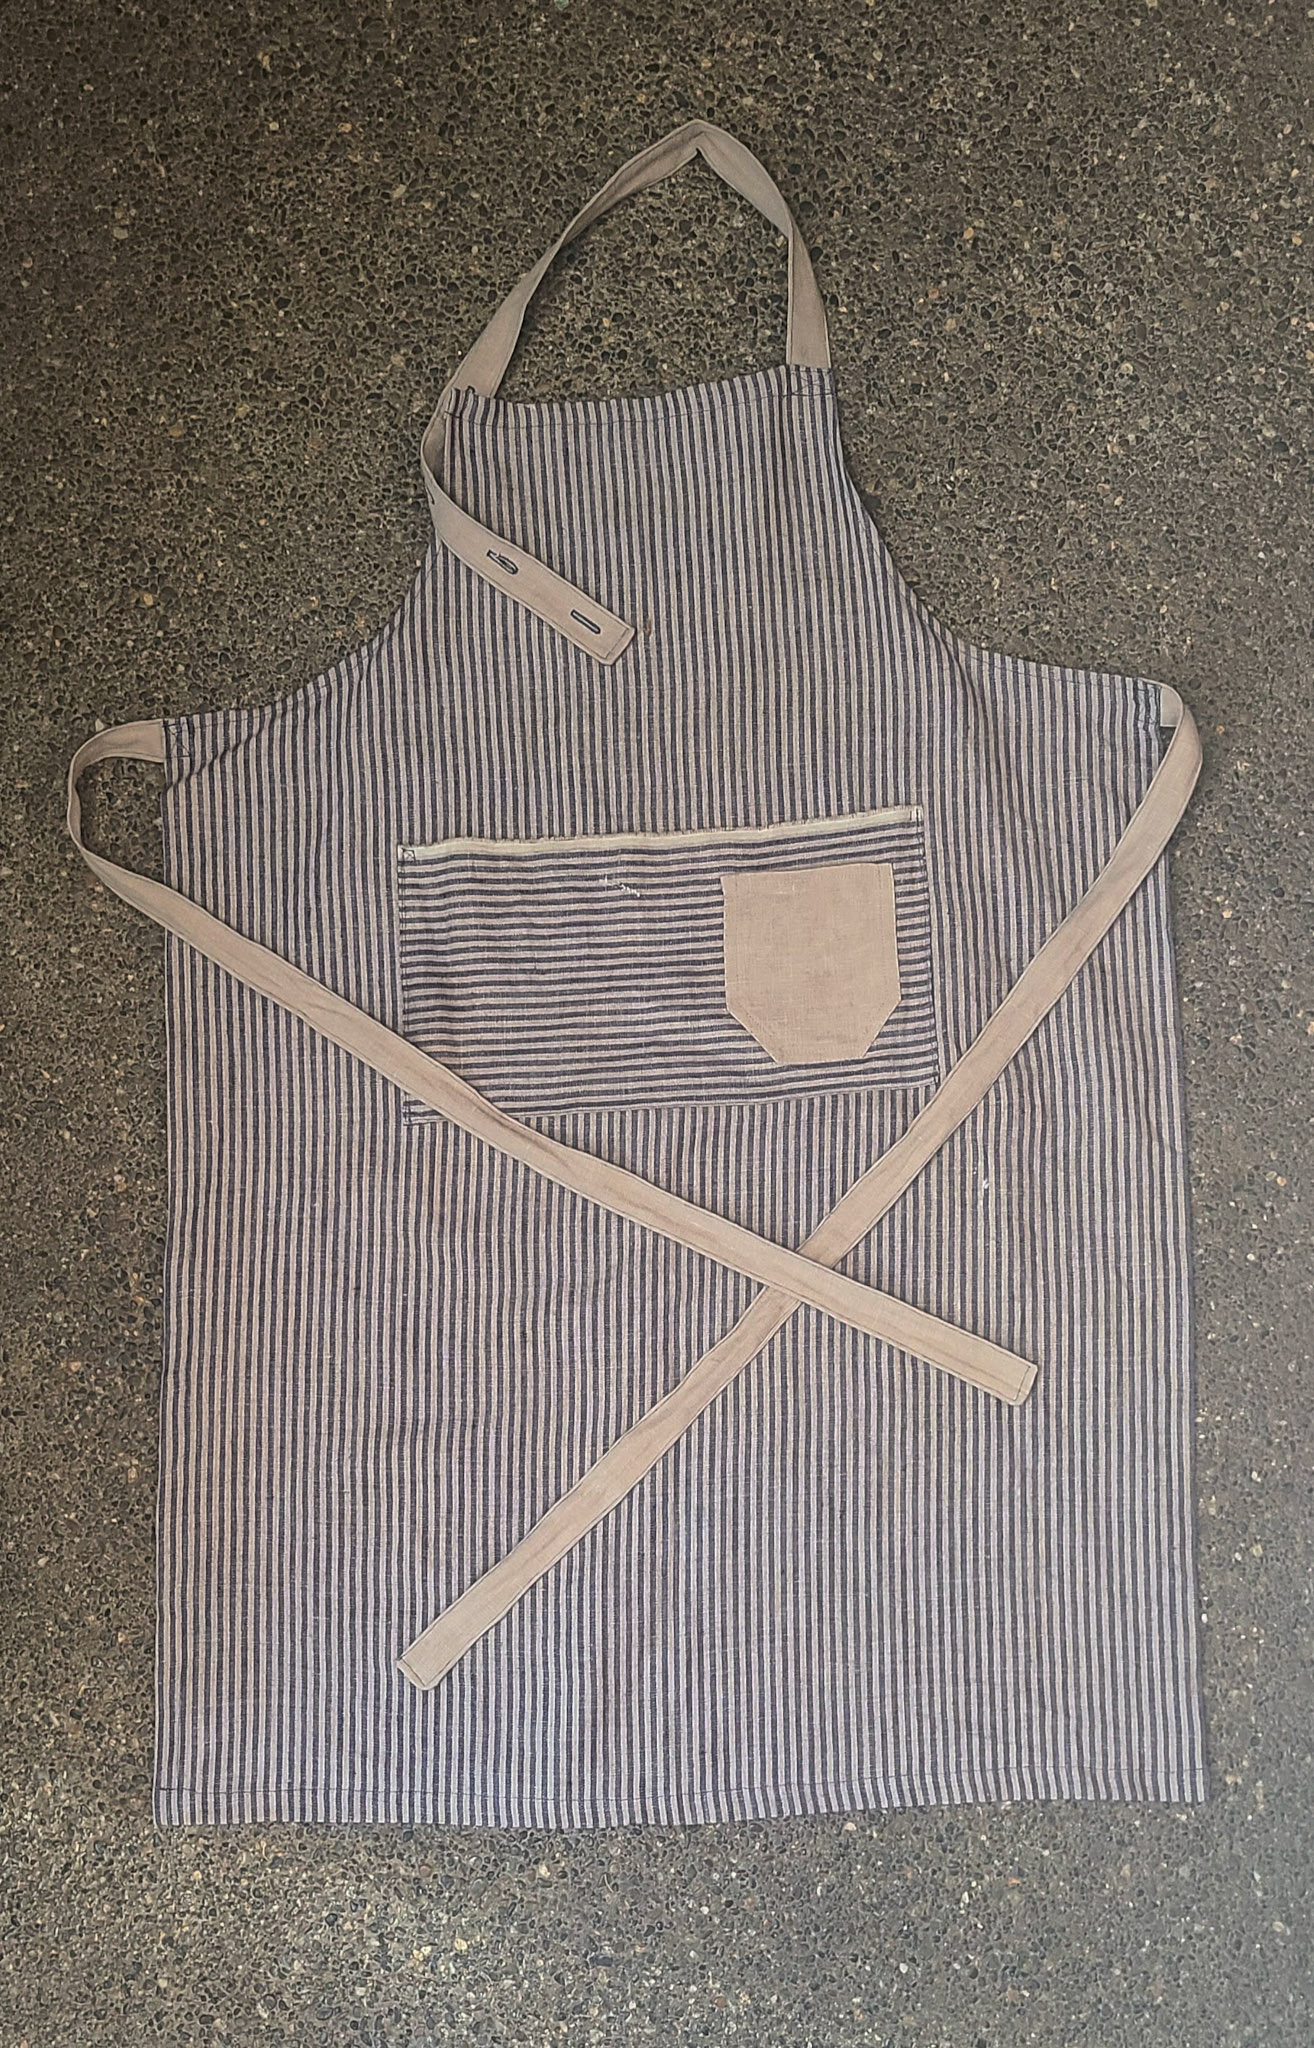
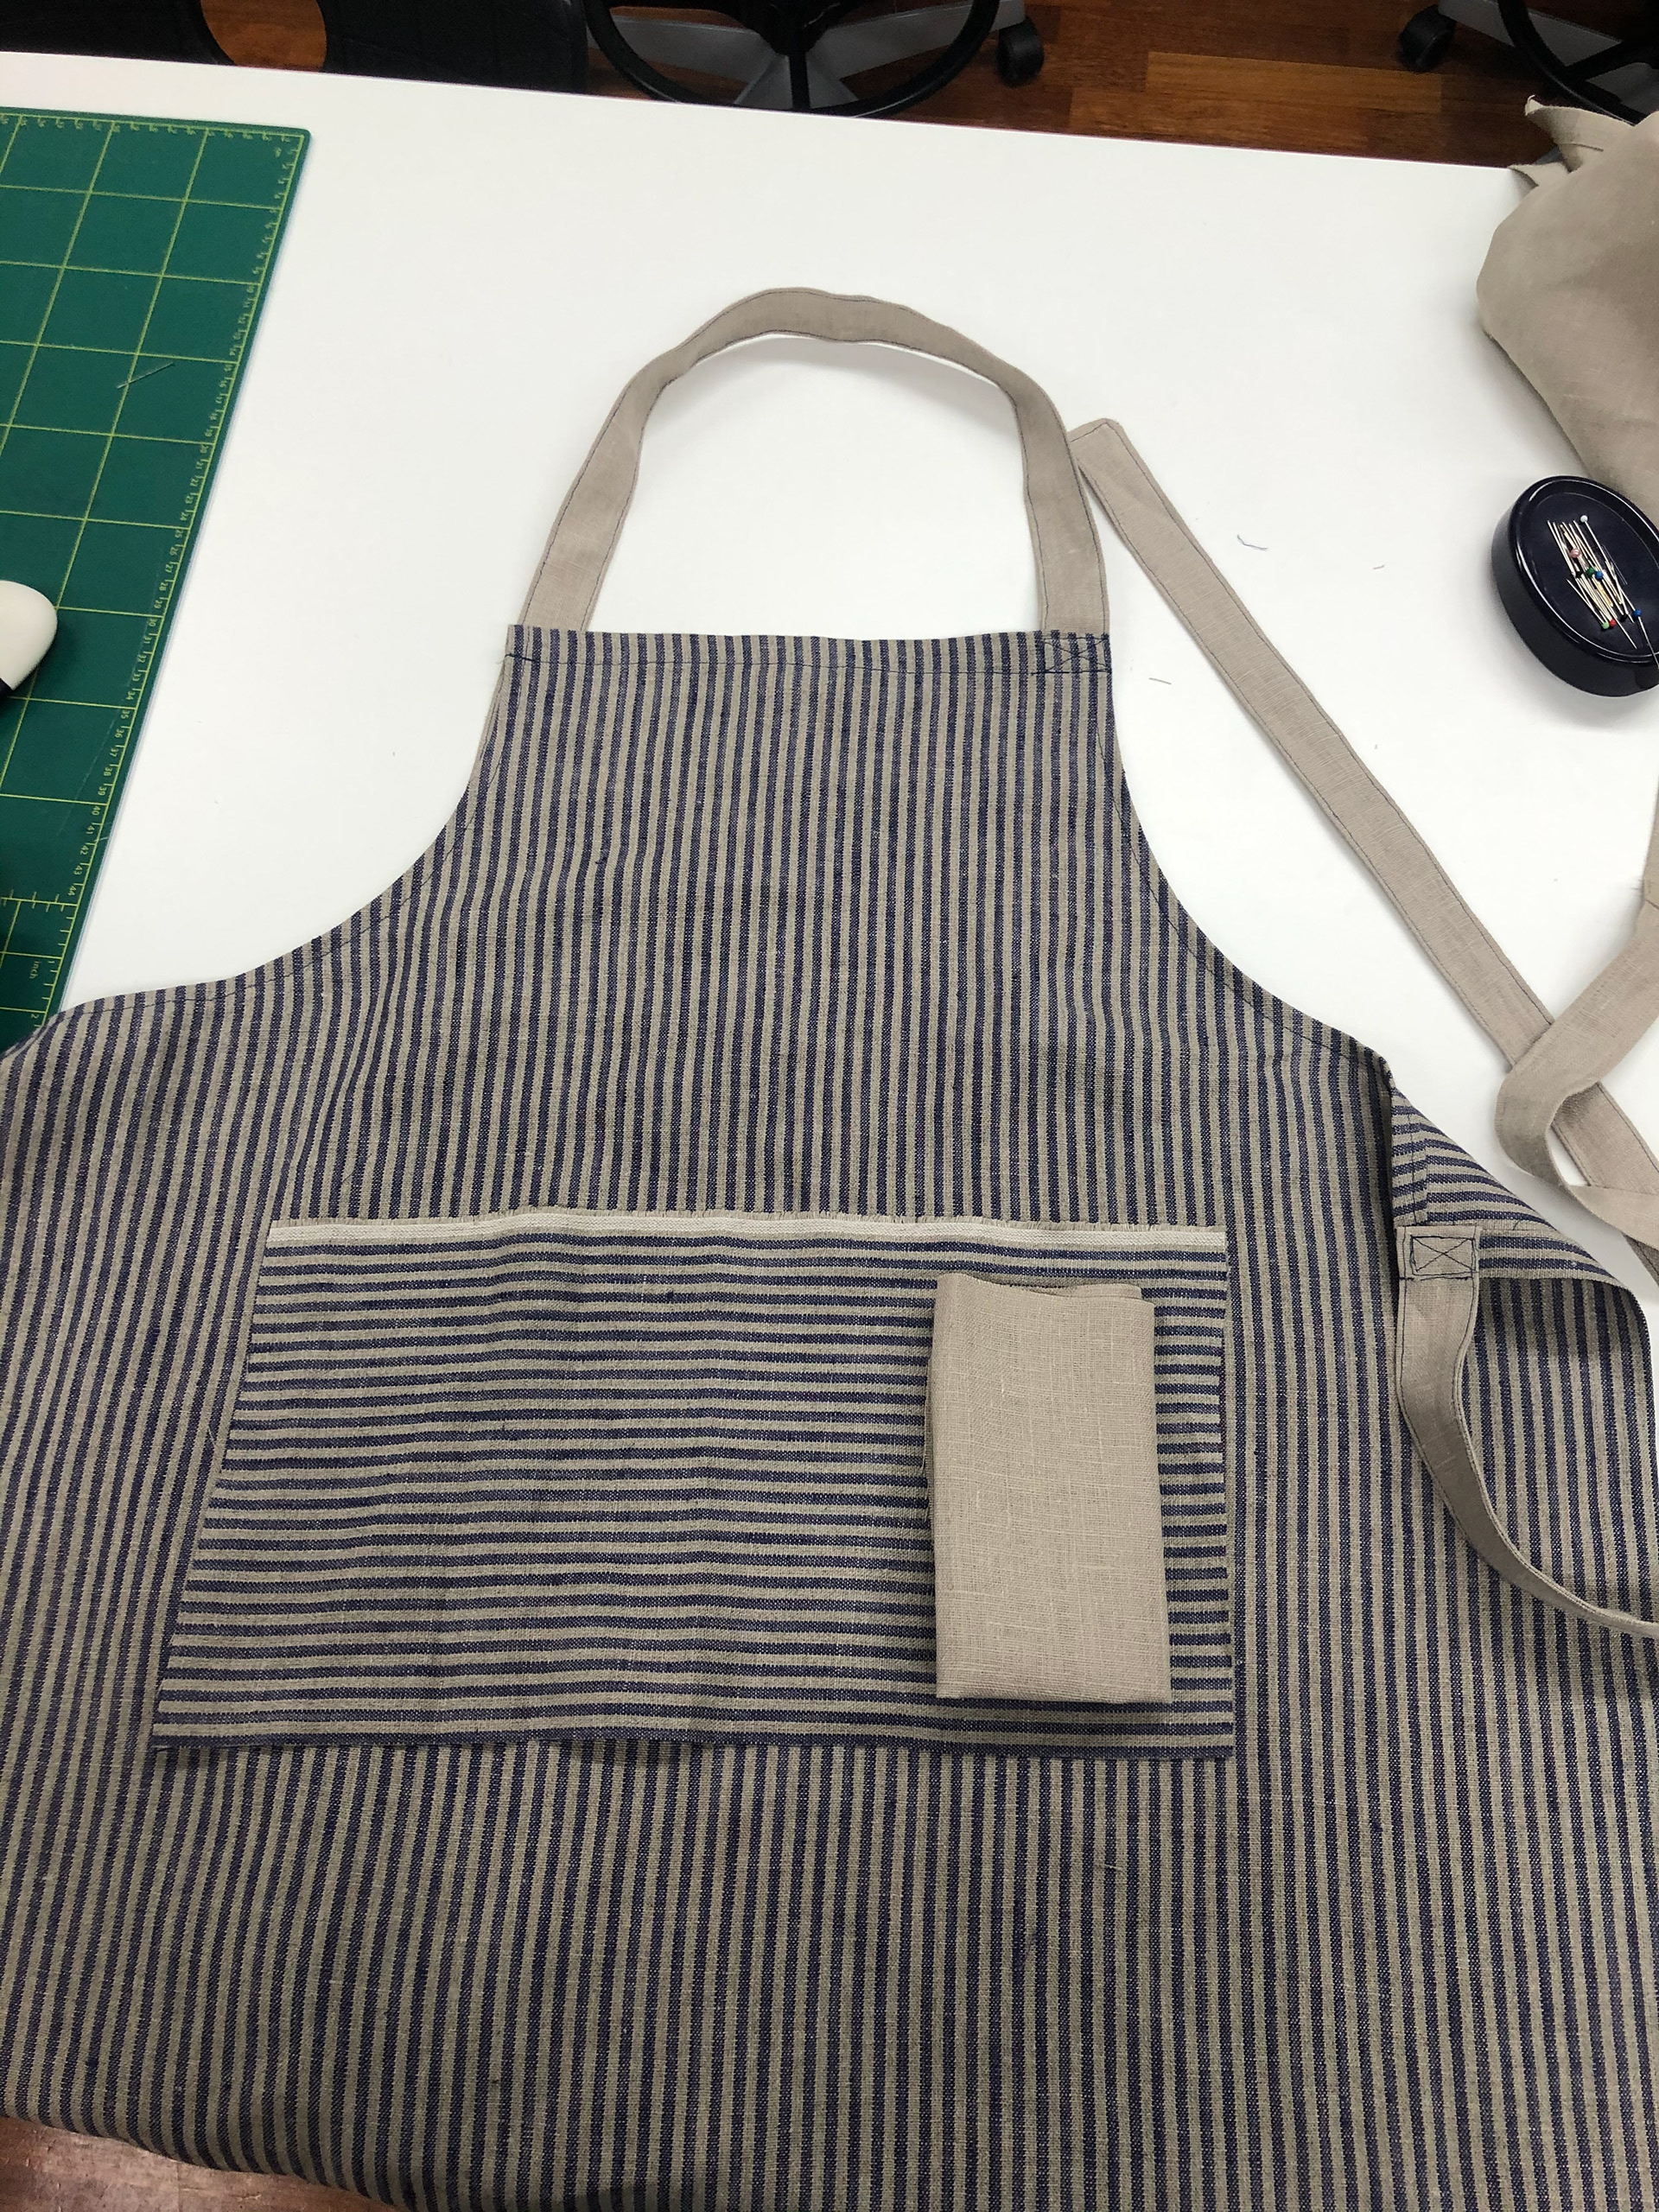
This is an apron that I sewed. This apron has two pockets and an adjustable neckline with a button on the inside of the top and button holes on the neck strap.
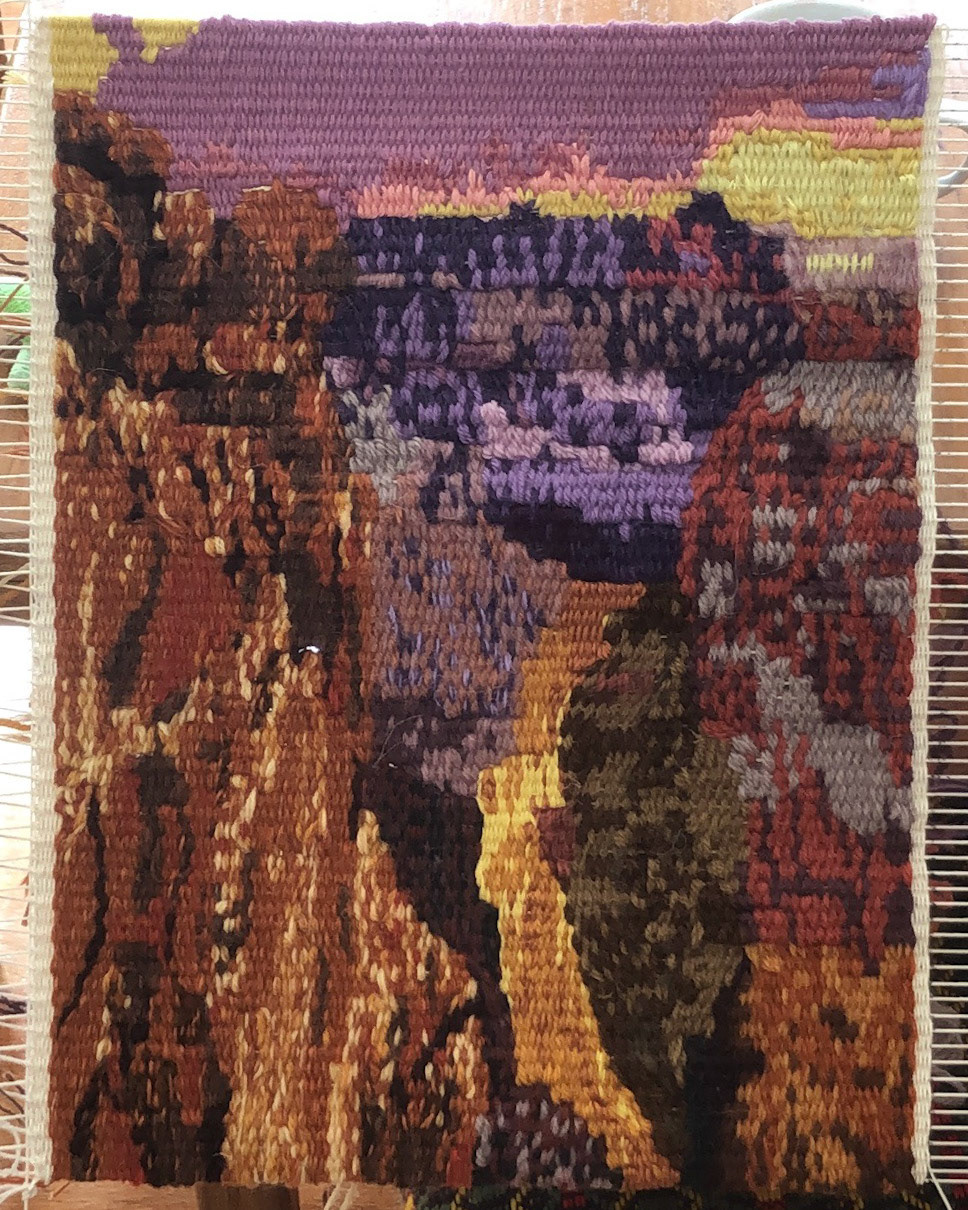
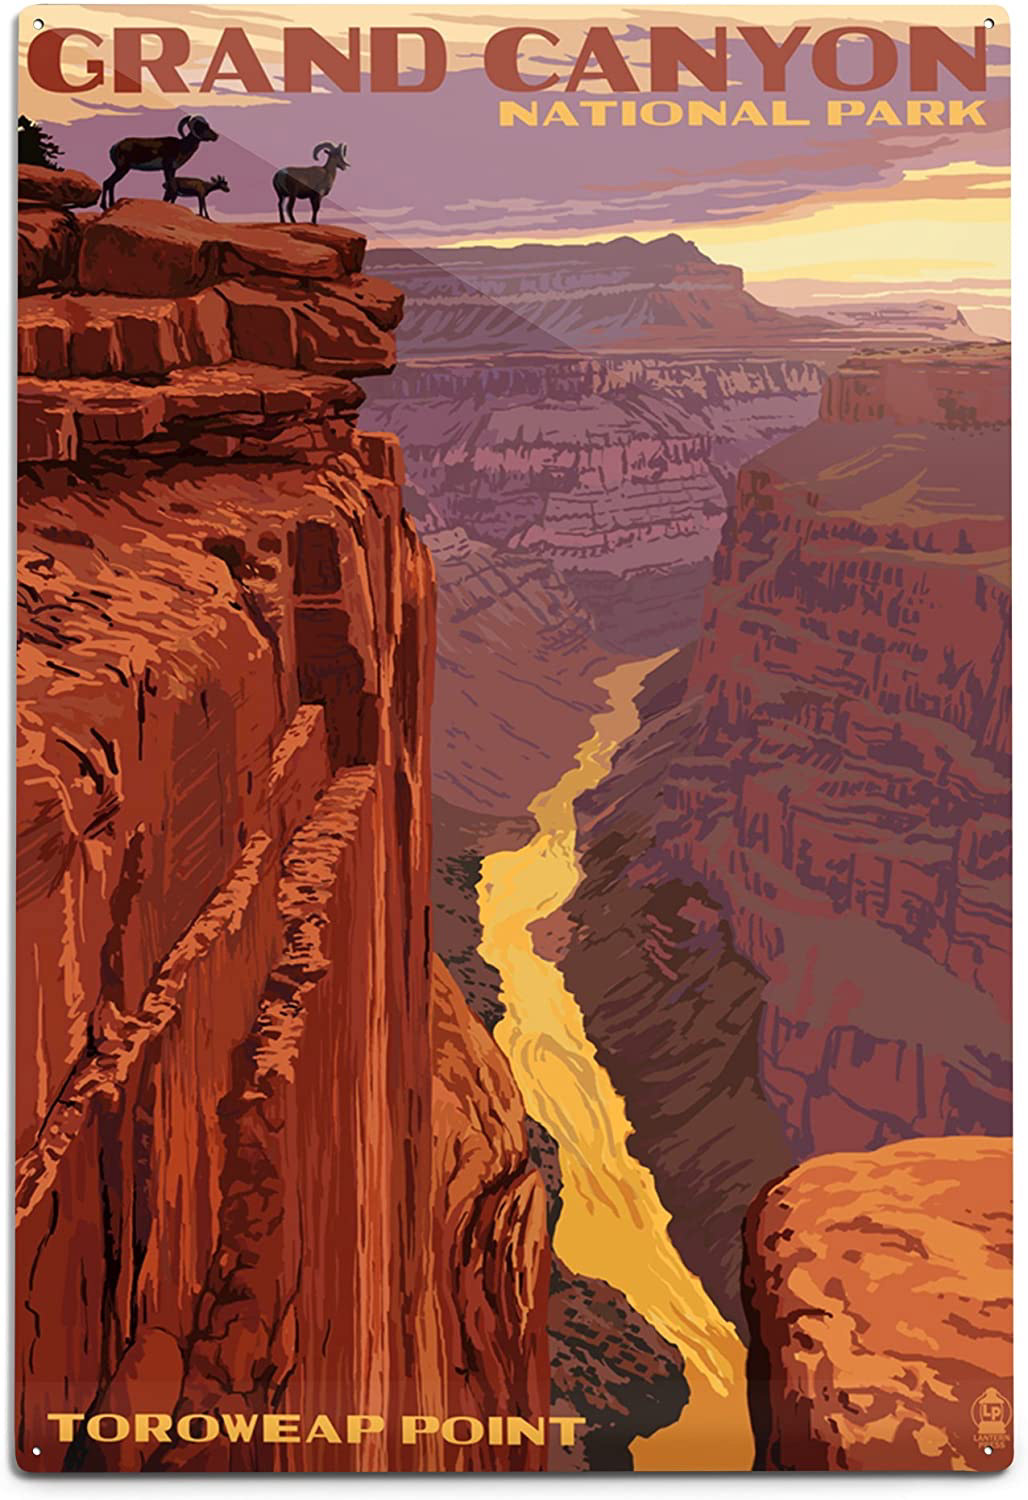
This is the first photo-inspired tapestry weaving that I created. This weaving was inspired by the Grand Canyon, which I river rafted in 2017 and therefore have an emotional connection to.
To the right is the inspiration photo created by LanternPress Artwork. To the left is the final project before weaving in the ends and blocking it to even the stitches.
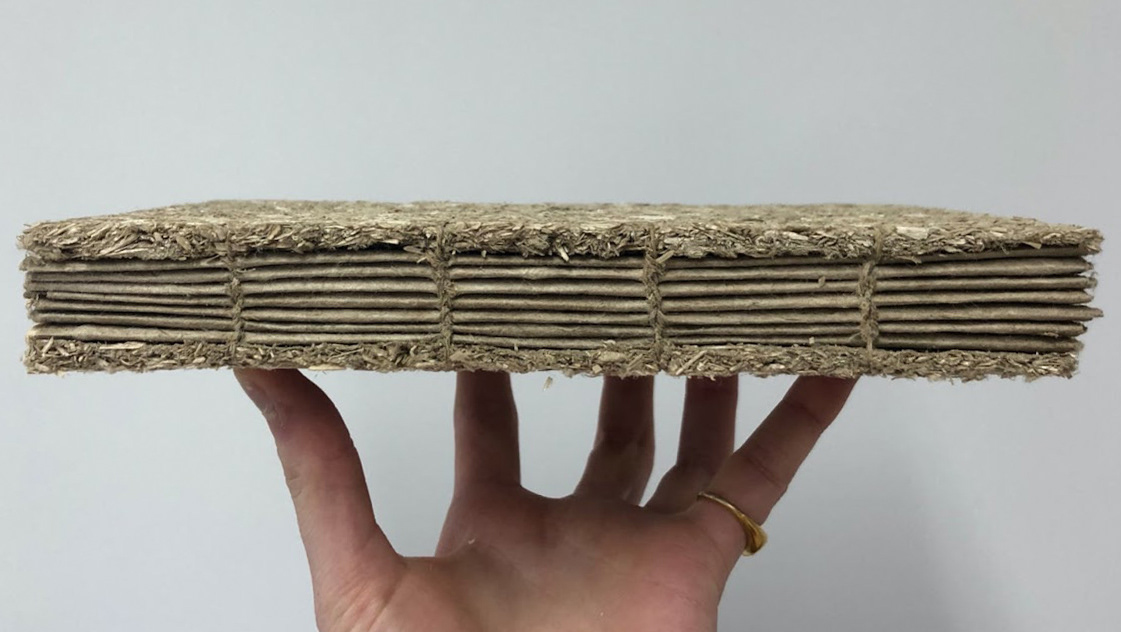
In my time at Hallormsstaðaskóli, we were partnered with a nearby hemp farm and provided with hemp stalks, roots, and leaves, which we were encouraged to experiment with. Working with hemp inspired me to learn more about the plant, and then to center my final project around working with it. I decided to make a full book 100% made from hemp, including the covers, paper, and binding twine. Below are some images of this book. Click the button above to be led to the Hemp Book page of my portfolio to see more about the making process.
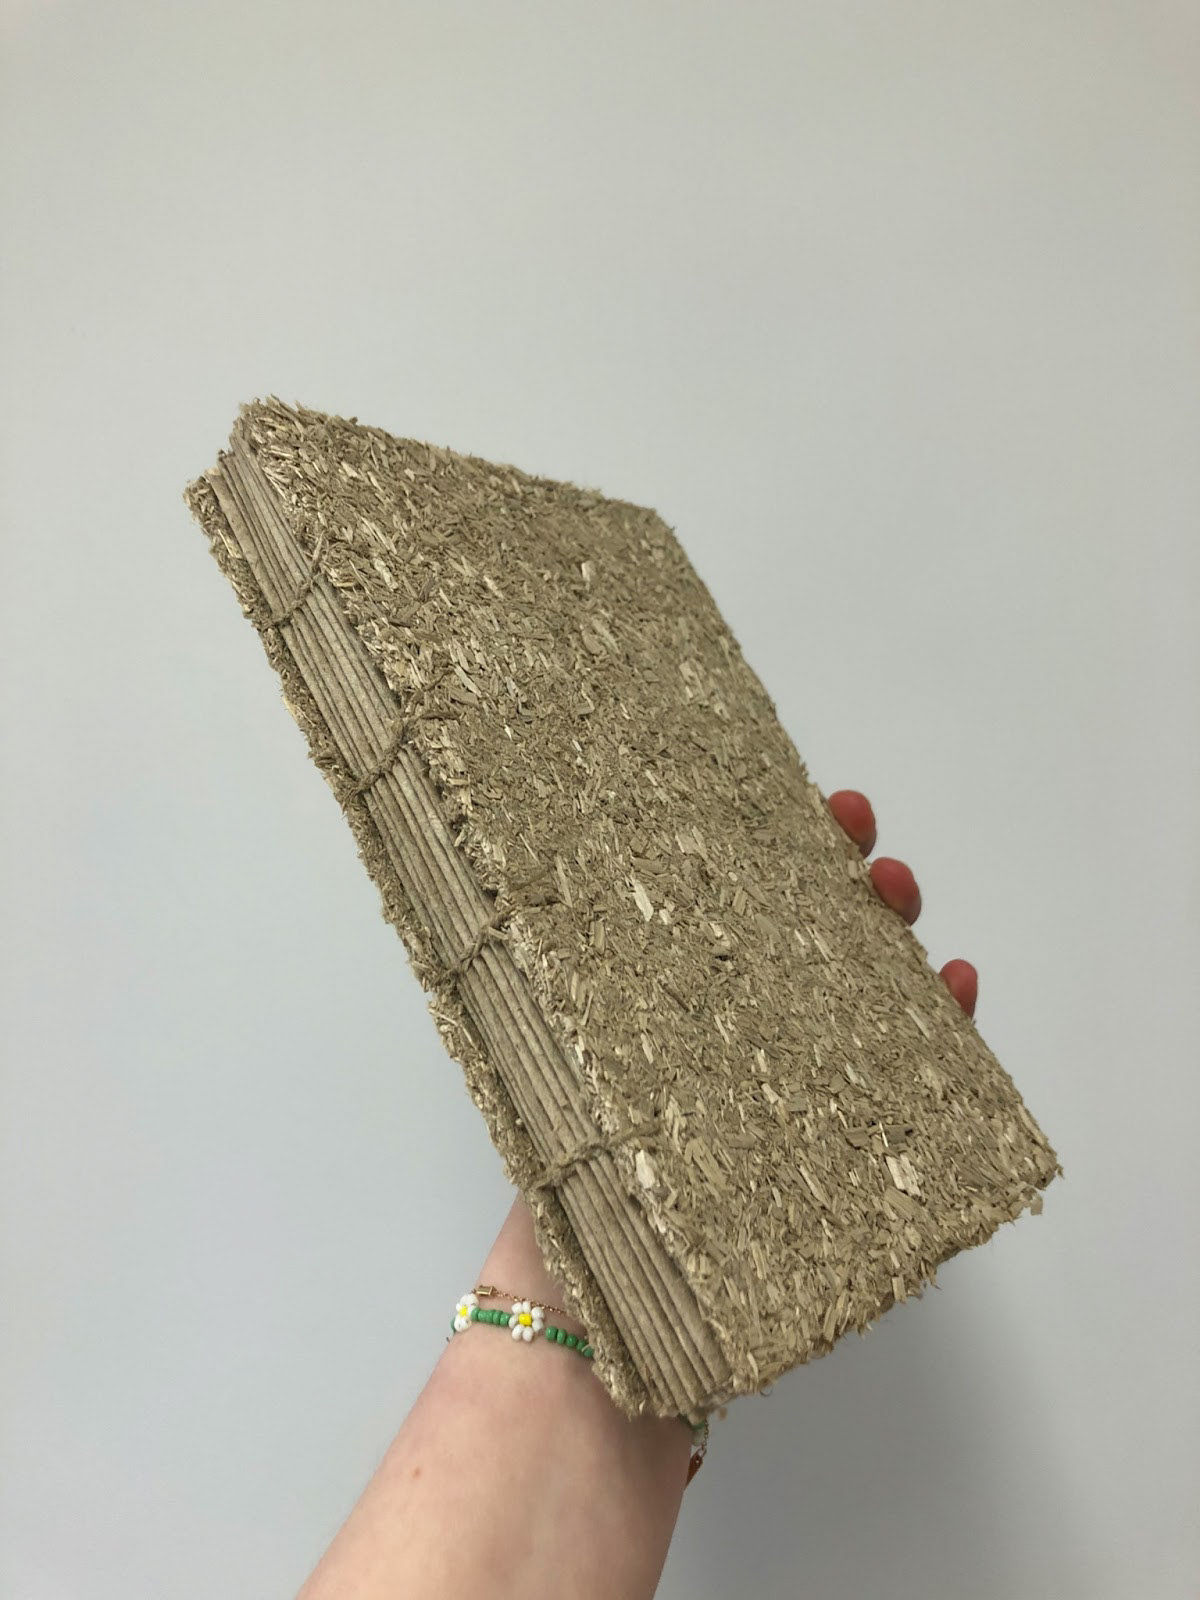
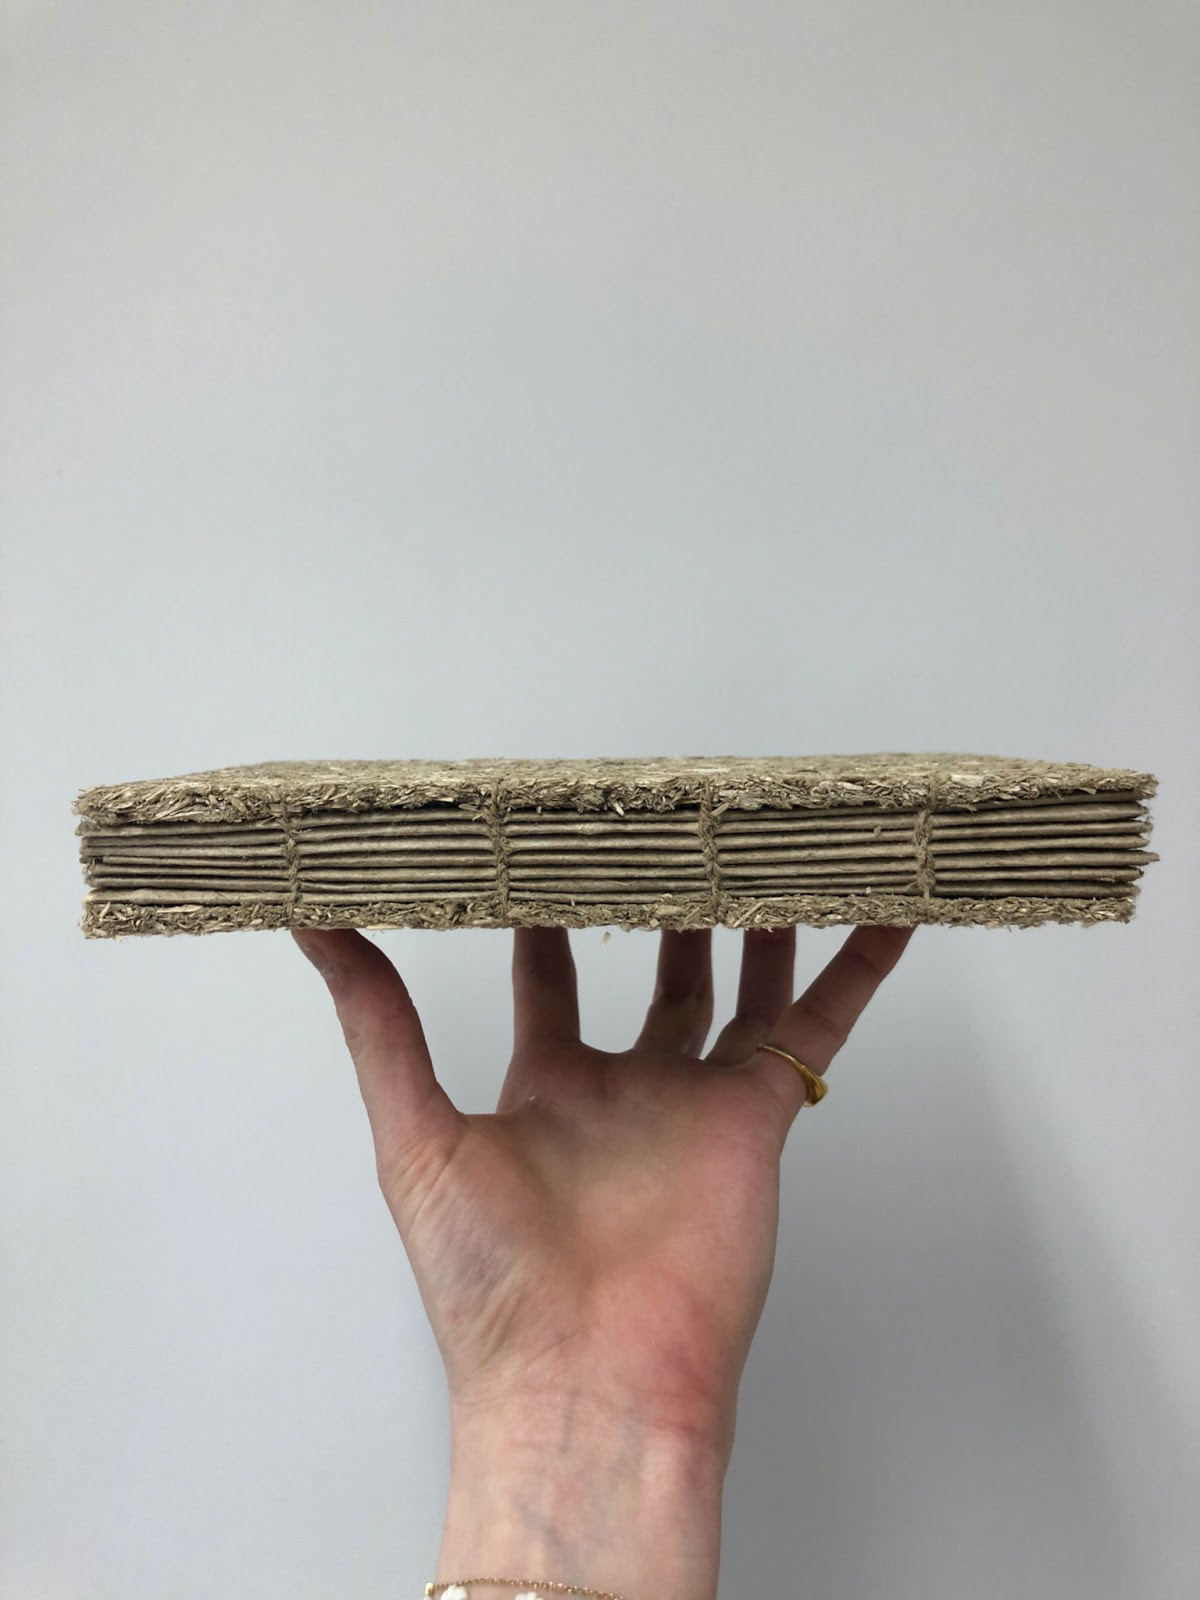
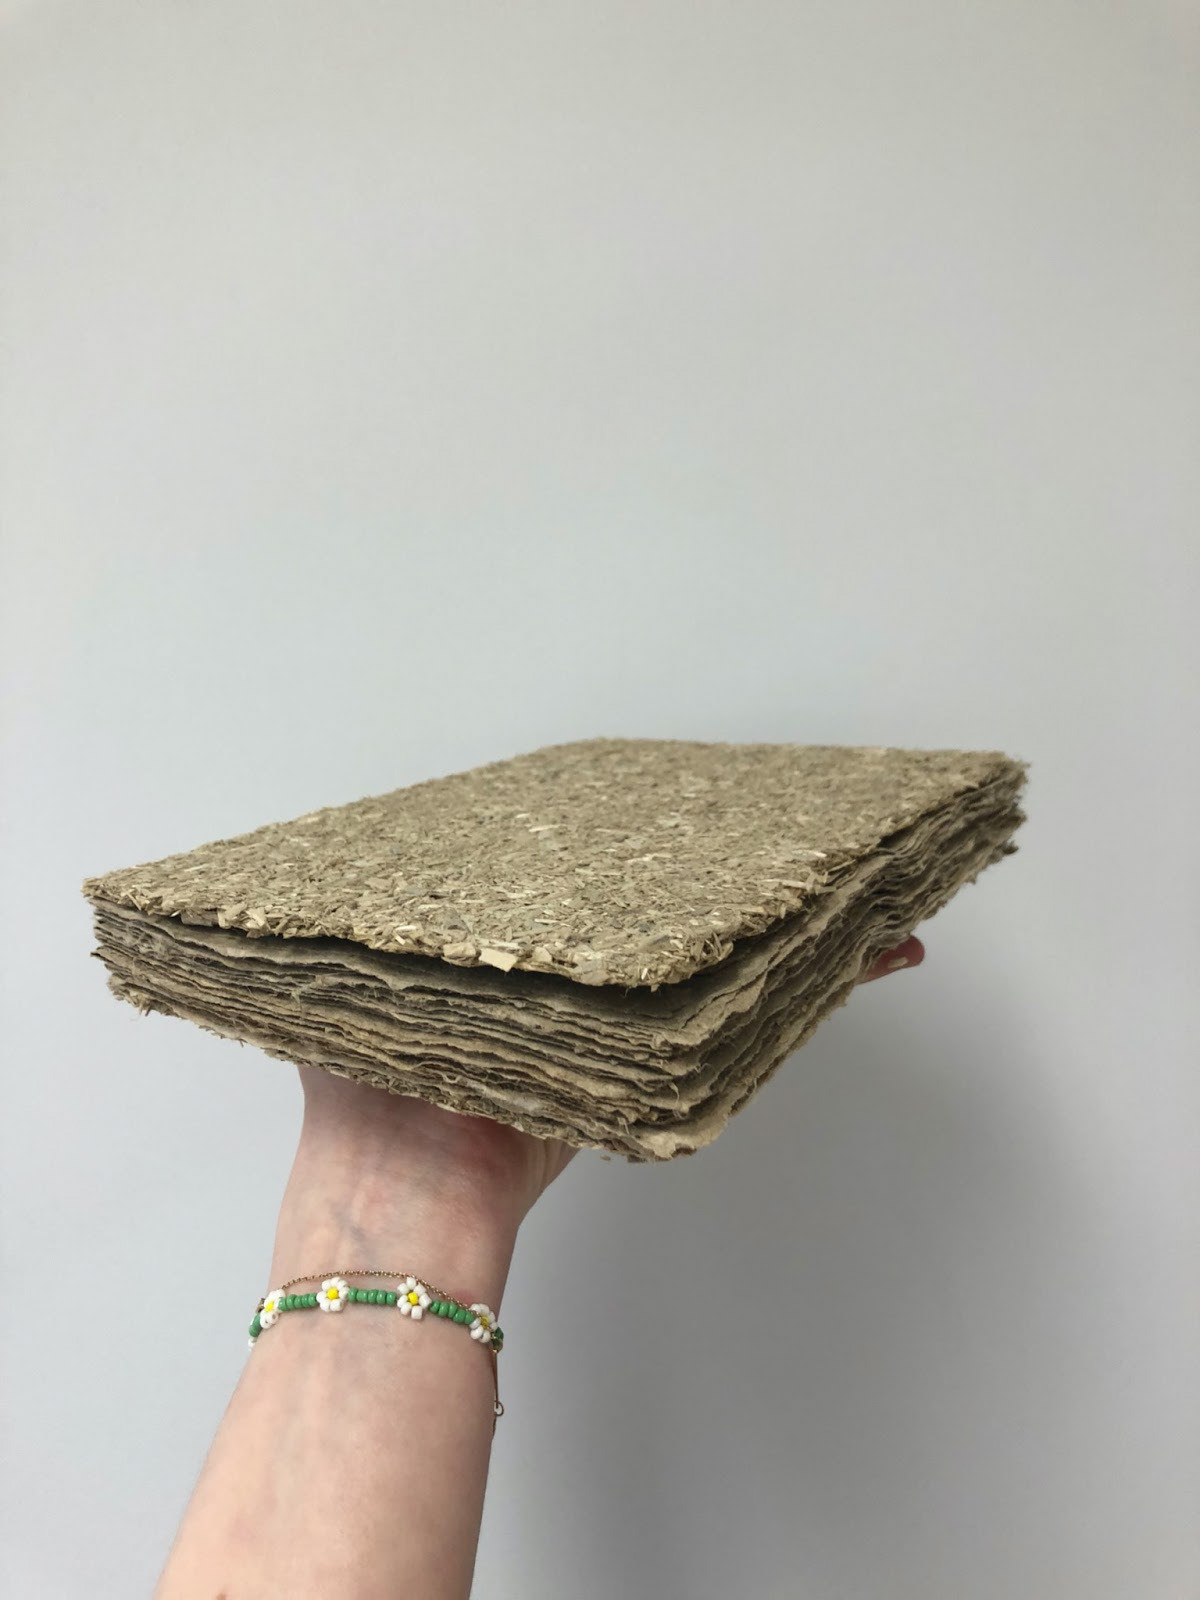
Above are images of the final hemp book. This book has around 80 pages, two covers, and twine that it is bound with.
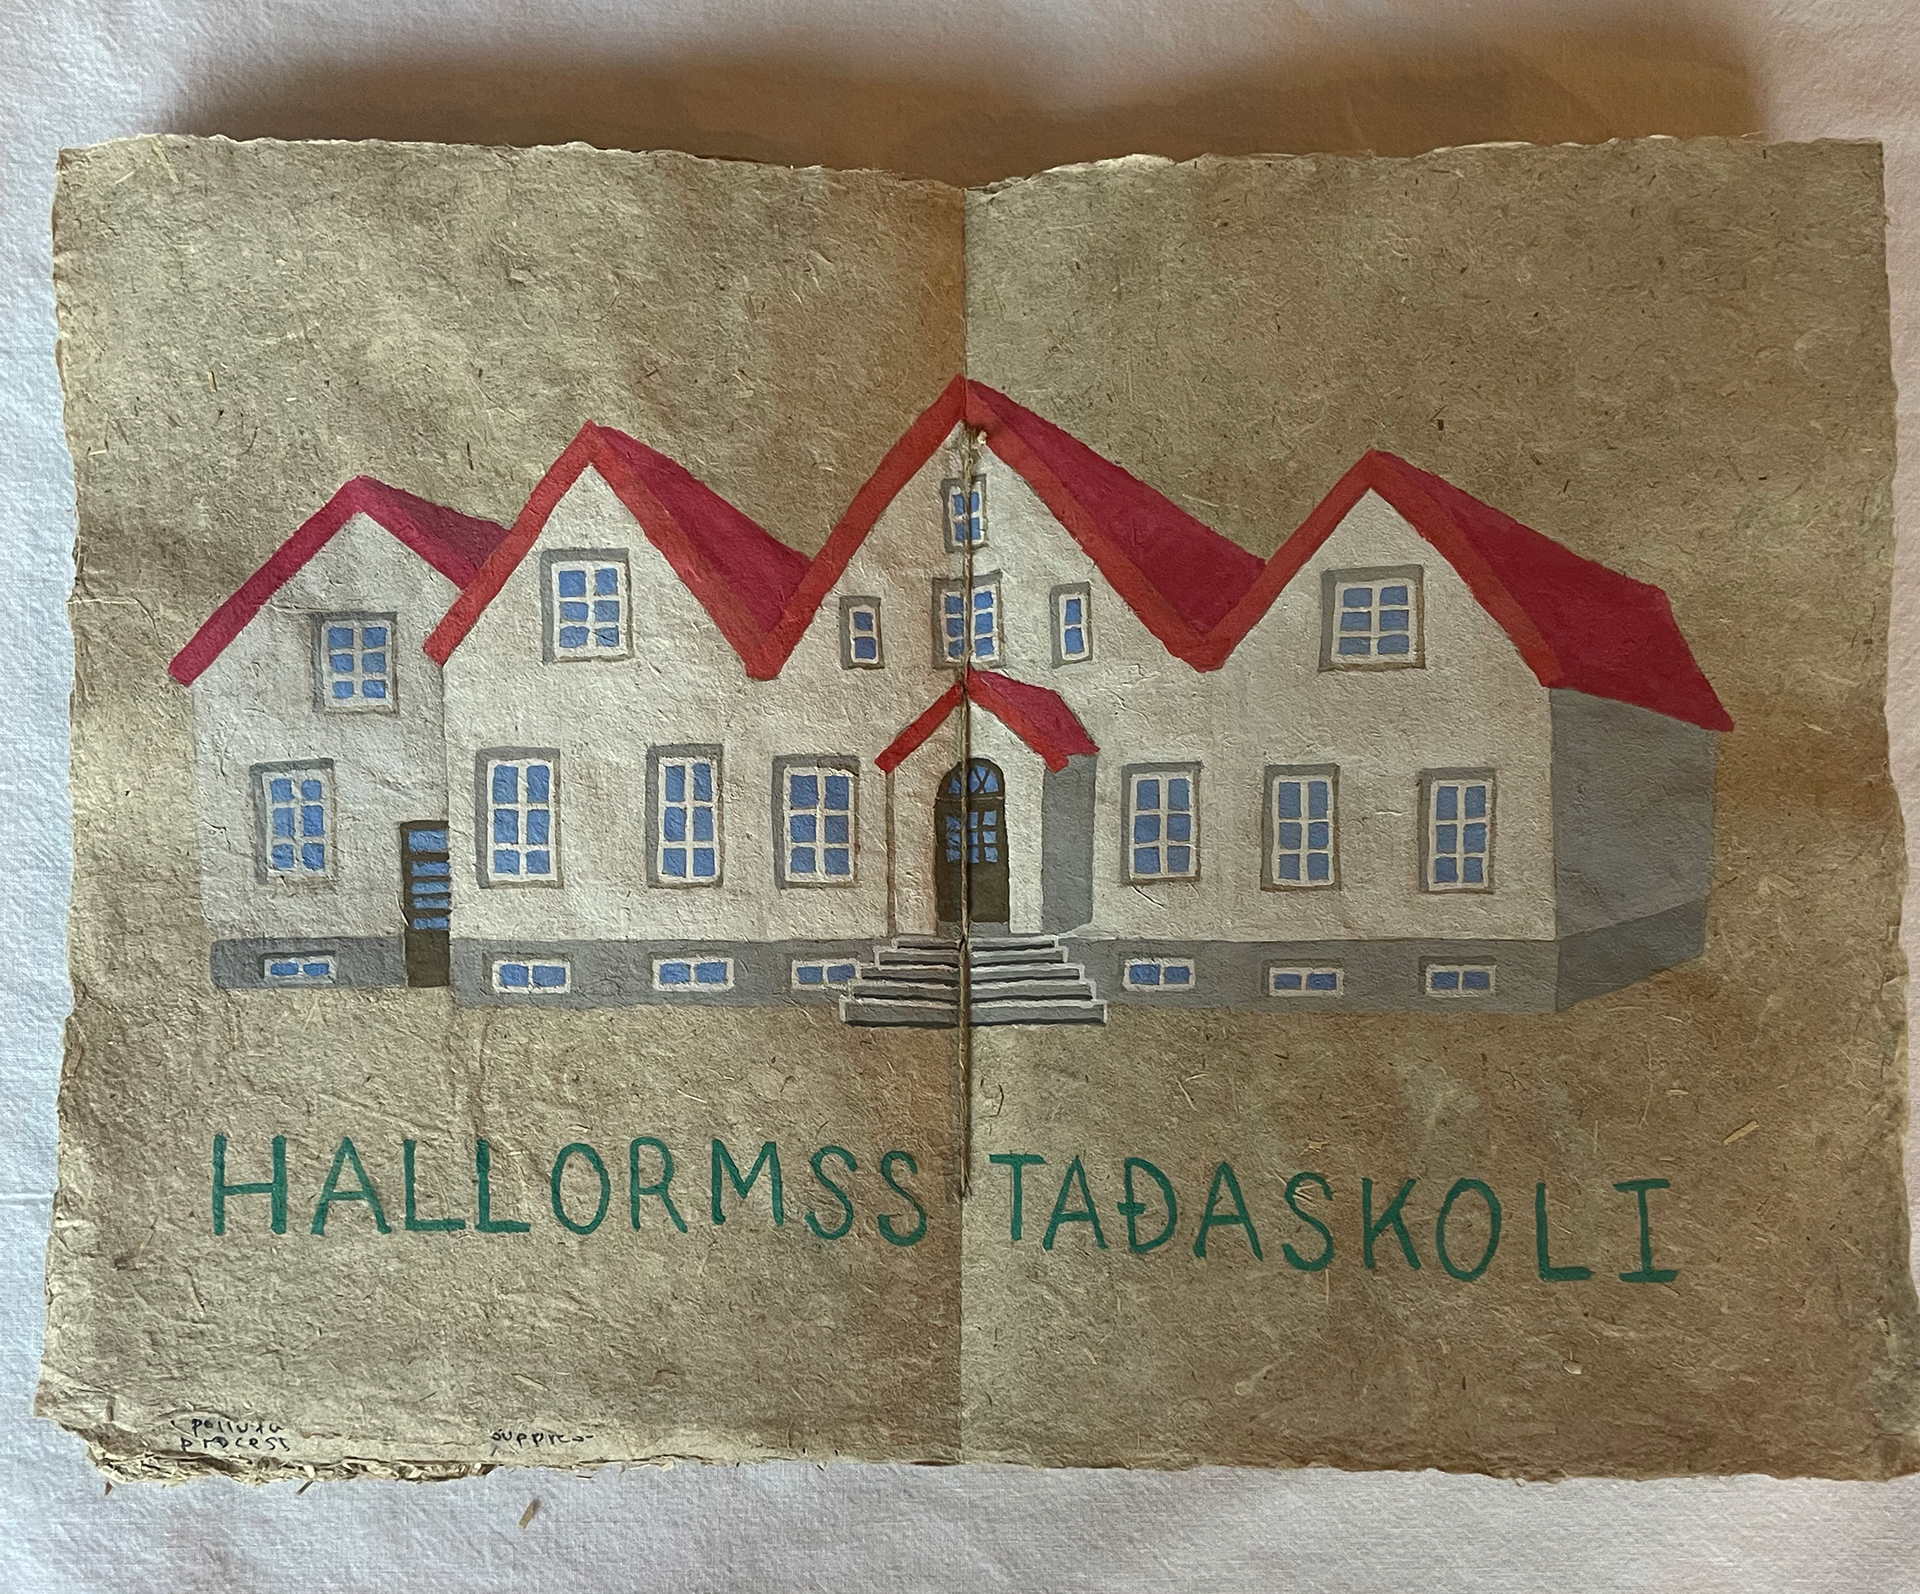
On one page of hemp book I painted the school with watercolors. I was pleasantly surprised at how well the paper took watercolor, and it almost appeared more like a gouache with how saturated it was, with no bleed marks on the before and after pages.
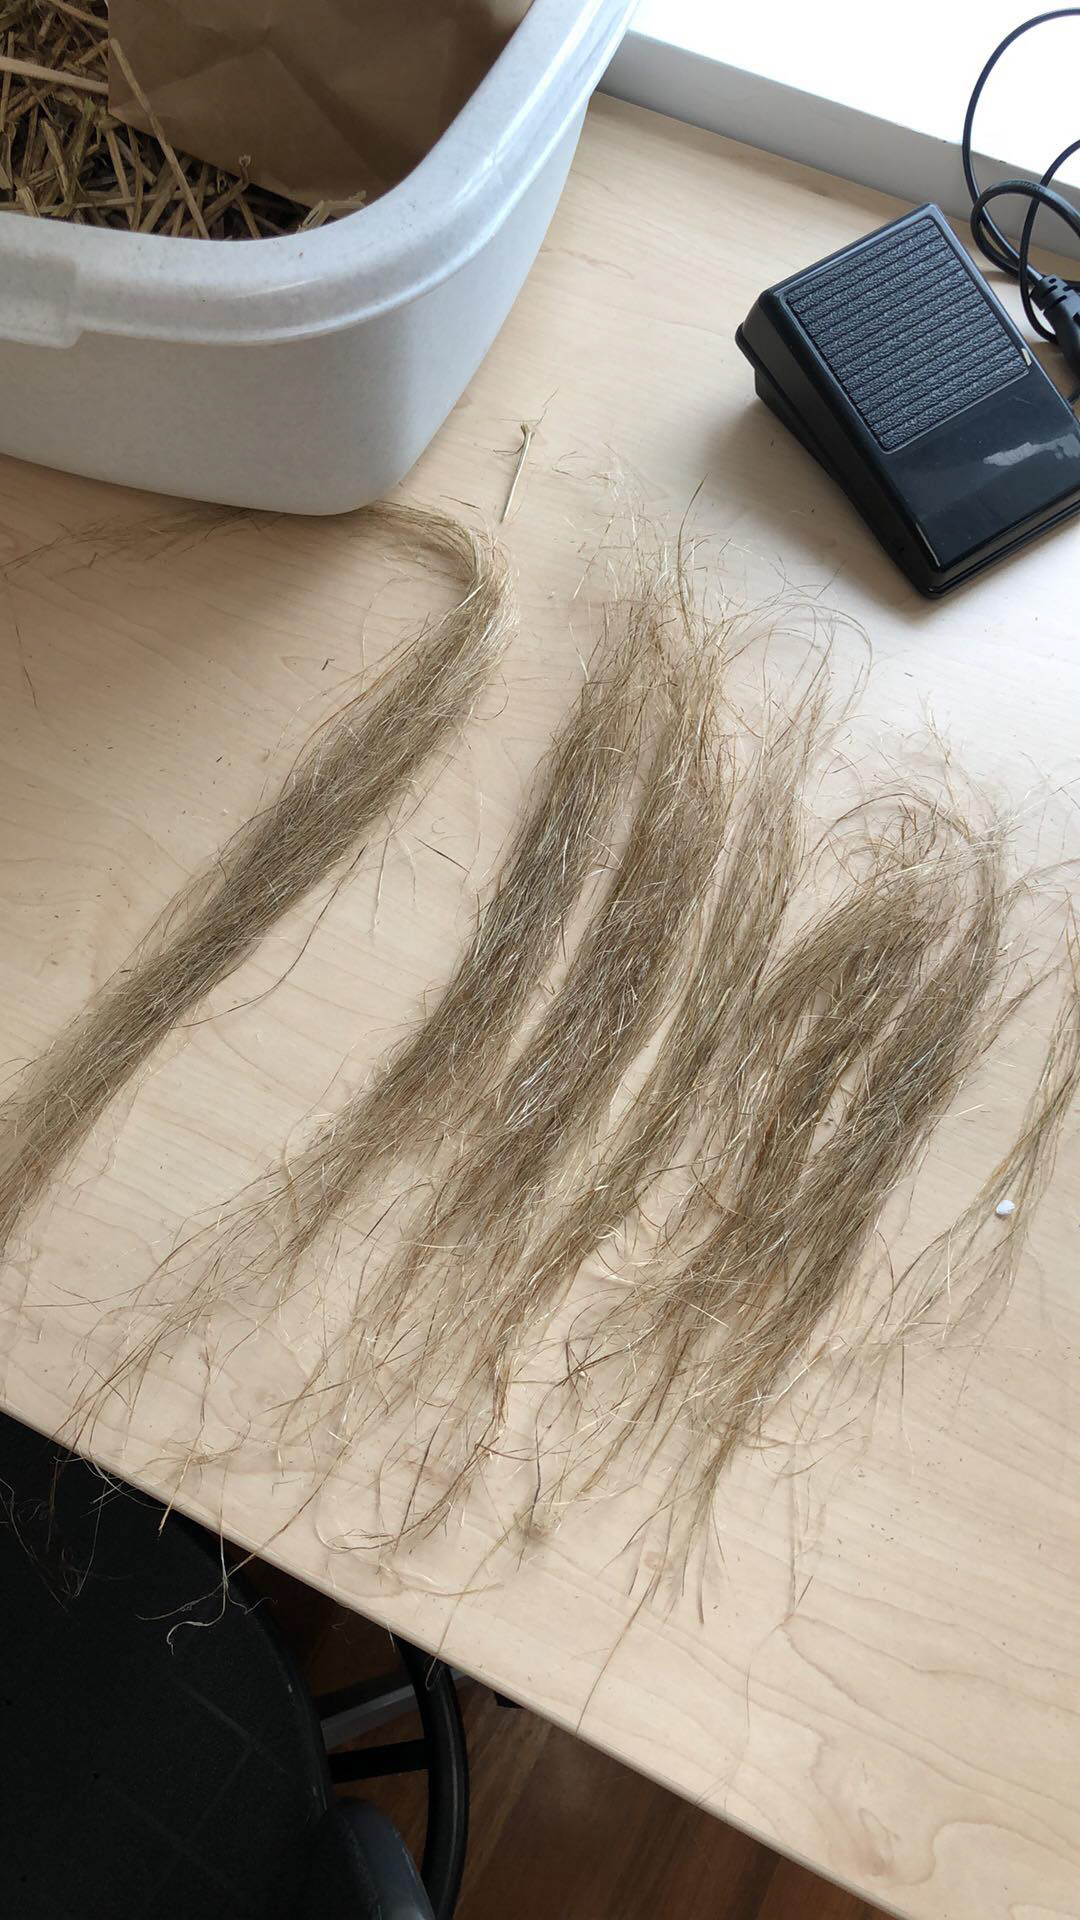
The fibers in the photos above are hemp fibers. I removed from the herd and brushed them, as you would brush wool, then spun bundles of them into a twine once they were fine enough.
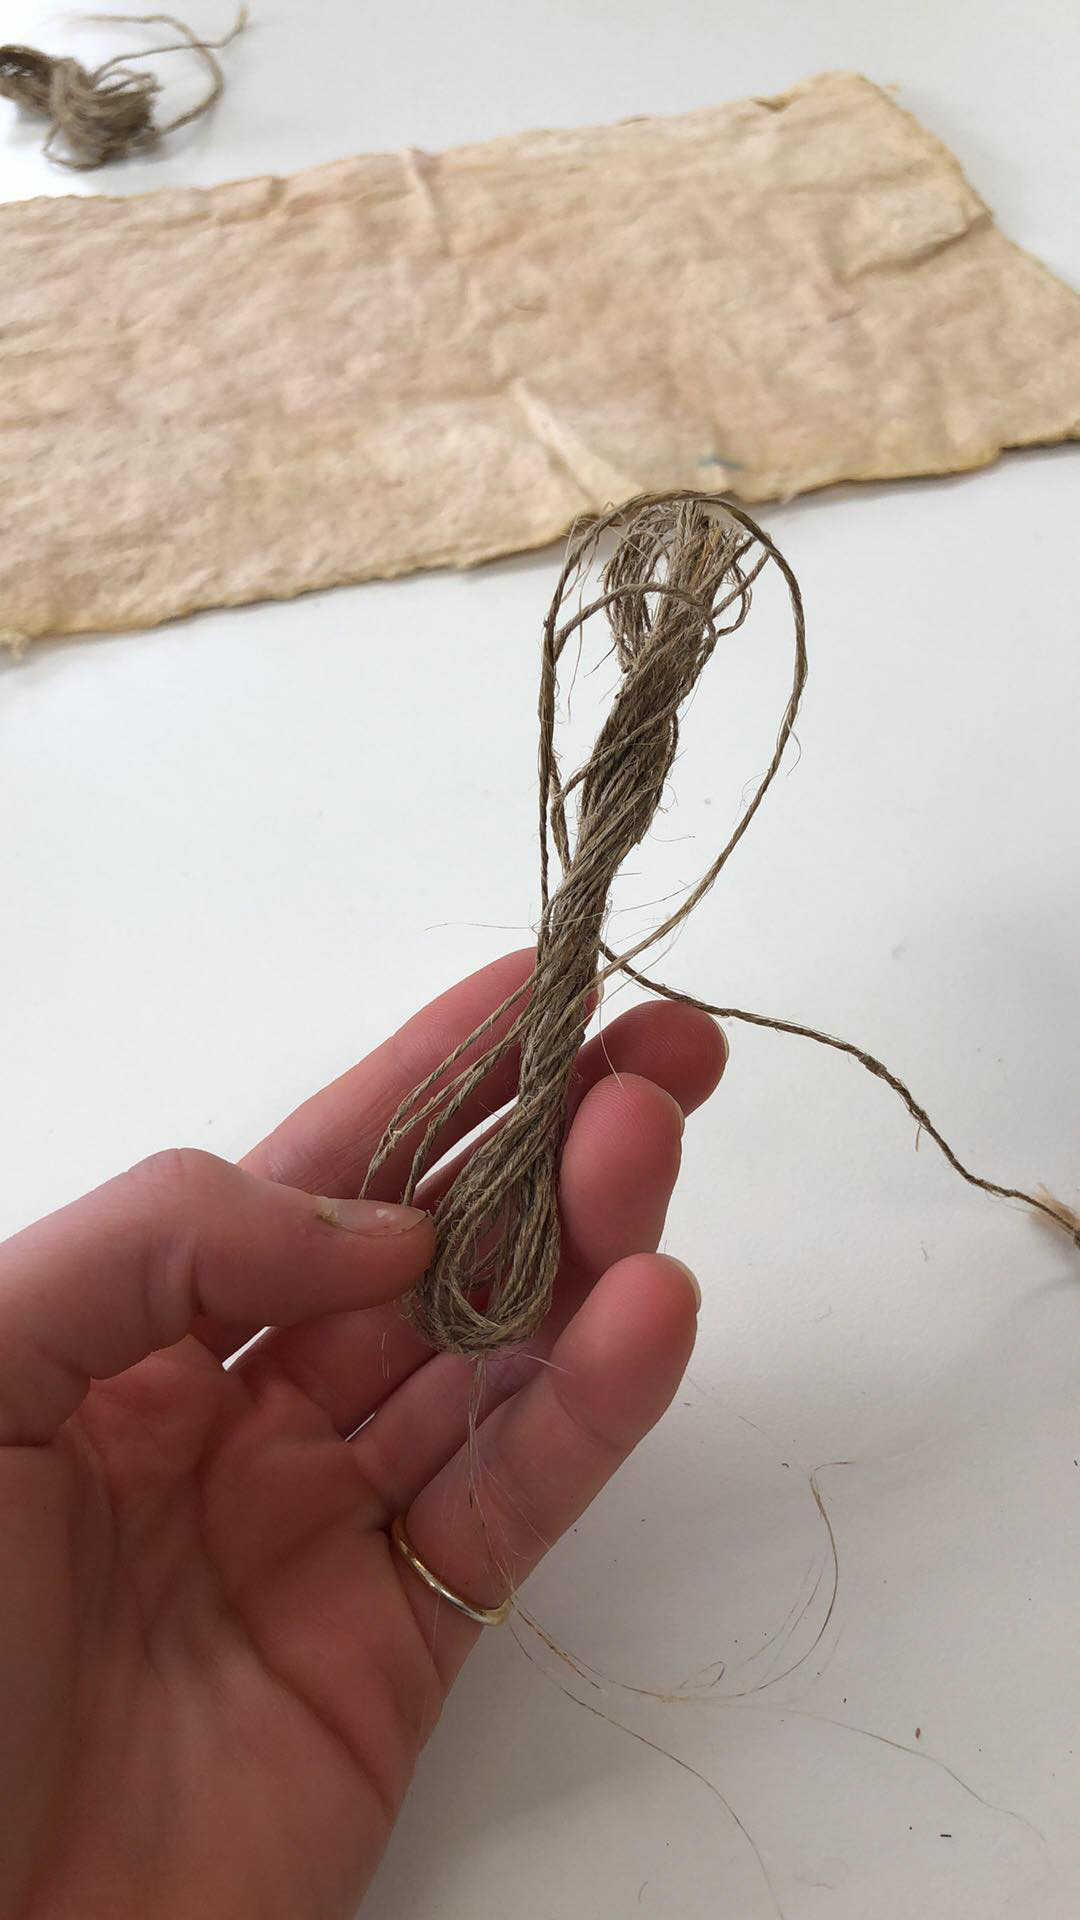
Above is the hemp twine that I spun. I coated it in beeswax, which is often used in bookbinding to strengthen twine, and it was ready to use for binding the hemp paper and covers into a book.